Module 01 · Introduction to React and Class ComponentsReact 与类组件简介
Passing Data and States between Components React组件生命周期、数据和状态传递
欢迎学习 React组件的生命周期及数据传递!通过本视频,你将能够:
- 描述 React 组件的 生命周期
- 解释如何在组件间传递 数据和状态
React 组件的生命周期
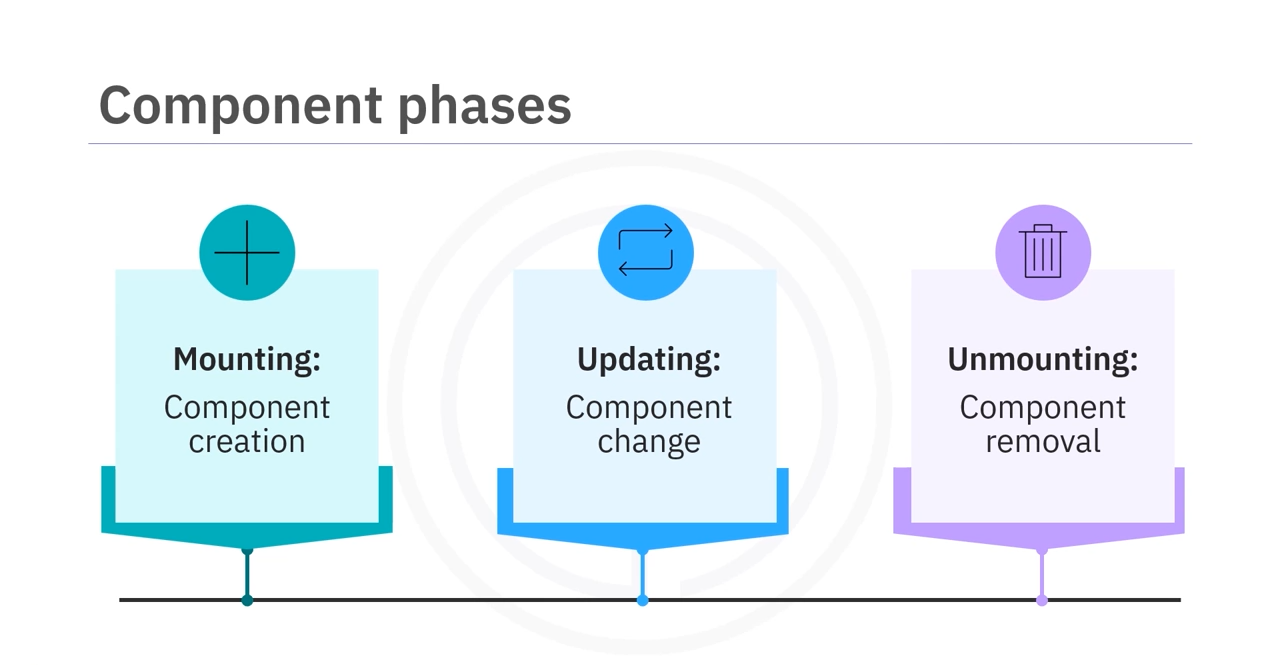
每个 React 组件的生命周期分为三个阶段:
- 挂载阶段 (Mounting):
- 当组件第一次创建时。
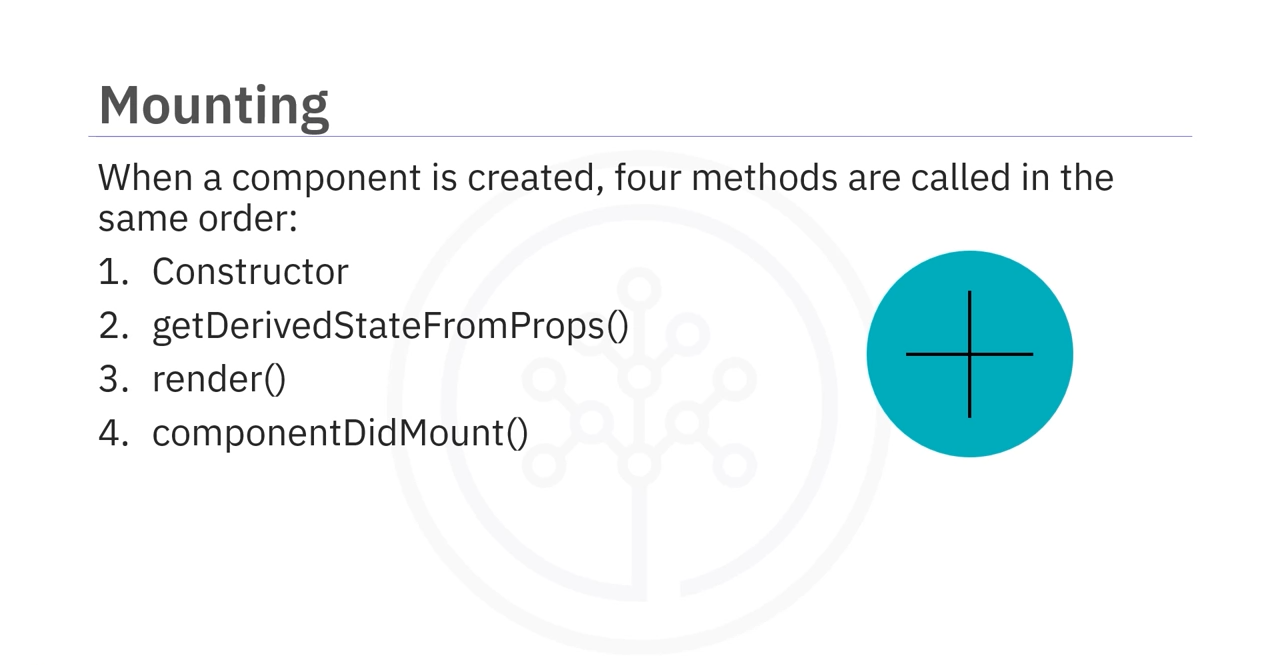
- 调用的生命周期方法顺序:
constructor:构造组件实例。getDerivedStateFromProps:仅在状态依赖于 Props 变化时调用。render:返回 UI 元素(只能返回一个根元素)。componentDidMount:在组件挂载到 DOM 后立即调用。
示例流程:
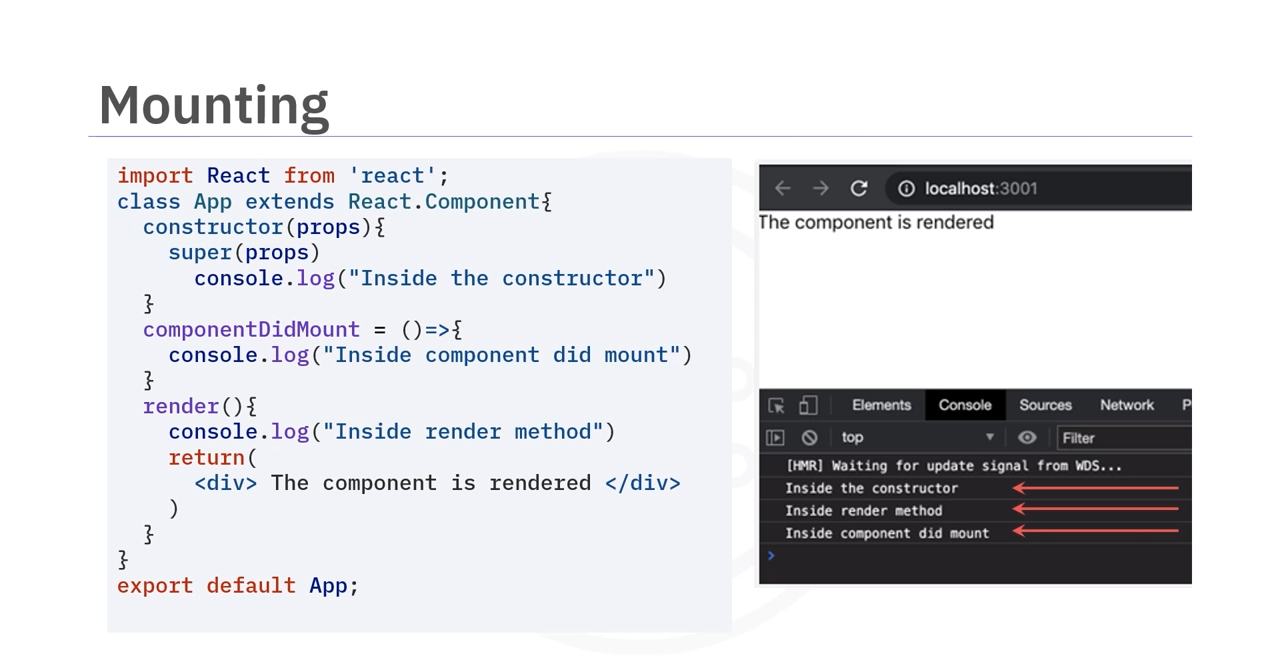
class App extends React.Component {
    constructor(props) {
        super(props);
        console.log("Constructor called");
    }

    componentDidMount() {
        console.log("ComponentDidMount called");
    }

    render() {
        console.log("Render called");
        return <h1>Hello, World!</h1>;
    }
}
- 更新阶段 (Updating):
- 当组件的状态或 Props 改变时。
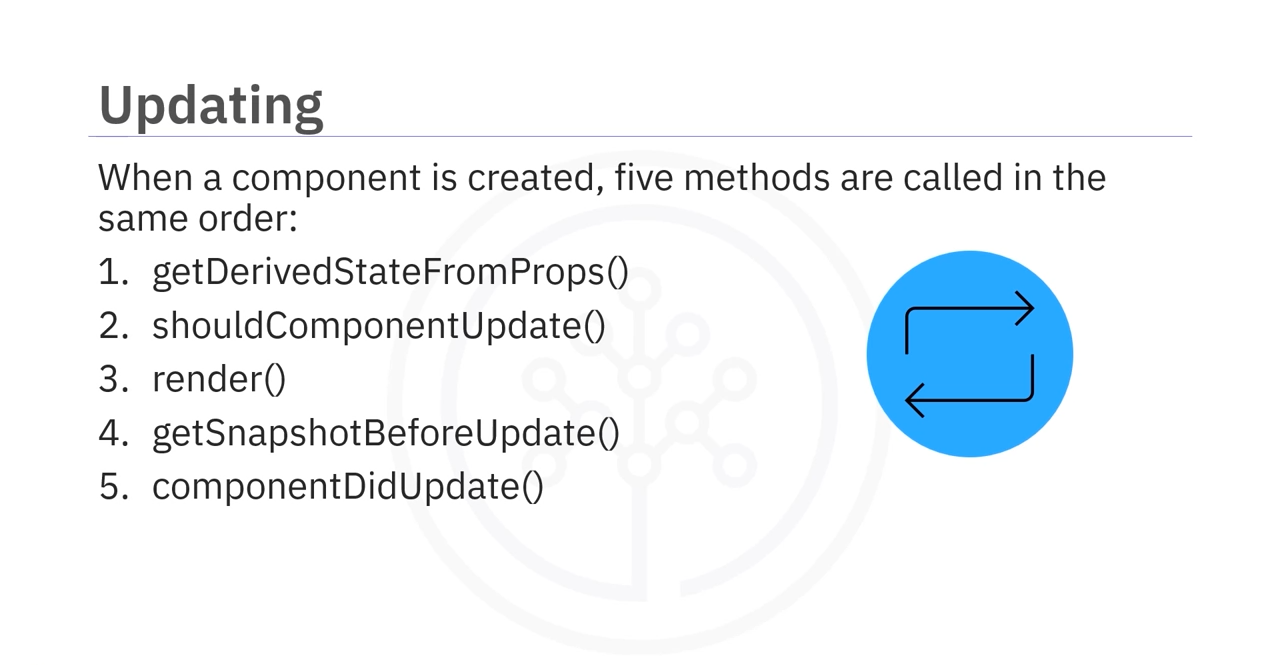
- 调用的生命周期方法顺序:
getDerivedStateFromPropsshouldComponentUpdate(默认返回true,控制是否重新渲染)rendergetSnapshotBeforeUpdate(在变化渲染前调用)componentDidUpdate(在变化渲染后调用)
示例:状态更新触发组件生命周期:
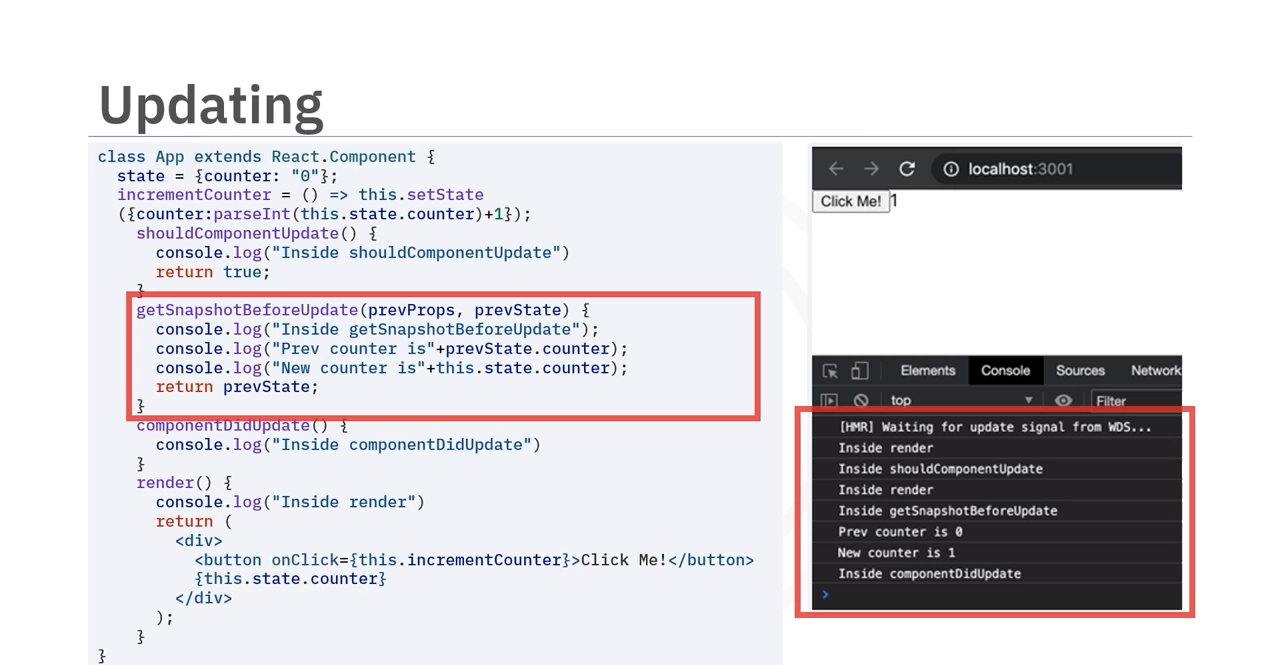
class Counter extends React.Component {
    constructor(props) {
        super(props);
        this.state = { count: 0 };
    }

    increment = () => {
        this.setState({ count: this.state.count + 1 });
    };

    render() {
        console.log("Render called");
        return (
            <div>
                <p>Count: {this.state.count}</p>
                <button onClick={this.increment}>Increment</button>
            </div>
        );
    }

    componentDidUpdate() {
        console.log("ComponentDidUpdate called");
    }
}
- 卸载阶段 (Unmounting):
- 当组件被从 DOM 中移除时。
- 调用的方法:
componentWillUnmount:在组件卸载前清理资源。
示例:组件卸载:
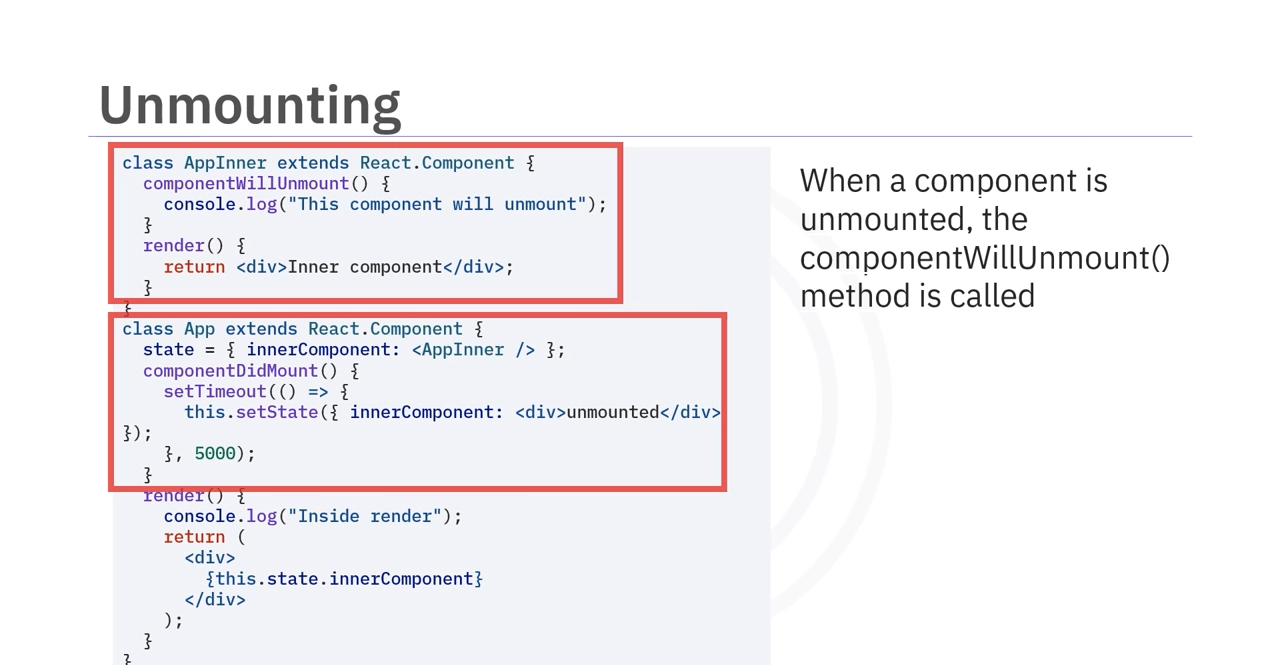
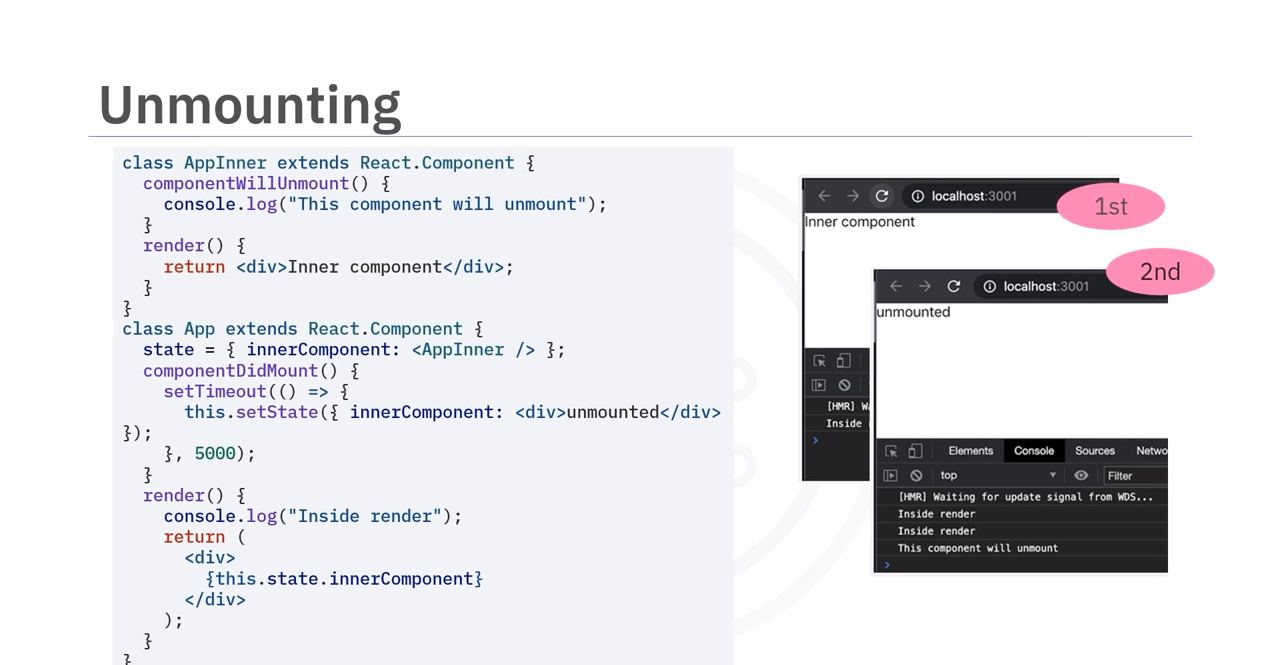
componentWillUnmount() {
    console.log("ComponentWillUnmount called");
}
React 组件间的数据传递
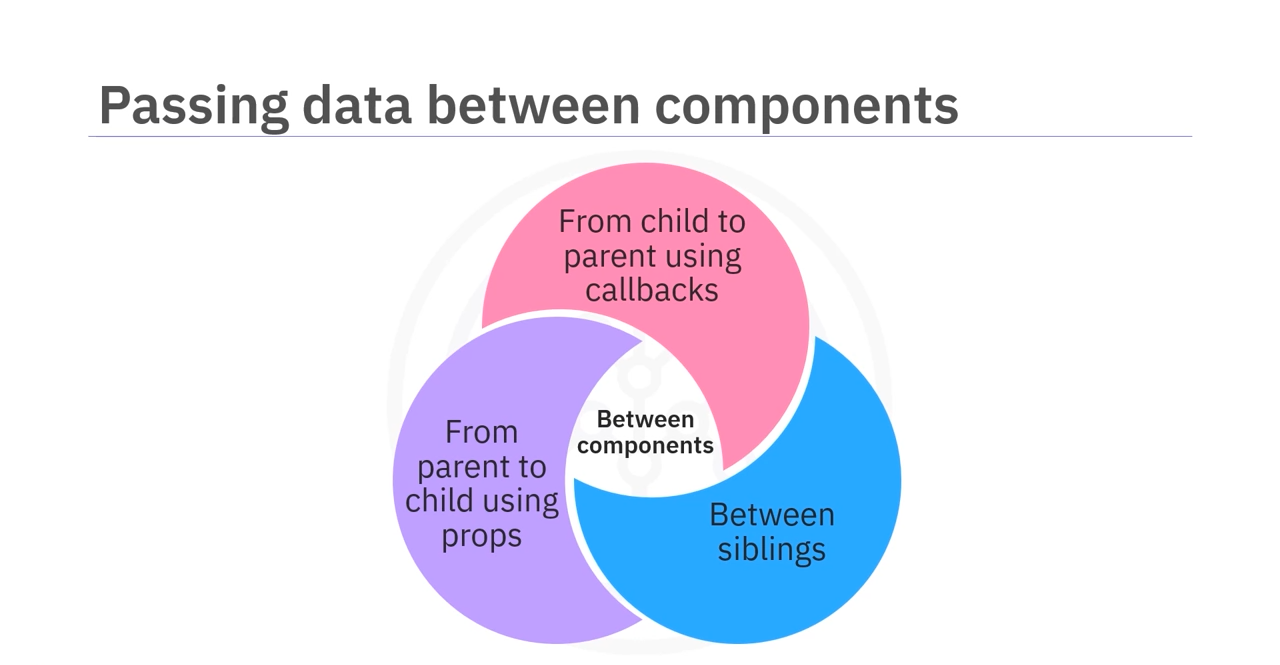
React 支持以下几种数据传递方式:
1从父组件到子组件(Props)
Props 是用于从父组件向子组件传递数据的方式。
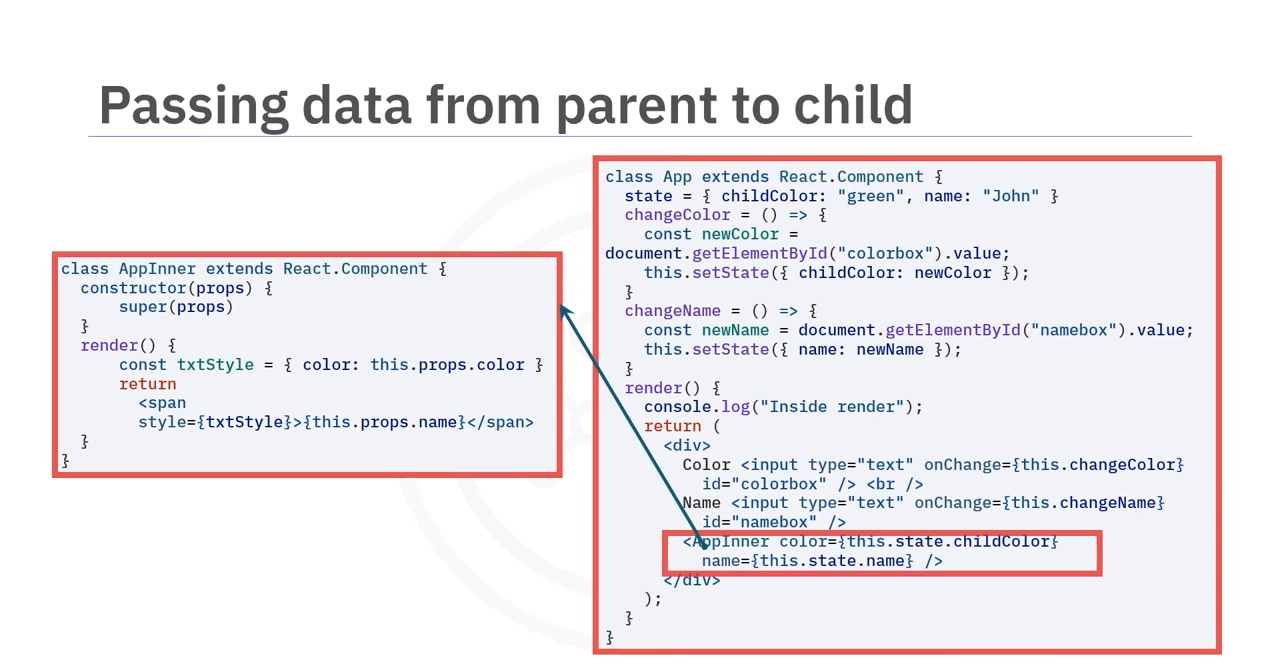
示例:通过 Props 传递数据
父组件:
class Parent extends React.Component {
    render() {
        return <Child name="John" />;
    }
}
子组件:
class Child extends React.Component {
    render() {
        return <h1>Hello, {this.props.name}!</h1>;
    }
}
2从子组件到父组件(回调函数)
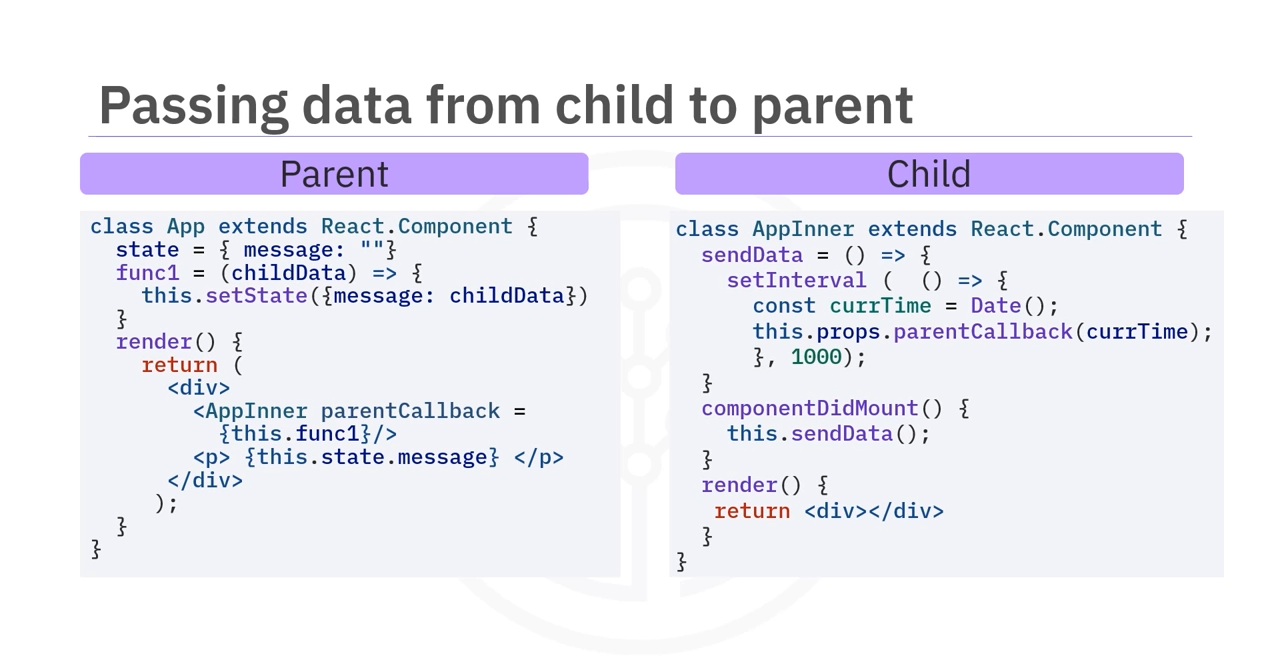
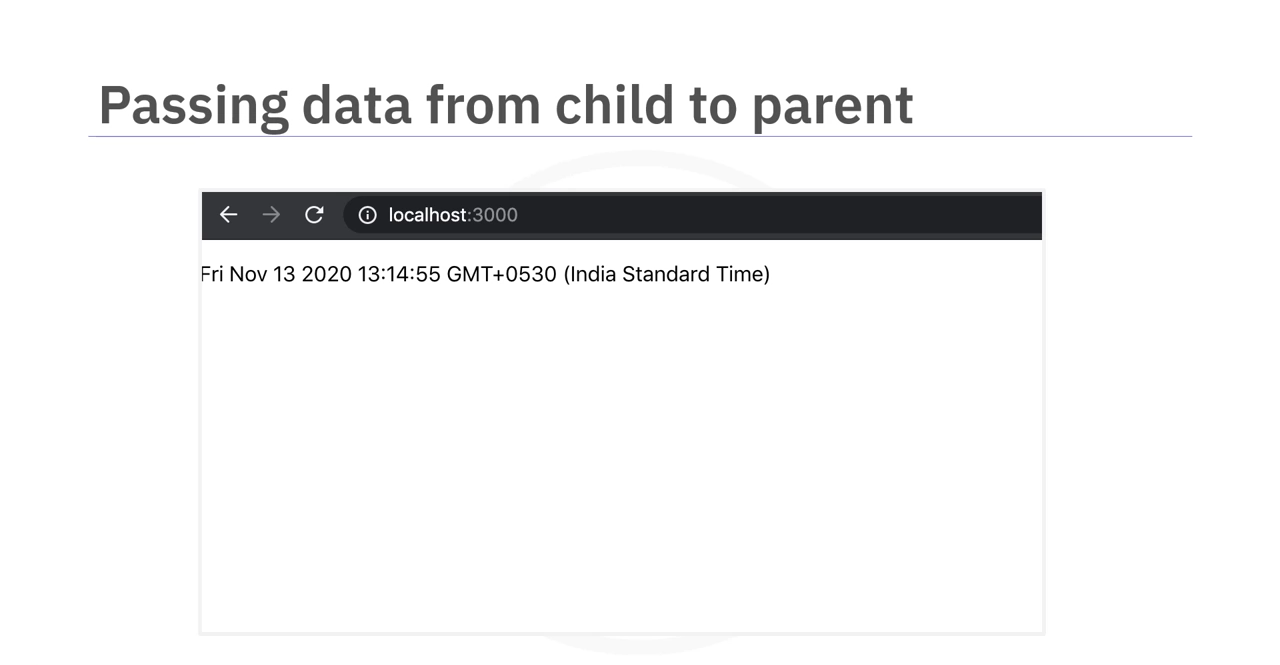
通过将回调函数作为 Props 传递给子组件,从而实现数据从子组件传递到父组件。
示例:通过回调传递数据
父组件:
class Parent extends React.Component {
    handleData = (data) => {
        console.log("Received from child:", data);
    };

    render() {
        return <Child sendData={this.handleData} />;
    }
}
子组件:
class Child extends React.Component {
    componentDidMount() {
        this.props.sendData("Hello from Child");
    }

    render() {
        return <h1>I am the Child component</h1>;
    }
}
3组件间的共享状态(Redux 或 Context)
对于兄弟组件之间的数据传递,可以使用 Redux 或 Context API 实现全局状态管理(本视频未涵盖)。
组件生命周期与数据传递的整合
示例:综合生命周期与数据传递
class App extends React.Component {
    constructor(props) {
        super(props);
        this.state = { name: "John", color: "green" };
    }

    handleInputChange = (event) => {
        this.setState({ [event.target.name]: event.target.value });
    };

    render() {
        return (
            <div>
                <input
                    type="text"
                    name="name"
                    value={this.state.name}
                    onChange={this.handleInputChange}
                />
                <input
                    type="text"
                    name="color"
                    value={this.state.color}
                    onChange={this.handleInputChange}
                />
                <Child name={this.state.name} color={this.state.color} />
            </div>
        );
    }
}

class Child extends React.Component {
    render() {
        return (
            <div>
                <p>Name: {this.props.name}</p>
                <p>Color: {this.props.color}</p>
            </div>
        );
    }
}
课程总结
- 组件生命周期:
- 挂载:组件首次加载到 DOM。
- 更新:组件的状态或 Props 改变时。
- 卸载:组件从 DOM 中移除时。
- 数据传递:
- 从父到子:使用 Props。
- 从子到父:使用回调函数。
- 兄弟组件间:使用 Redux 或 Context。
通过本课程,你已经掌握了 React 组件生命周期及数据传递的基础知识,接下来可以尝试结合这些概念创建更复杂的交互式组件!🚀