Module 02 · Web API Essentials: REST API and GraphQL
Hands-on Lab: Creating a Swagger Documentation for REST API动手实验:为 REST API 创建 Swagger 文档
In this lab, you will understand how to create Swagger documentation for your REST APIs.
Hands-on Lab - Creating a Swagger documentation for REST API using Python
Estimated Time: 45 minutes
In this lab, you will understand how to create a Swagger documentation for your REST APIs.
Learning Objectives
After completing this exercise, you should be able to perform the following tasks:
- Use the Swagger Editor to create Swagger documentation for REST API
- Use SwaggerUI to access the REST API endpoints of an application
- Generate code with the Swagger documentation
Pre-requisites
- You must be familiar with Docker applications and commands
- You must have a good understanding of REST API.
- Knowledge of Python is highly recommended
Task 1 - Getting your application started
- Open a terminal window by using the top menu in the IDE: Terminal > New Terminal, if you don’t have one open already.
- In the terminal, clone the repository which has the Swagger documentation and the REST API code ready by pasting the following command. The repository that you clone has code that will run a REST API application which can be used to organize tasks.
git clone https://github.com/ibm-developer-skills-network/jmgdo-microservices.git
- Change the working directory to jmgdo-microservices/swagger_example by running the following command.
cd jmgdo-microservices/swagger_example
- Run the following commands to install the required packages.
python3 -m pip install flask_cors
- Now start the application which serves the REST API on port number 5000.
python3 app.py
- Click on the Skills Network button on the left, it will open the "Skills Network Toolbox". Then click Launch Application, from there you enter the port no. as 5000 and click Your Application button. This will open a new browser page, which accesses the application you just ran.
- Copy the url on the address bar.
- From the file menu, go to
jmgdo-microservices/swagger_example/swagger_config.jsonto view the file on the file editor.
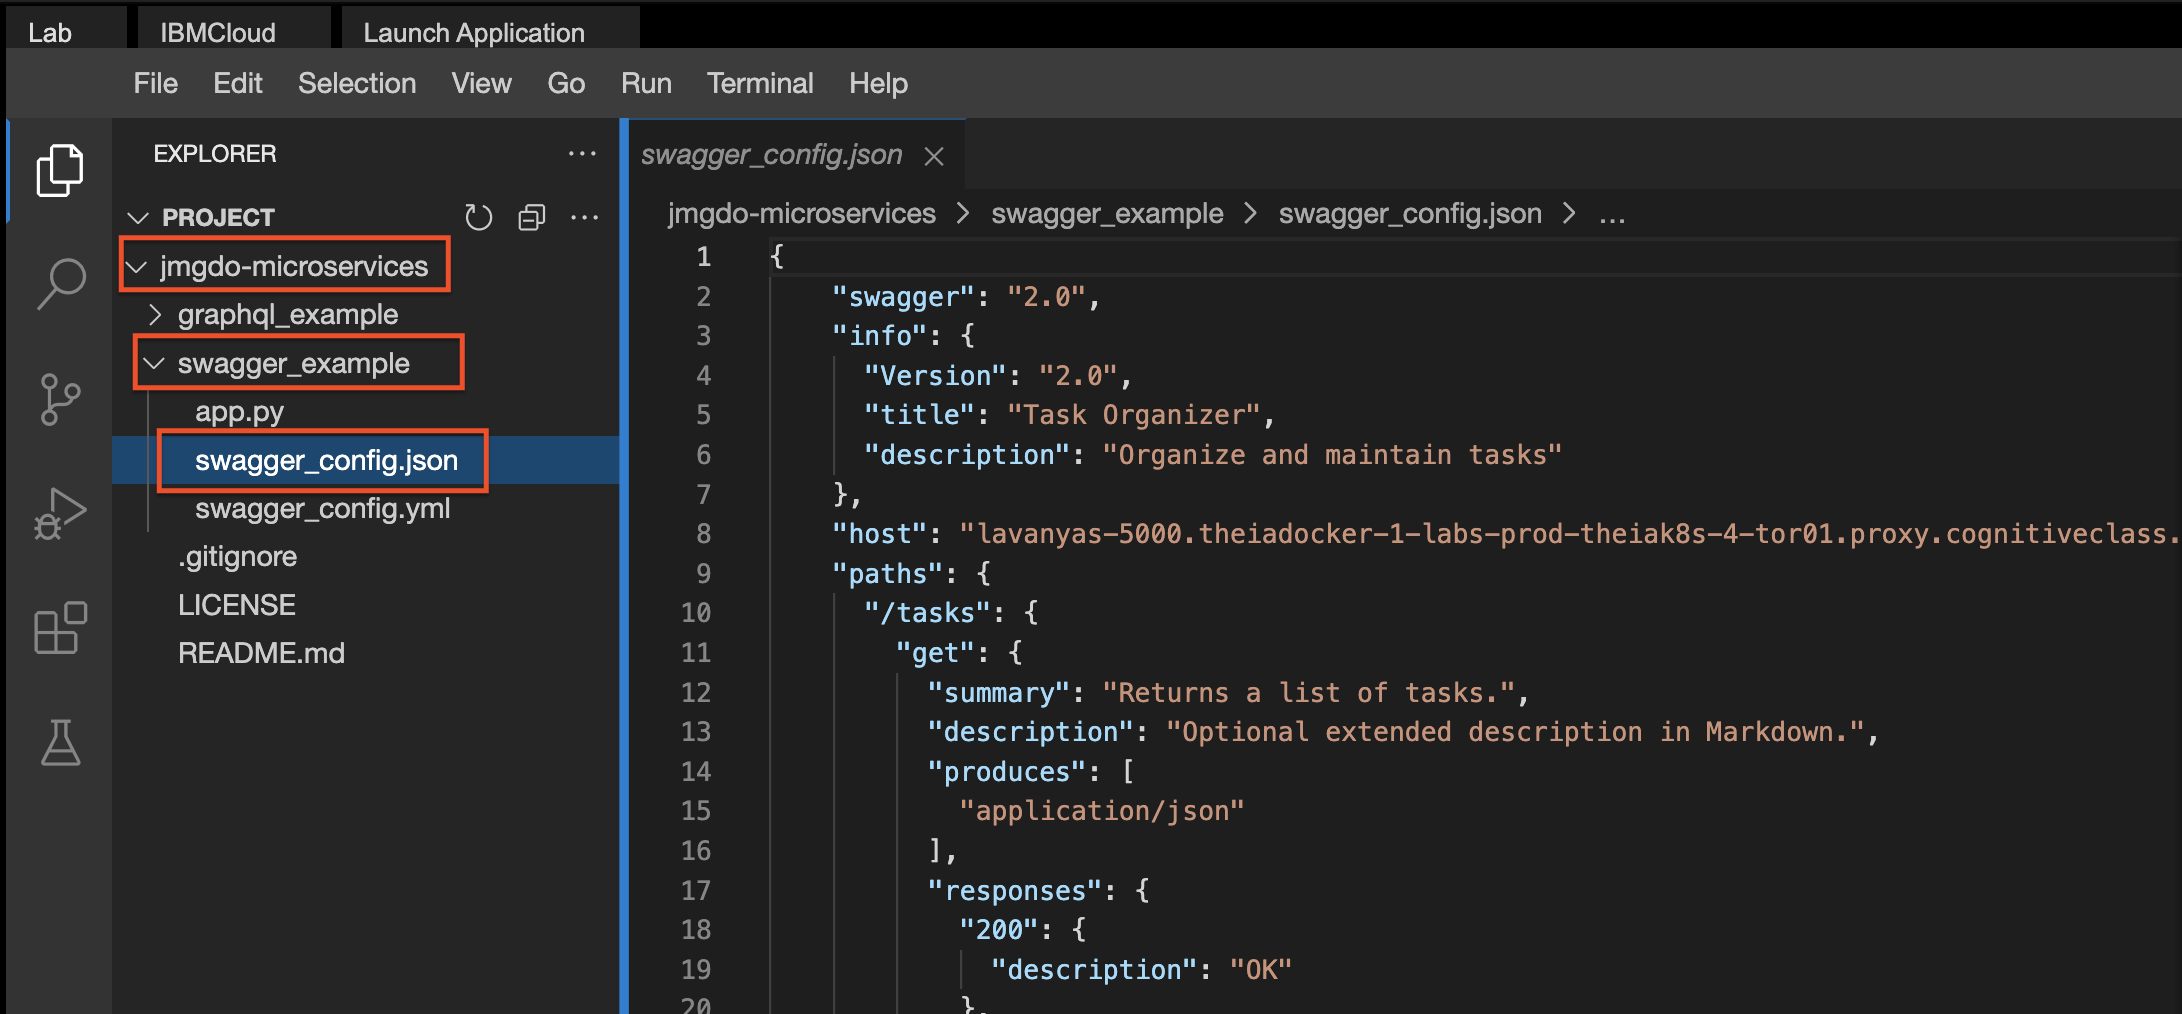
- In the file editor, paste the application URL that you copied where it says
**<Your application URL\>**without the protocol (https://) and do not put a "/" at the end of the URL and save the file. - Copy the entire content of the file swagger_config.json. You will need this copied content to generate SwaggerUI.
- Click on this link https://editor.swagger.io/ to go to the Swagger Editor.
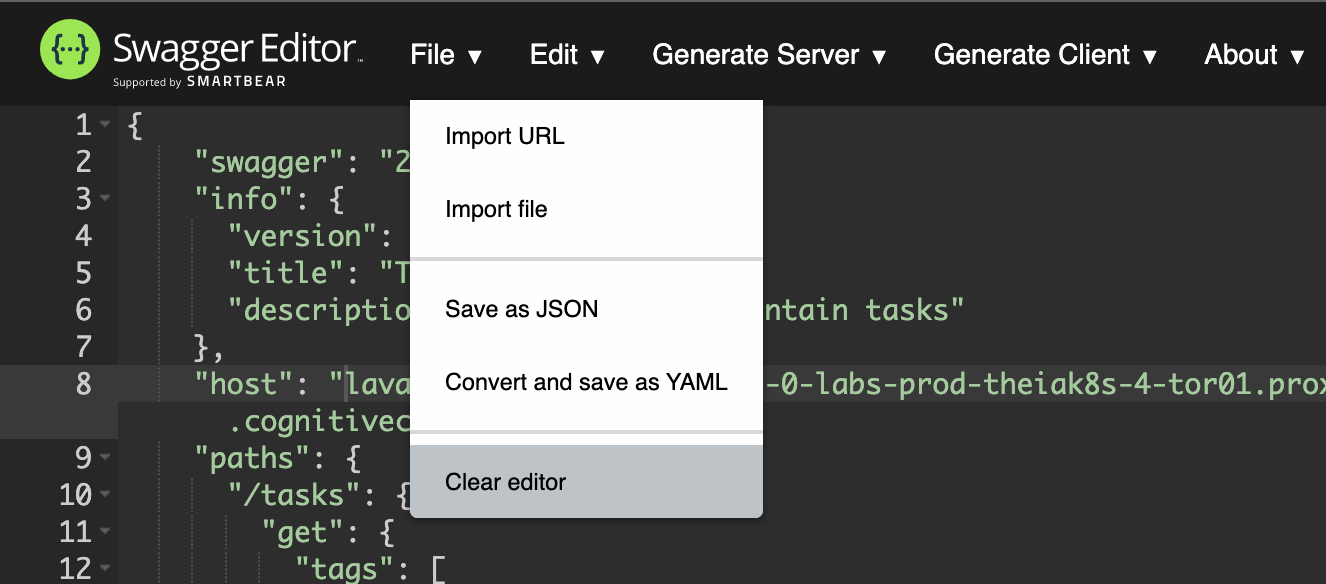
- From the File menu, click on Clear Editor to clear the content of the Swagger Editor.
- Paste the content you copied from swagger_config.json on the left side. You will get a prompt which says
Would you like to convert your JSON into YAML?. PressCancelto paste the content. - You will see that the UI is automatically populated on the right.
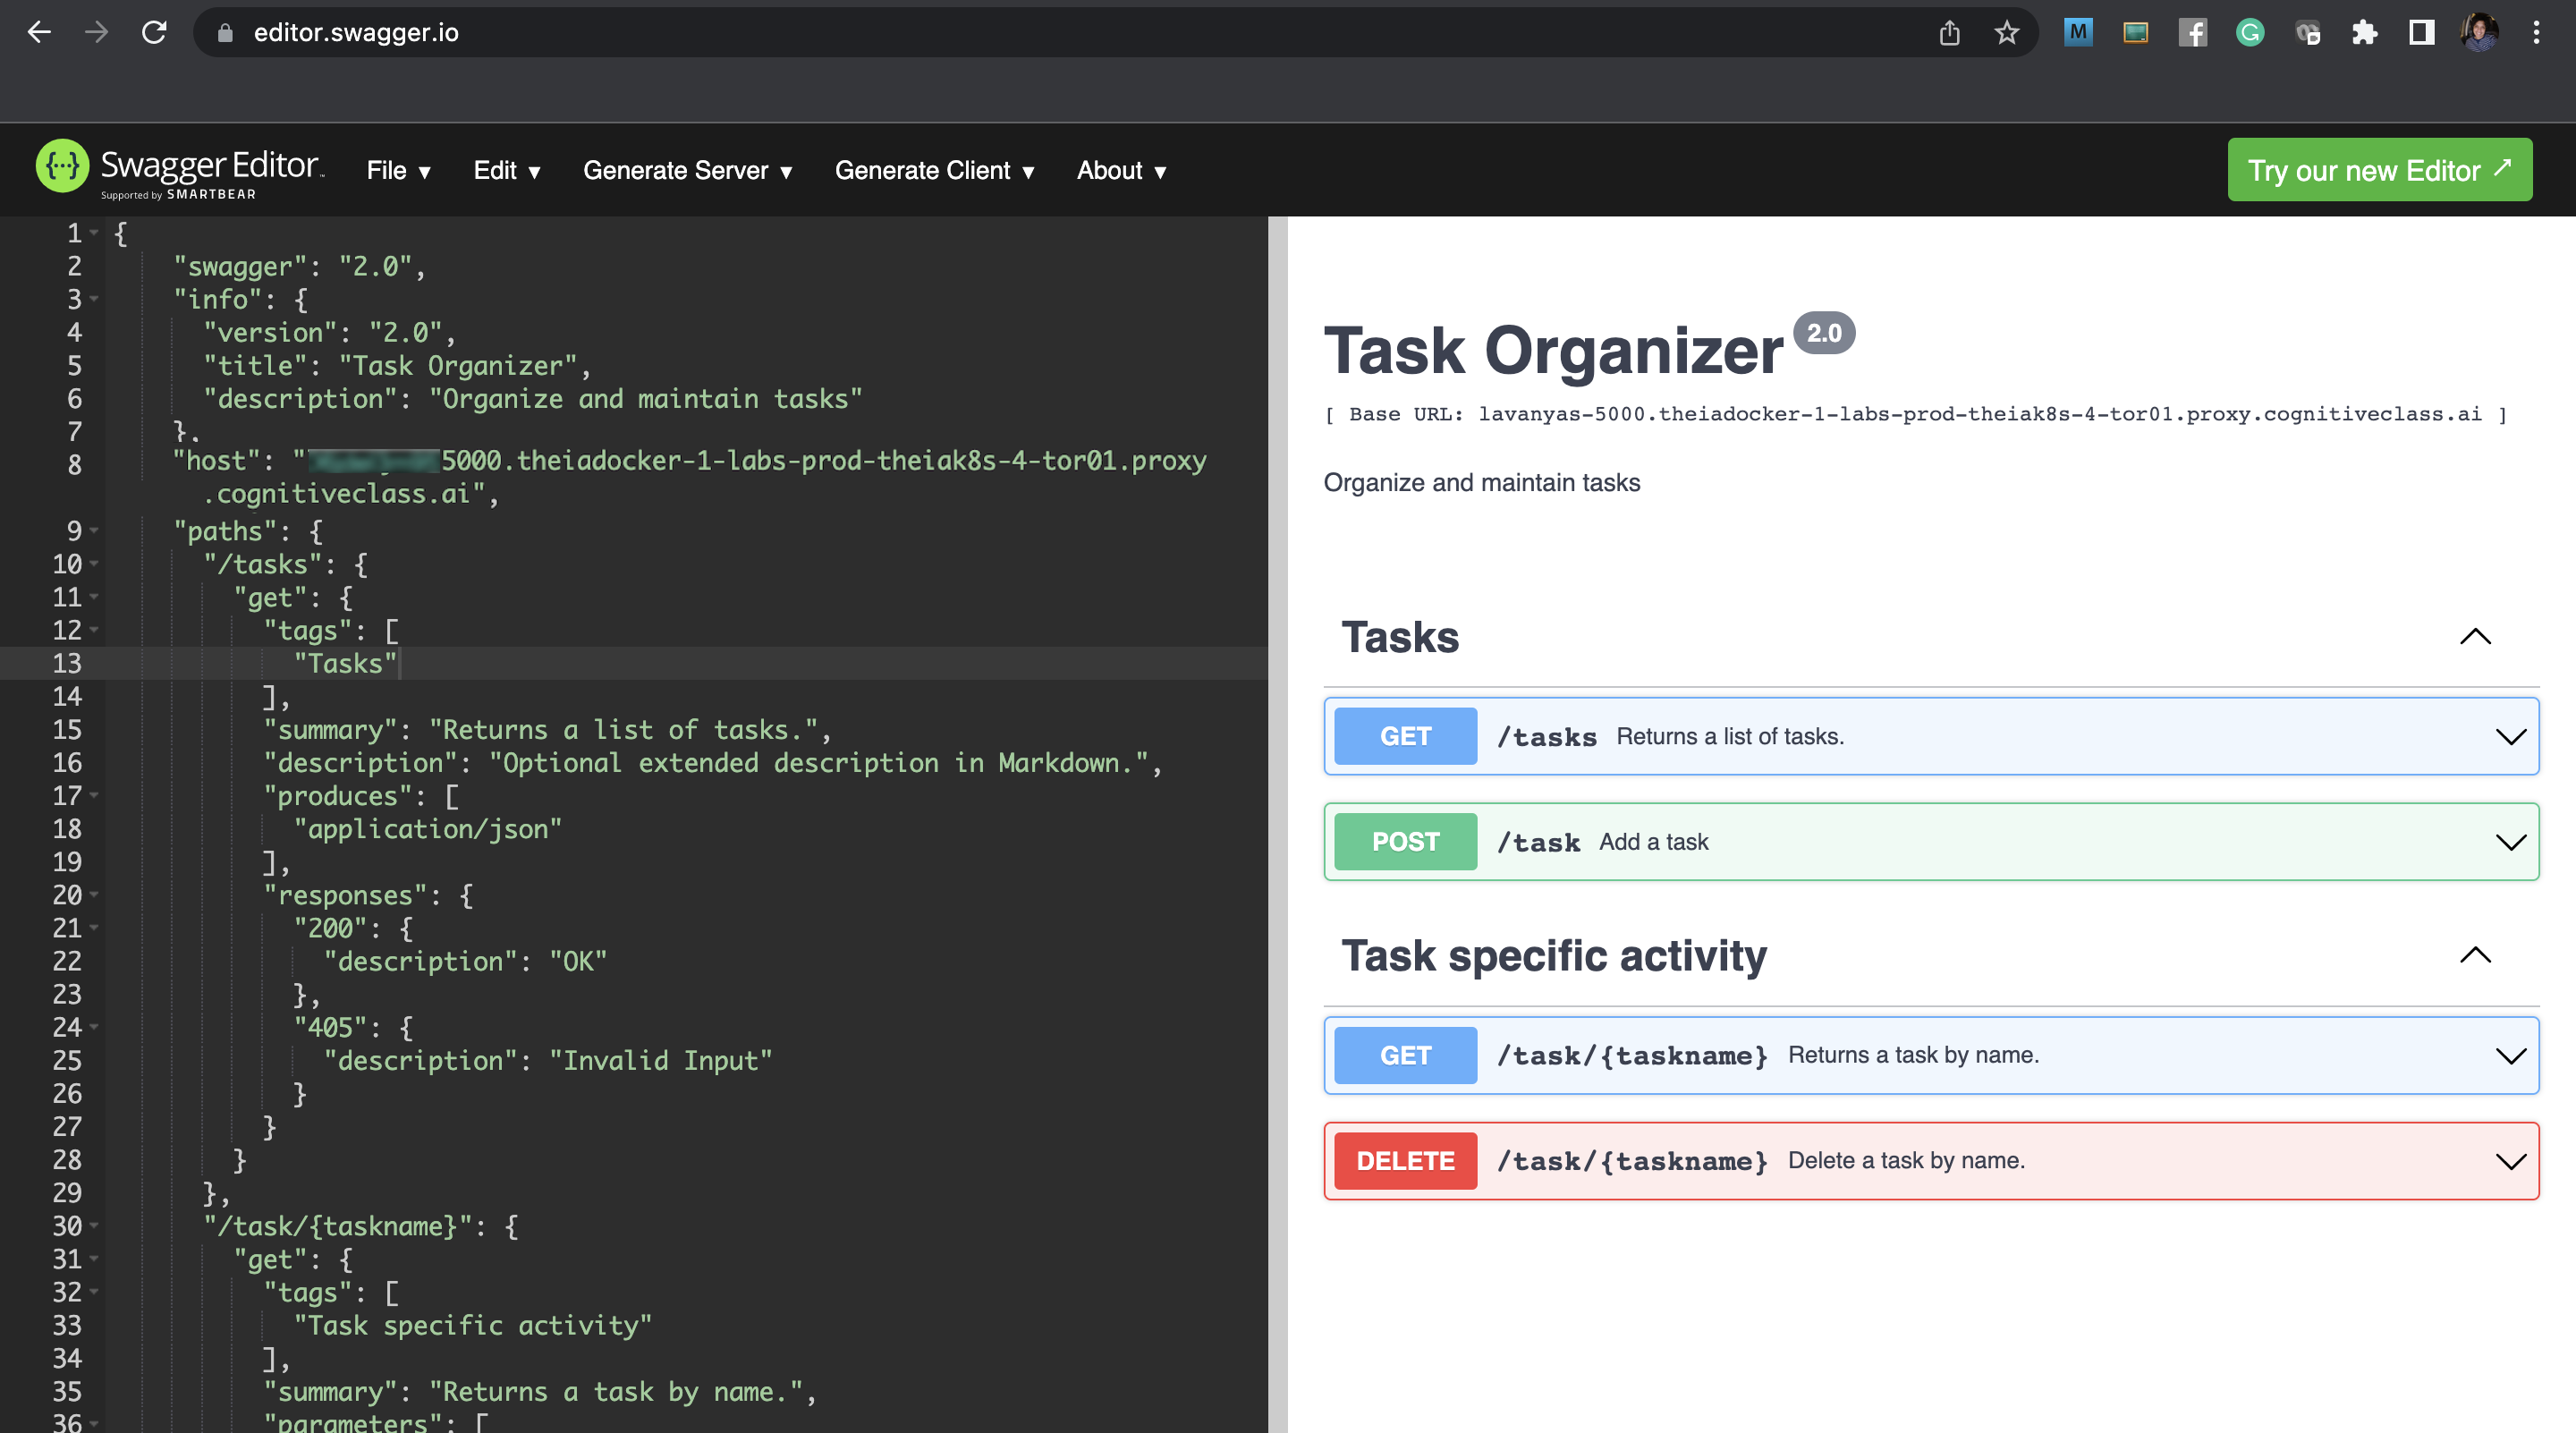
- Now you can test each of the endpoints. Four tasks have been already added for you, when the application was started. Click on the down arrow next to GET /tasks.

- Click on Try it out. This will allow you to try your REST API endpoint.
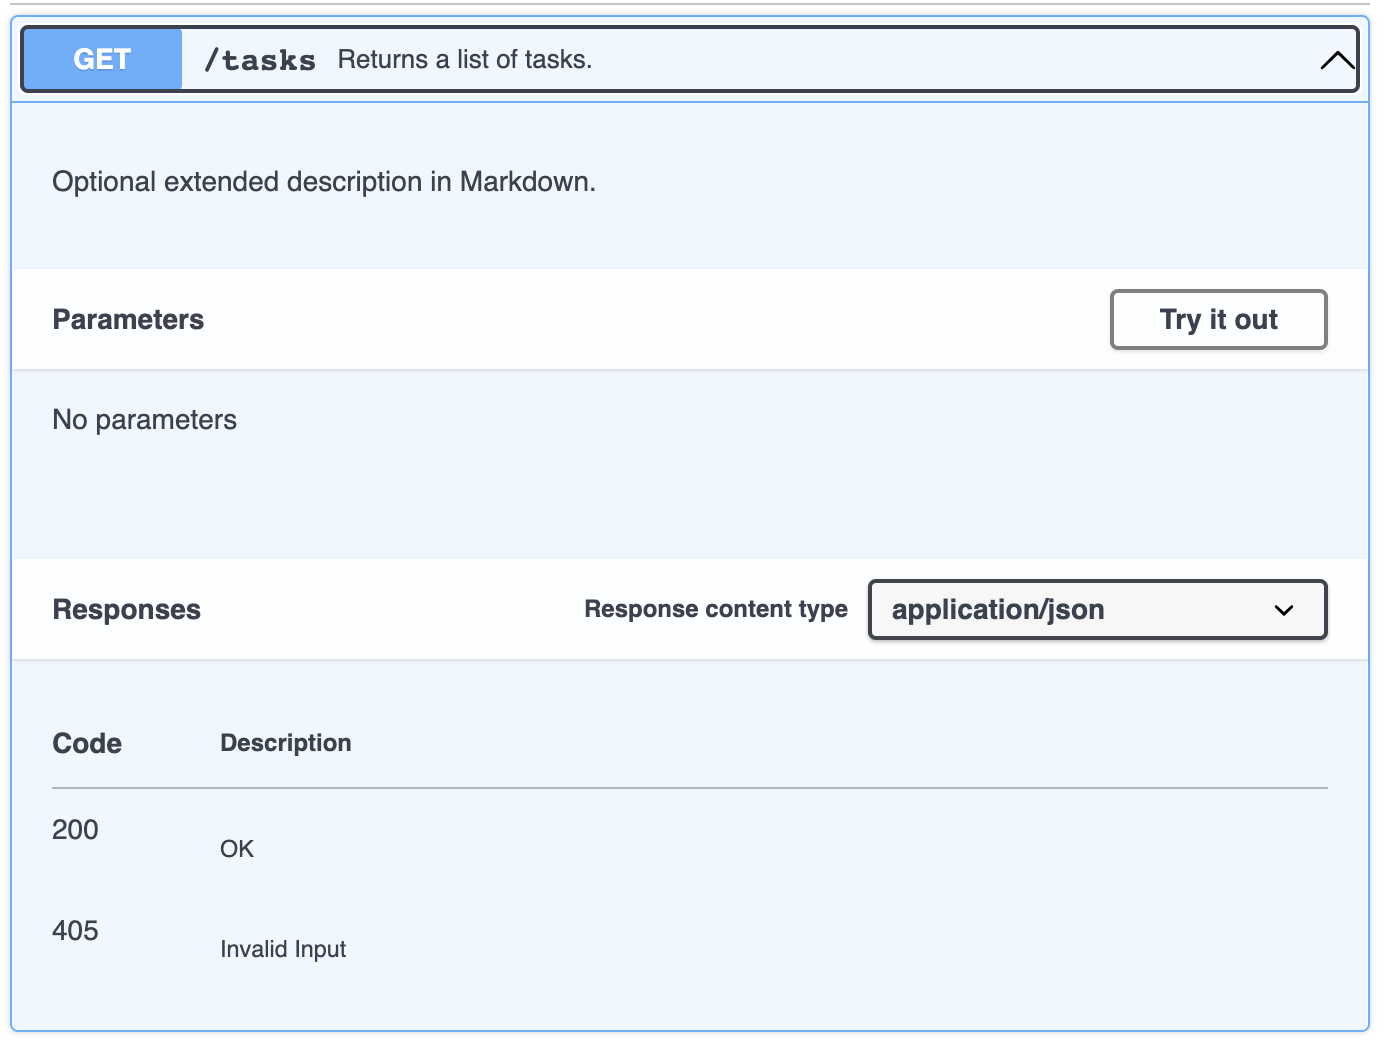
- Click on Execute to invoke a call to your REST API. This is a GET request which does not take any parameters. It returns the task as an application/json.
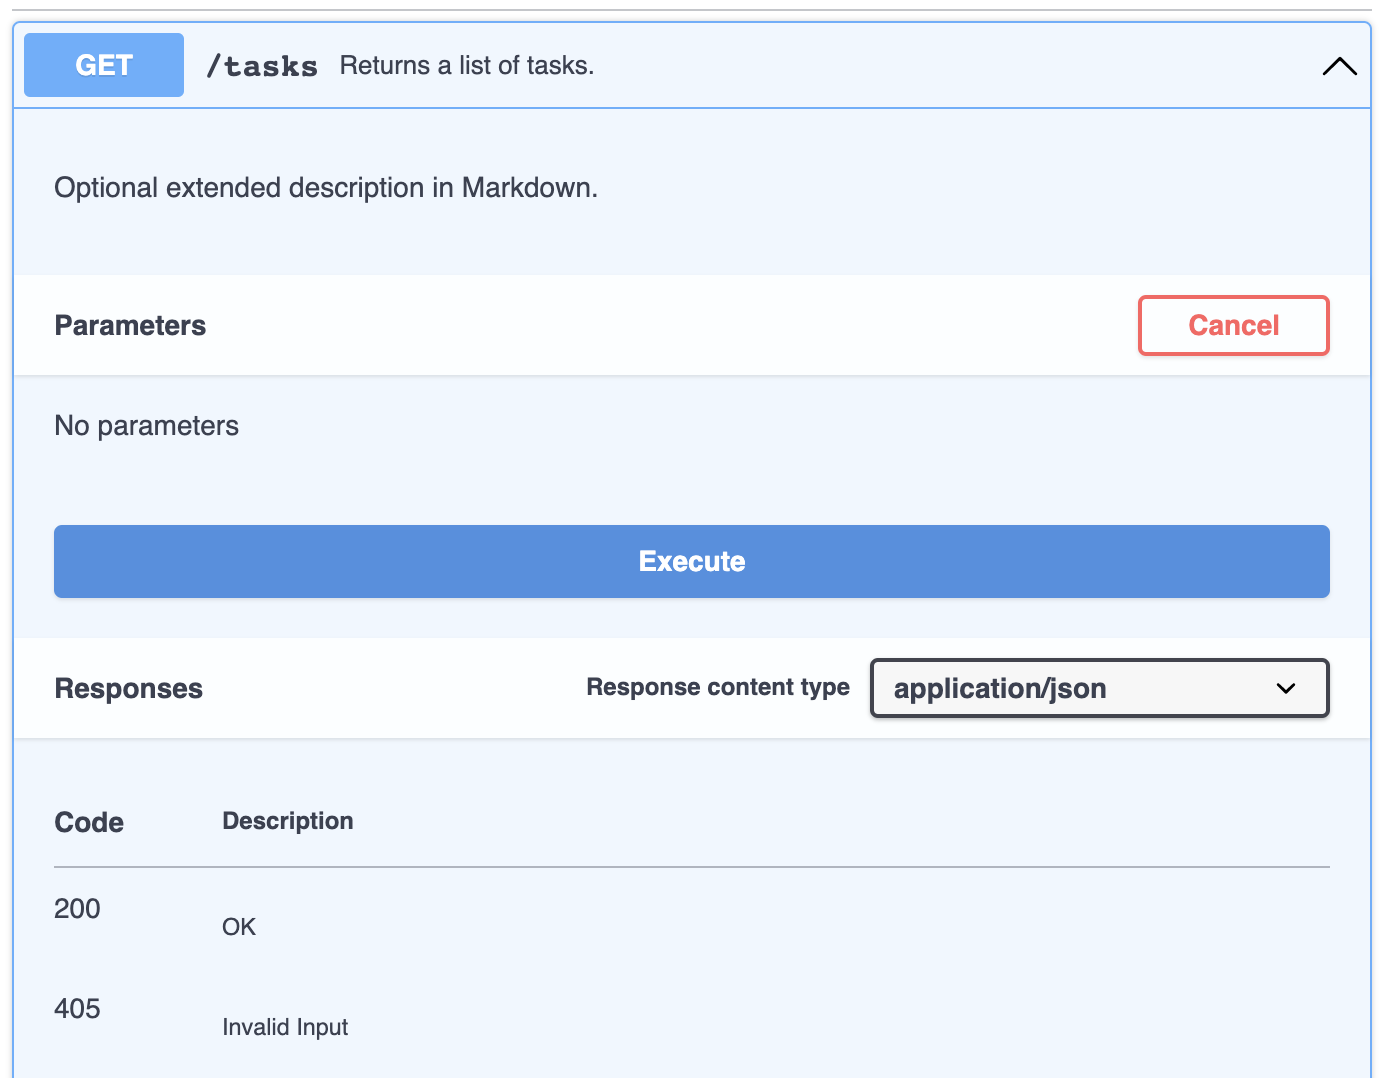
- You can scroll down to view the output of the API call.
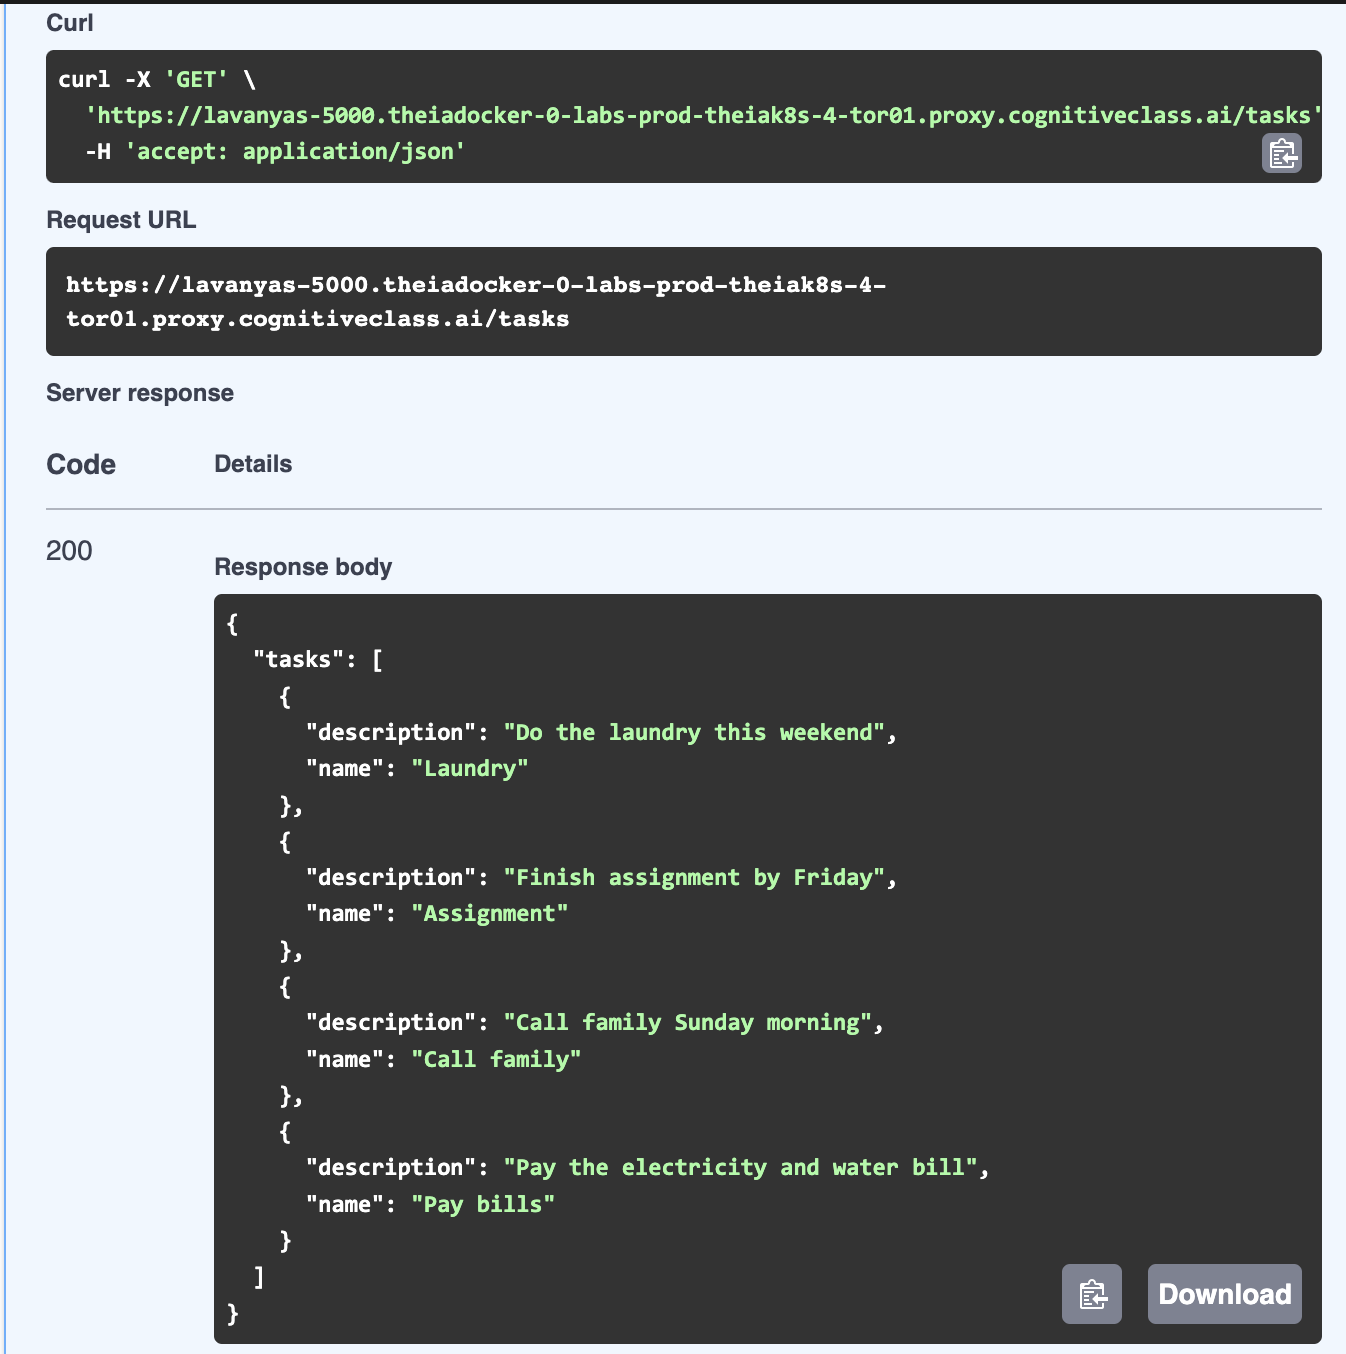
- Try to do the following:
- Add a task
- Retrieve the tasks to see if your task is added to the list
- Get the details on one task
- Delete a task and check the list to verify that it is deleted.
- From the File menu, click on Clear Editor to clear the content of the Swagger Editor.
Task 2Build and Run Greetings API with Docker
In this task, you will set up a simple REST API server that responds with greetings in different languages, and for this we will use a pre-generated python-flask server package.
- Open a new terminal and go to the /home/project directory.
cd /home/project
- Download the Python-flask Server Code by executing the following command in the terminal.
wget -O python-flask-server-generated.zip "https://cf-courses-data.s3.us.cloud-object-storage.appdomain.cloud/aT_uc4RfRHH-_0F2QafO4w/python-flask-server-generated.zip"
- Check to see if the zip file that you just downloaded, exists.
ls python-flask-server-generated.zip
- Unzip the contents of the zip file into a directory named python-flask-server-generated by running the following command.
unzip python-flask-server-generated.zip -d python-flask-server-generated/
- Change to the python-flask-server folder inside the folder you just extracted the zip file into.
cd python-flask-server-generated/python-flask-server
- The entire server setup along with endpoint is done for you already. Let's build the server code.
docker build . -t mynewserver
This takes a while. If the build runs successfully you will have a new container with tag mynewserver.
- Run the docker application now by running the following command. The server generated code automatically is configured to run on port 8080.
docker run -dp 8080:8080 mynewserver
You will get a hex code that indicates the application has started.
- To confirm that the service is running and your REST API works, execute the following command.
curl localhost:8080/greetings

What you see in the output is what you have to do. do some magic!
First inspect the Docker images you've built by executing the following command:
docker images
This command will provide a list of Docker images, with their respective IMAGE IDs.
Then delete the Docker image of mynewserver by using the following command:
docker rmi -f <IMAGE ID>
Make sure to replace "<IMAGE ID>" with the actual IMAGE ID of mynewserver you got in the previous step.
Open the "requirements.txt" file which present inside the unzipped folder named "python-flask-server-generated" and update the connexion version to "connexion >= 2.7.0, < 3.0.0" as shown in the screenshot below.
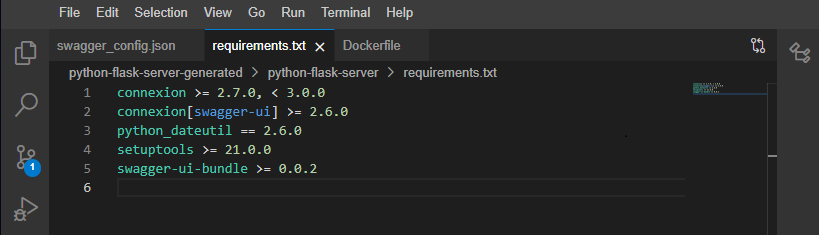
Once the image is deleted, proceed with rebuilding the docker image and allowing some time before running the docker application.
9. Now you should stop the server. For this you need the docker container id. Run the following command and copy the container id.
docker ps | grep mynewserver

10. To stop the container you need to kill the instance referring to the container id you copied in the last step.
docker kill <container_id>
- In the file explorer go to, python-flask-server-generated/python-flask-server/swagger_server/controllers/hello_in_different_languages_controller.py. This is where you need to implement your actual response for the REST API.
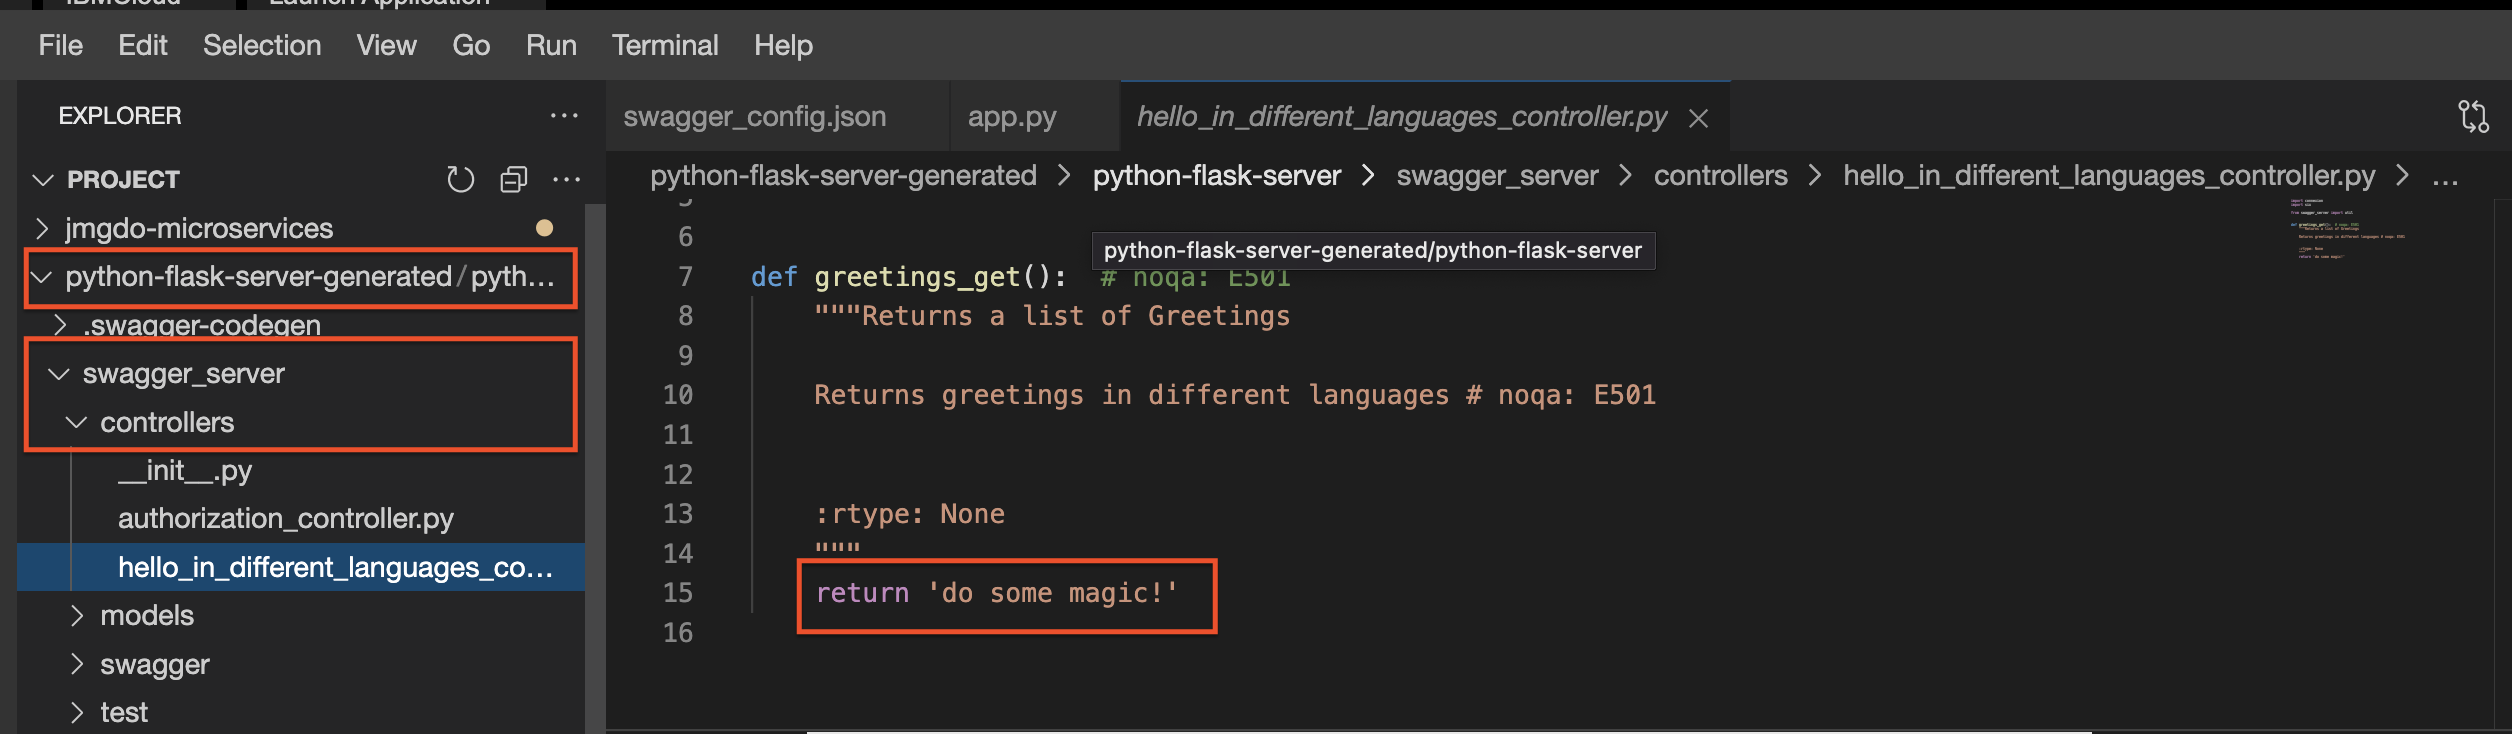
- Replace
return 'do some magic!'with the following code. As this is the python code and the indentation in Python is very important, make sure you check the indentations error.
hellos = {
  "English": "hello",
  "Hindi": "namastey",
  "Spanish": "hola",
  "French": "bonjour",
  "German": "guten tag",
  "Italian": "salve",
  "Chinese": "nǐn hǎo",
  "Portuguese": "olá",
  "Arabic": "asalaam alaikum",
  "Japanese": "konnichiwa",
  "Korean": "anyoung haseyo",
  "Russian": "Zdravstvuyte"
}

return hellos
- Build the docker container again to ensure the changed code is taken in.
docker build . -t mynewserver
- Run the container now with the following command. You may notice that you are using -p instead of -dp. This is to ensure the server is not running in discreet mode and you are able to see errors if any.
docker run -p 8080:8080 mynewserver
- Click on the Skills Network button on the left, it will open the "Skills Network Toolbox". Then click Launch Application, from there you enter the port no. as 8080 and click Your Application button. This will open a browser window. Append the path /greetings to the URL. You should see the greetings in the page.
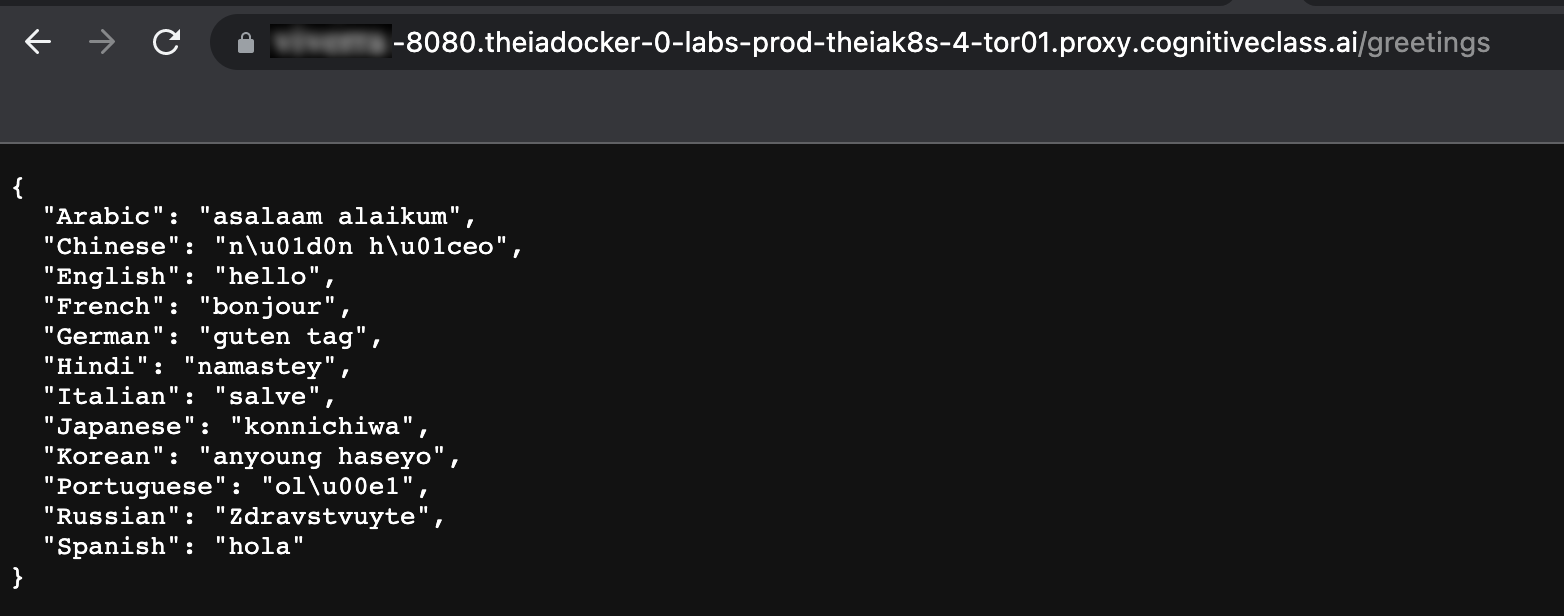
Congratulations! You have successfully completed the task.