Module 03 · Serverless Overview
Reading: AWS Lambda阅读:AWS Lambda
Introduction 引言
Let's build a simple serverless application using AWS Lambda.
让我们使用 AWS Lambda 构建一个简单的无服务器应用程序。
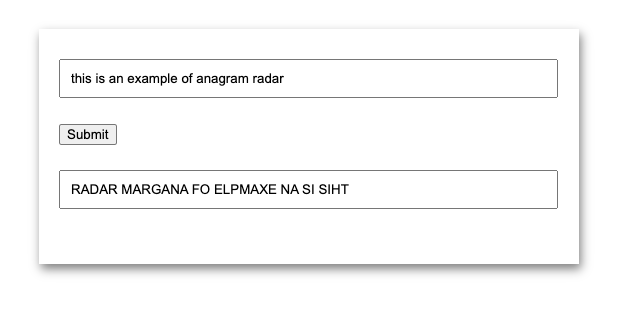
This application will have an html front end hosted on AWS Amplify, where you can enter some text. On submitting the form, it will provide you with a response which is capitalized and reverse of your entered text.
该应用程序将有一个托管在 AWS Amplify 上的 HTML 前端,您可以在其中输入一些文本。提交表单后,它将为您提供响应,该响应是您输入文本的大写和反转版本。
Capitalize and Reverse will be two separate Lambda functions to show you the chaining capabilities. Instead of accessing these functions directly, an API Gateway will be used to accept client requests and respond with the final output.
大写和大写反转将是两个独立的 Lambda 函数,以展示链式处理能力。而不是直接访问这些函数,将使用 API Gateway 接受客户端请求并以最终输出进行响应。
The application will include two separate Lambda functions: Capitalize and Reverse. These functions will be chained together using AWS Step Functions. Instead of accessing these functions directly, an API Gateway will be used to accept client requests and respond with the final output.
该应用程序将包括两个独立的 Lambda 函数:大写和大写反转。这些函数将使用 AWS Step Functions 进行链式处理。而不是直接访问这些函数,将使用 API Gateway 接受客户端请求并以最终输出进行响应。
Components Used: 所用组件
-
AWS CodeCommit: AWS CodeCommit is a secure, highly scalable, fully managed source control service that hosts private Git repositories.
AWS CodeCommit:AWS CodeCommit 是一种安全、高度可扩展、完全托管的源代码控制服务,用于托管私有 Git 仓库。
As a Git-based service, CodeCommit is well suited to most version control needs. There are no arbitrary limits on file size, file type, and repository size.
作为一种基于 Git 的服务,CodeCommit 非常适合大多数版本控制需求。文件大小、文件类型和仓库大小没有任意限制。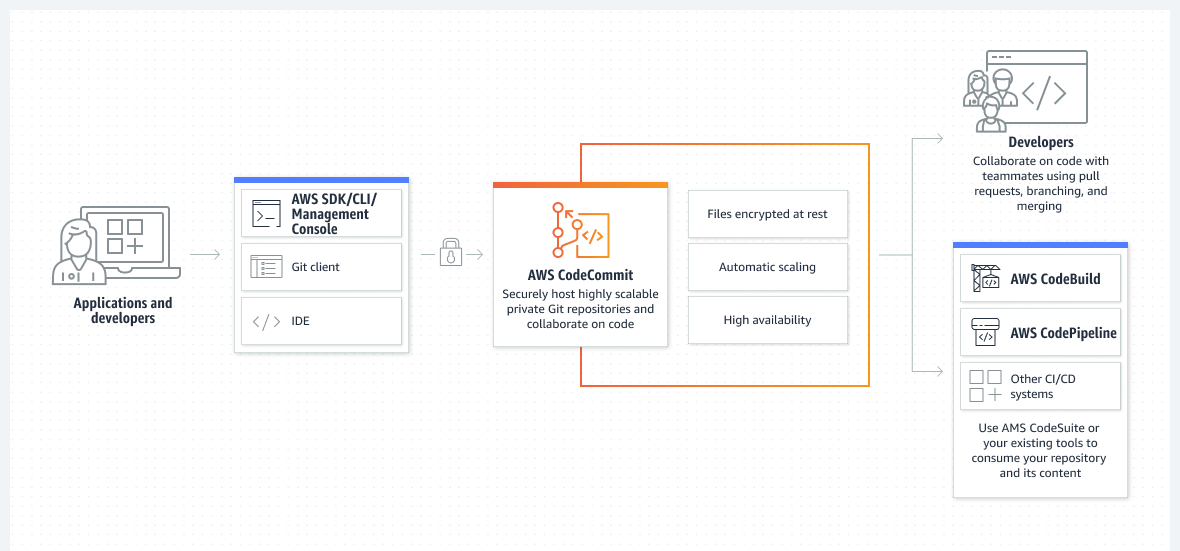
-
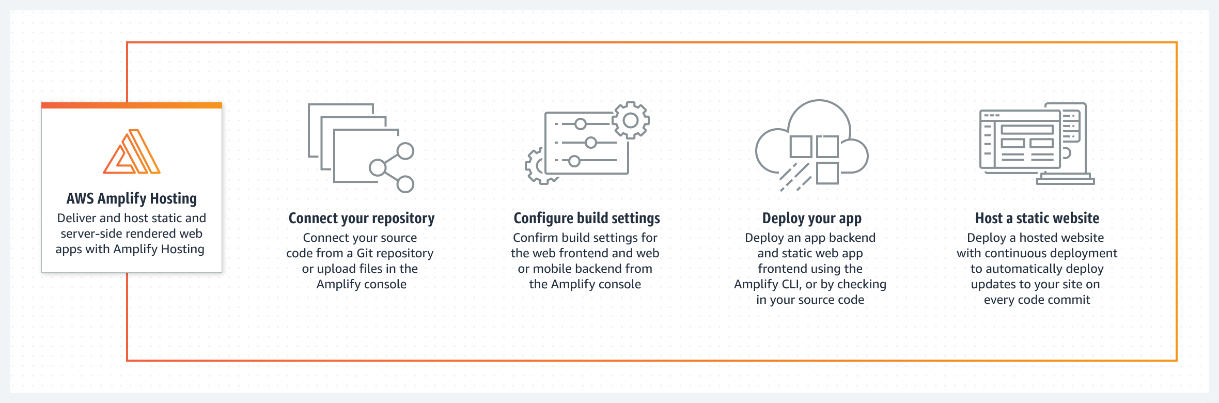
AWS Amplify: AWS Amplify is a complete solution that lets front end web and mobile developers easily build, ship, and host full-stack applications on AWS, with the flexibility to leverage the breadth of AWS services as use cases evolve.
AWS Amplify:AWS Amplify 是一种完整解决方案,使前端 Web 和移动开发人员能够轻松在 AWS 上构建、发布和托管全栈应用程序,并随着用例的发展,灵活利用 AWS 服务的广度。
-
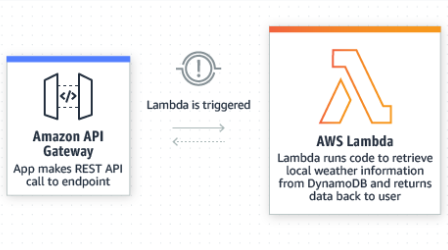
AWS Lambda: AWS Lambda is a serverless, event-driven compute service that lets you run code for virtually any type of application or back end service without provisioning or managing servers. You can trigger Lambda from over 200 AWS services and software as a service (SaaS) application, and only pay for what you use.
AWS Lambda:AWS Lambda 是一种无服务器、事件驱动的计算服务,允许您为几乎任何类型的应用或后端服务运行代码,而无需配置或管理服务器。您可以从超过 200 种 AWS 服务和软件即服务(SaaS)应用程序触发 Lambda,并且只需为您使用的部分付费。
-
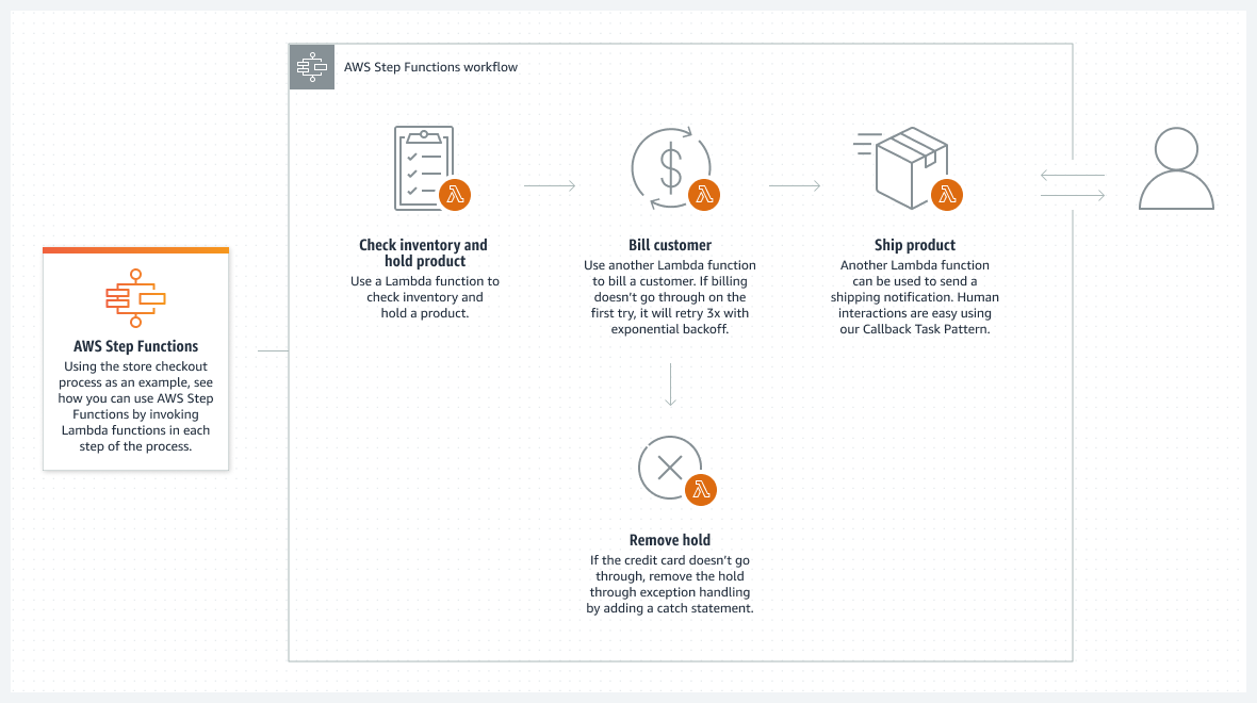
AWS Step Function: AWS Step Function is a visual workflow service that helps developers use AWS services to build distributed applications, automate processes, orchestrate microservices, and create data and machine learning (ML) pipelines.
AWS Step Function:AWS Step Function 是一种可视化工作流服务,帮助开发人员使用 AWS 服务构建分布式应用程序、自动化流程、编排微服务以及创建数据和机器学习(ML)管道。
-
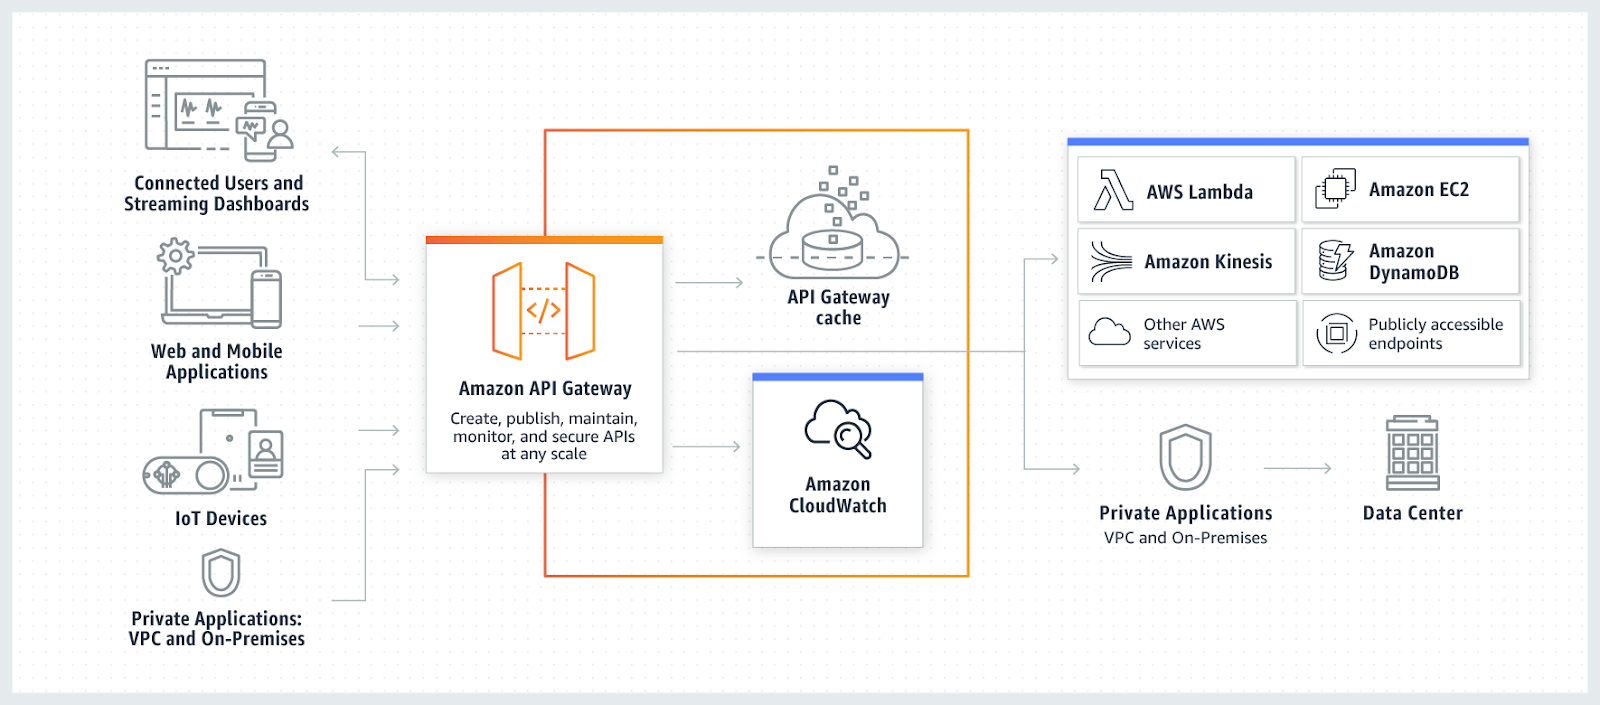
AWS API Gateway: Amazon API Gateway is a fully managed service that makes it easy for developers to create, publish, maintain, monitor, and secure APIs at any scale. APIs act as the "front door" for applications to access data, business logic, or functionality from your back end services.
AWS API Gateway:Amazon API Gateway 是一种完全托管的服务,使开发人员能够轻松创建、发布、维护、监控和保障 API 的任何规模。API 充当应用程序访问后端服务中的数据、业务逻辑或功能的“前端门”。
Process 流程
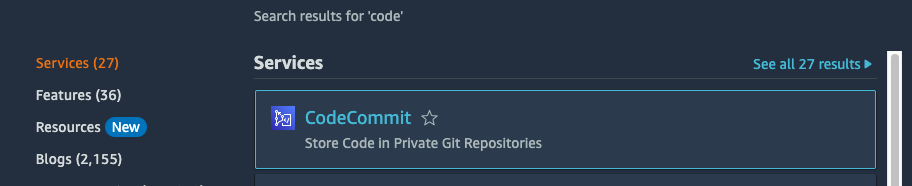
- Let's start with defining CodeCommit resource which you can use as your code repository.
让我们从定义 CodeCommit 资源开始,您可以使用它作为您的代码仓库。
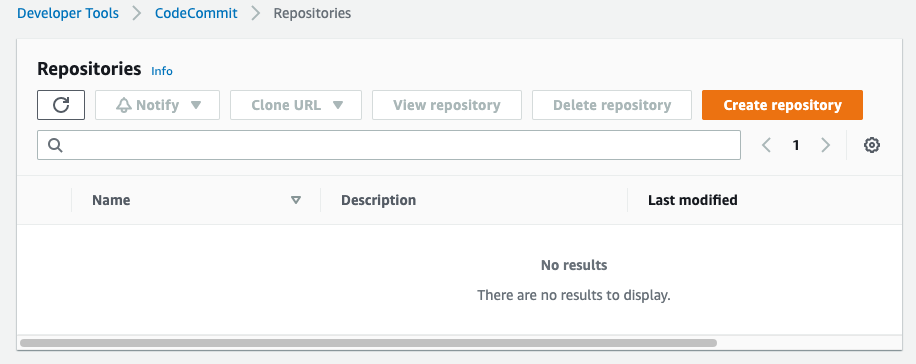
- You start with a blank repository. Click on Create repository.
您从一个空仓库开始。点击创建仓库。
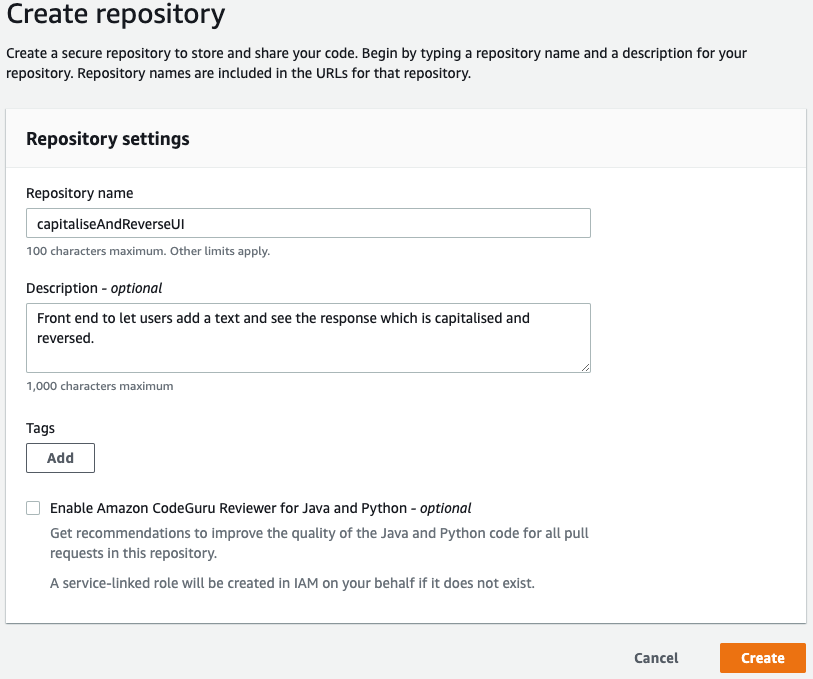
- Provide a repository name and an optional description.
提供一个仓库名称和一个可选的描述。
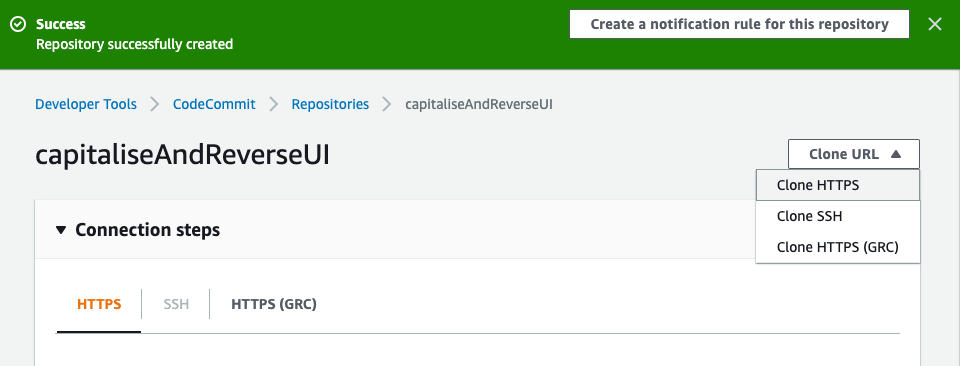
- Now get the details of this repository to clone in your local environment.
现在获取此仓库的详细信息,以便在您的本地环境中克隆。
- Clone the repository on your computer to create the required html resources.
在你的计算机上克隆存储库以创建所需的 html 资源。

- You then create a simple html page (that will contain the require JavaScript and CSS sections).
然后创建一个简单的 html 页面(该页面将包含所需的 JavaScript 和 CSS 部分)。
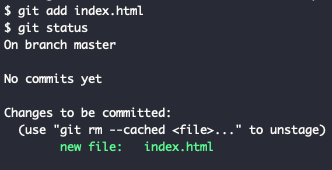
- Commit your changes and you can also push the changes to the remote repository on AWS CodeCommit.
提交你的更改,你也可以将更改推送到 AWS CodeCommit 上的远程存储库。

Host Front-End with AWS Amplify
使用 AWS Amplify 托管前端
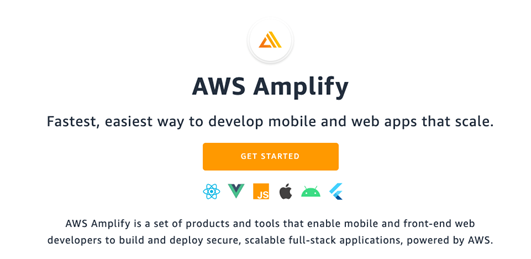
- Now create AWS Amplify resource to host your static content (HTML).
现在创建 AWS Amplify 资源来托管您的静态内容(HTML)。
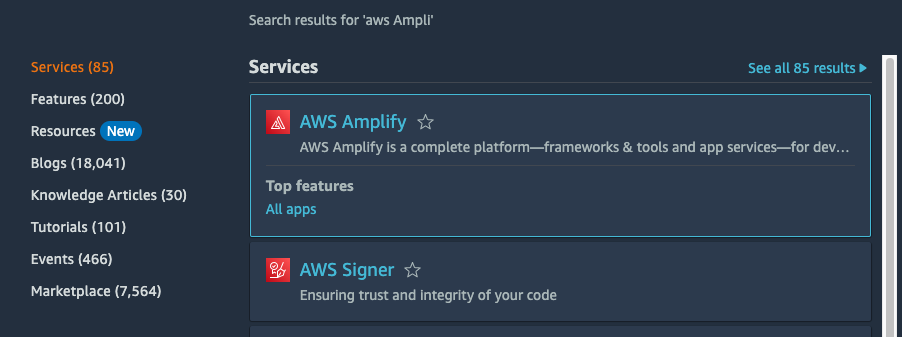
- Start by creating the resource.
首先创建该资源。
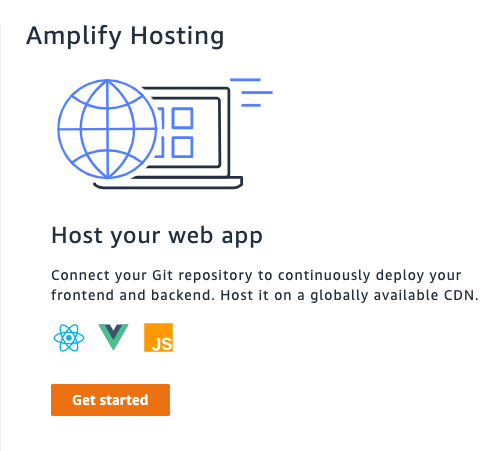
- Choose Host your web app.
选择托管您的 Web 应用。
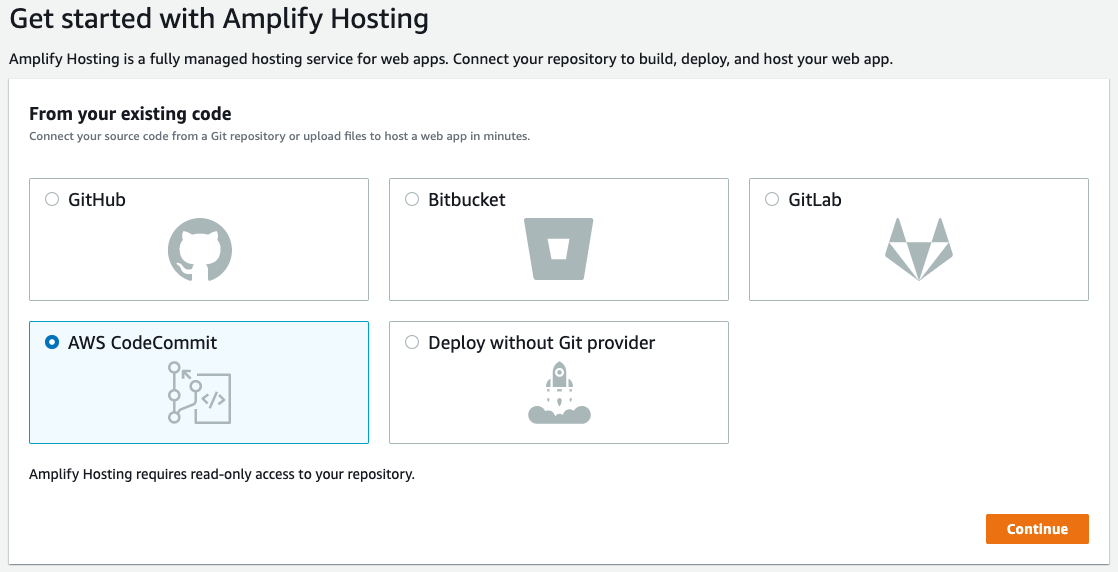
- Select AWS CodeCommit; this is where you have pushed changes from your local environment to the repository.
选择 AWS CodeCommit;这是您将本地环境中的更改推送到存储库的地方。
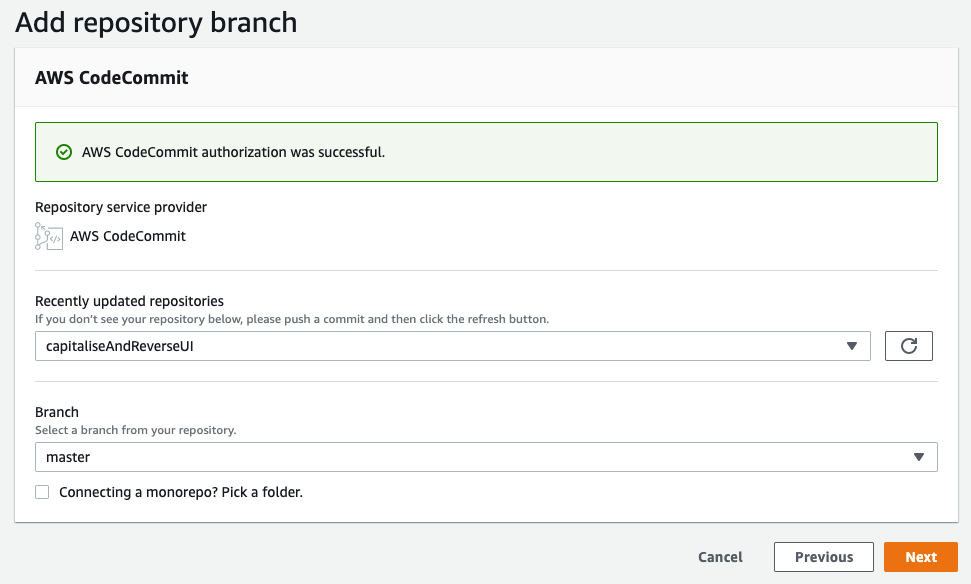
- You will now link the master branch with AWS Amplify. This will provide the continuous delivery for you whenever you push changes to master branch.
您现在将主分支与 AWS Amplify 关联。这将使您在每次向主分支推送更改时都能获得持续交付。
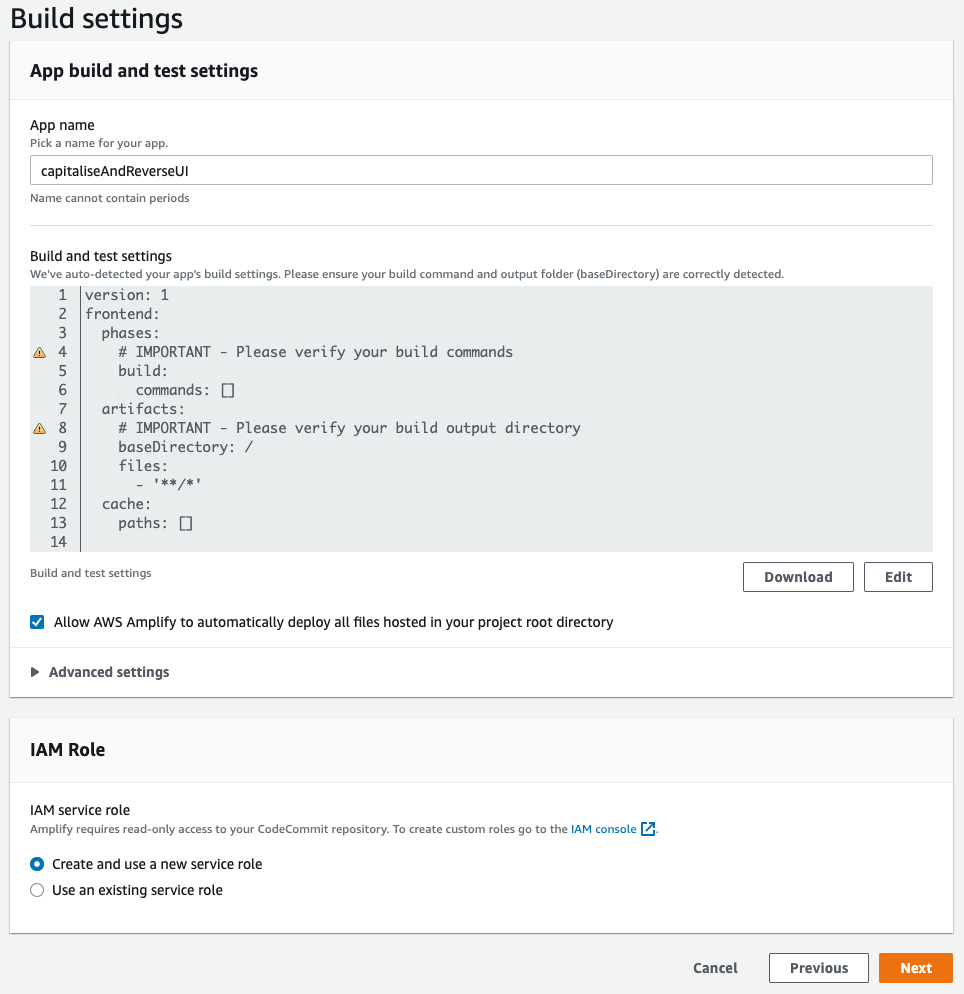
- Accept the default build settings.
接受默认的构建设置。
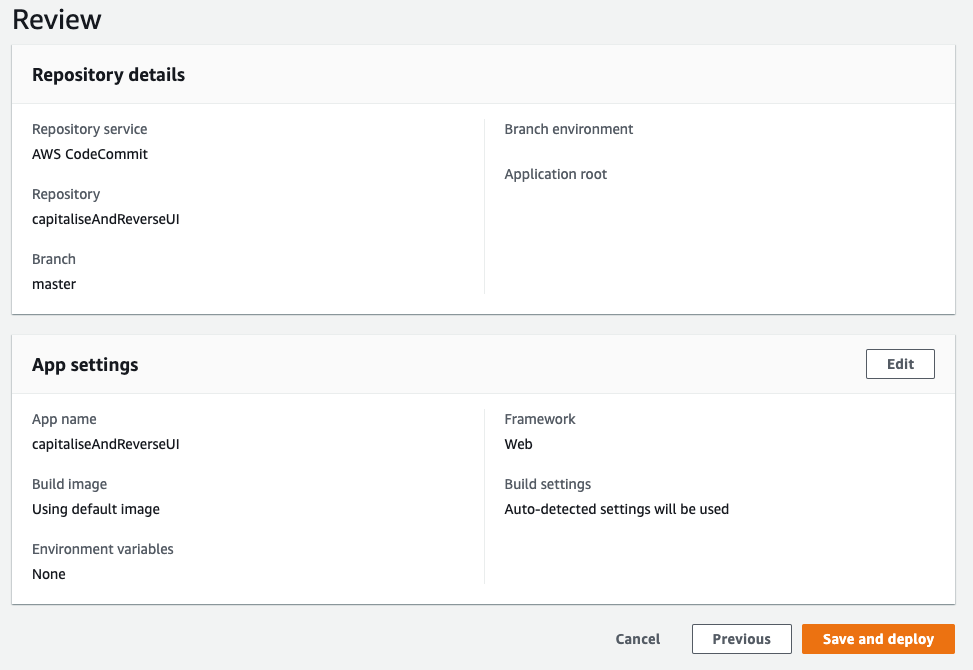
- Review and complete the process.
审查并完成流程。
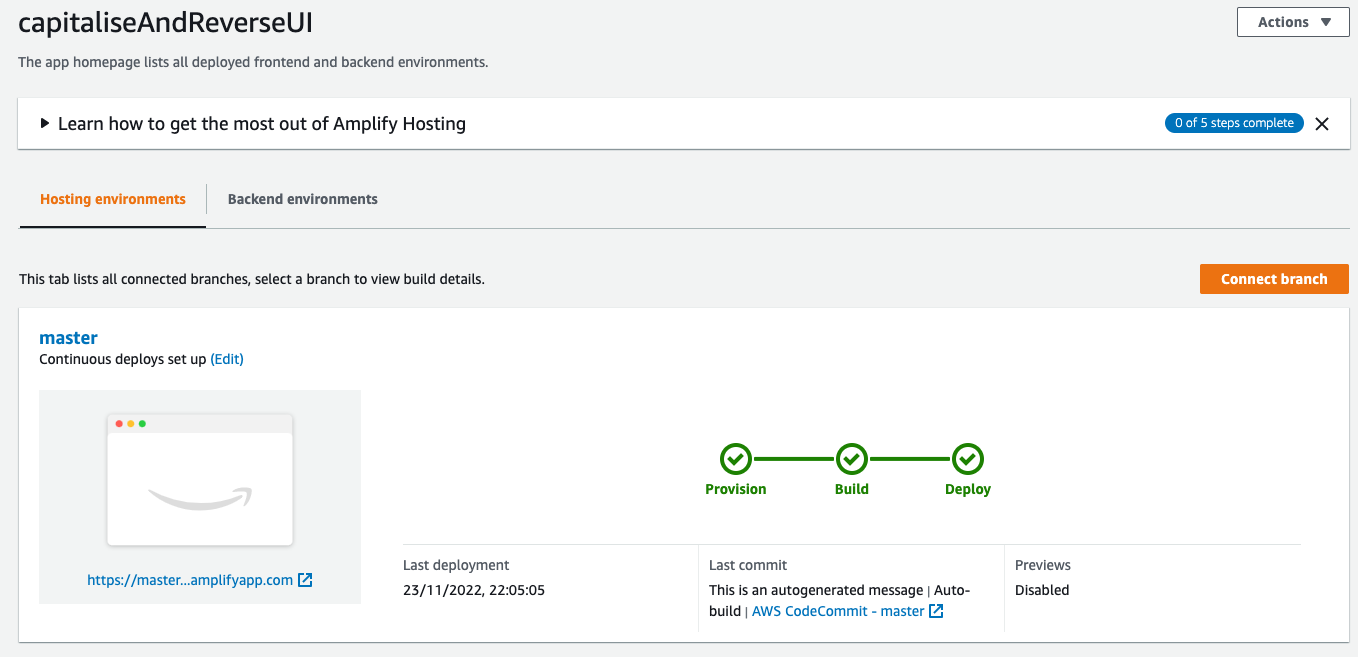
- Process takes some time to complete (provisioning, building, and deploying your changes).
该过程需要一些时间来完成(包括资源分配、构建和部署您的更改)。
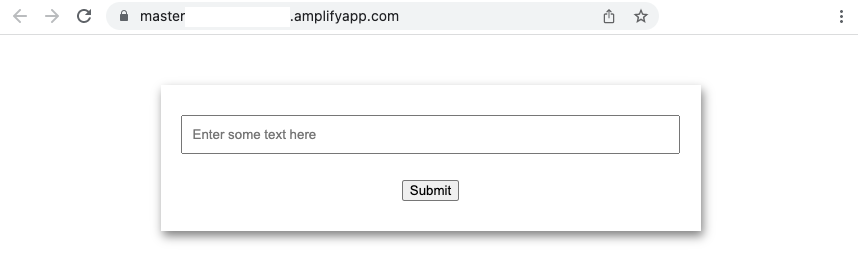
- Once completed, you can visit the URL to see your web application in action.
完成之后,您可以访问 URL 来查看您的 Web 应用程序的运行情况。
Deploying Your Application on AWS Amplify using GitHub 使用 GitHub 在 AWS Amplify 上部署您的应用程序
- Select GitHub and click Next. You'll need to define the GitHub repository you want to use as your code repository.
选择 GitHub 并点击下一步。您需要定义要用作代码仓库的 GitHub 存储库。
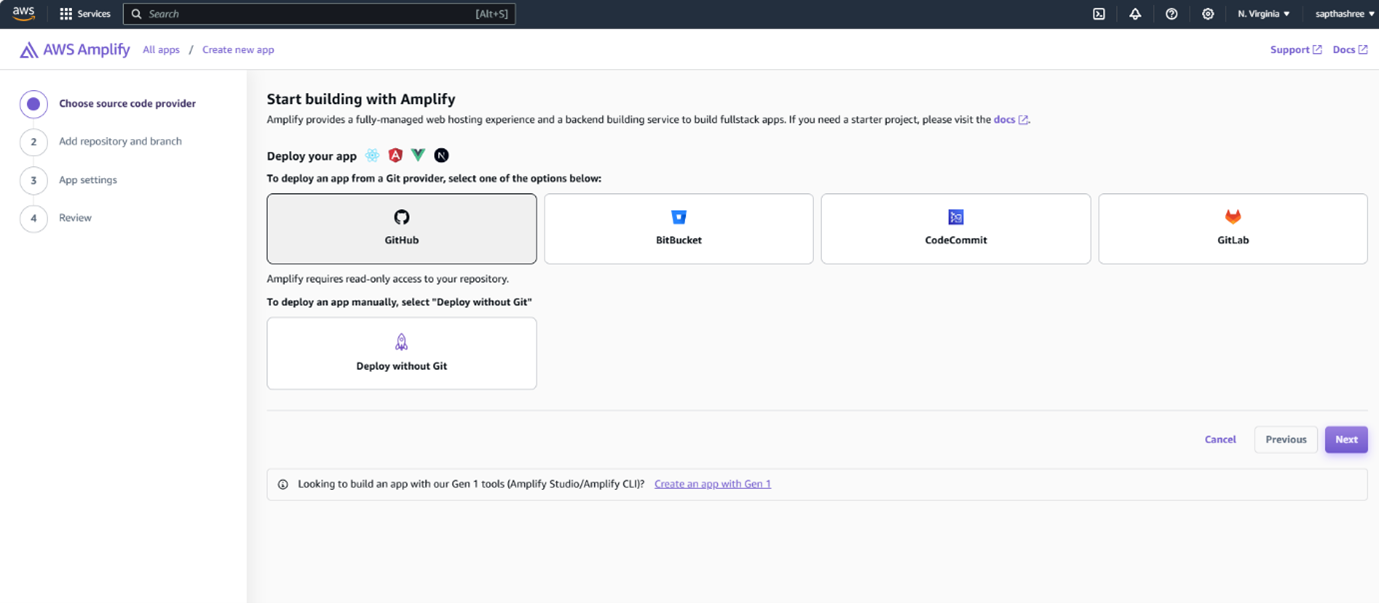
Note: After selecting GitHub, You'll be prompted to authorize access.
注意:选择 GitHub 后,系统将提示您授权访问。 - Choose the project you wish to deploy, then connect its working branch (main/master) to GitHub. This setup will enable continuous delivery, automatically deploying updates whenever you push changes to the working branch.
选择您希望部署的项目,然后将其工作分支(main/master)连接到 GitHub。此设置将启用持续交付,在您向工作分支推送更改时自动部署更新。
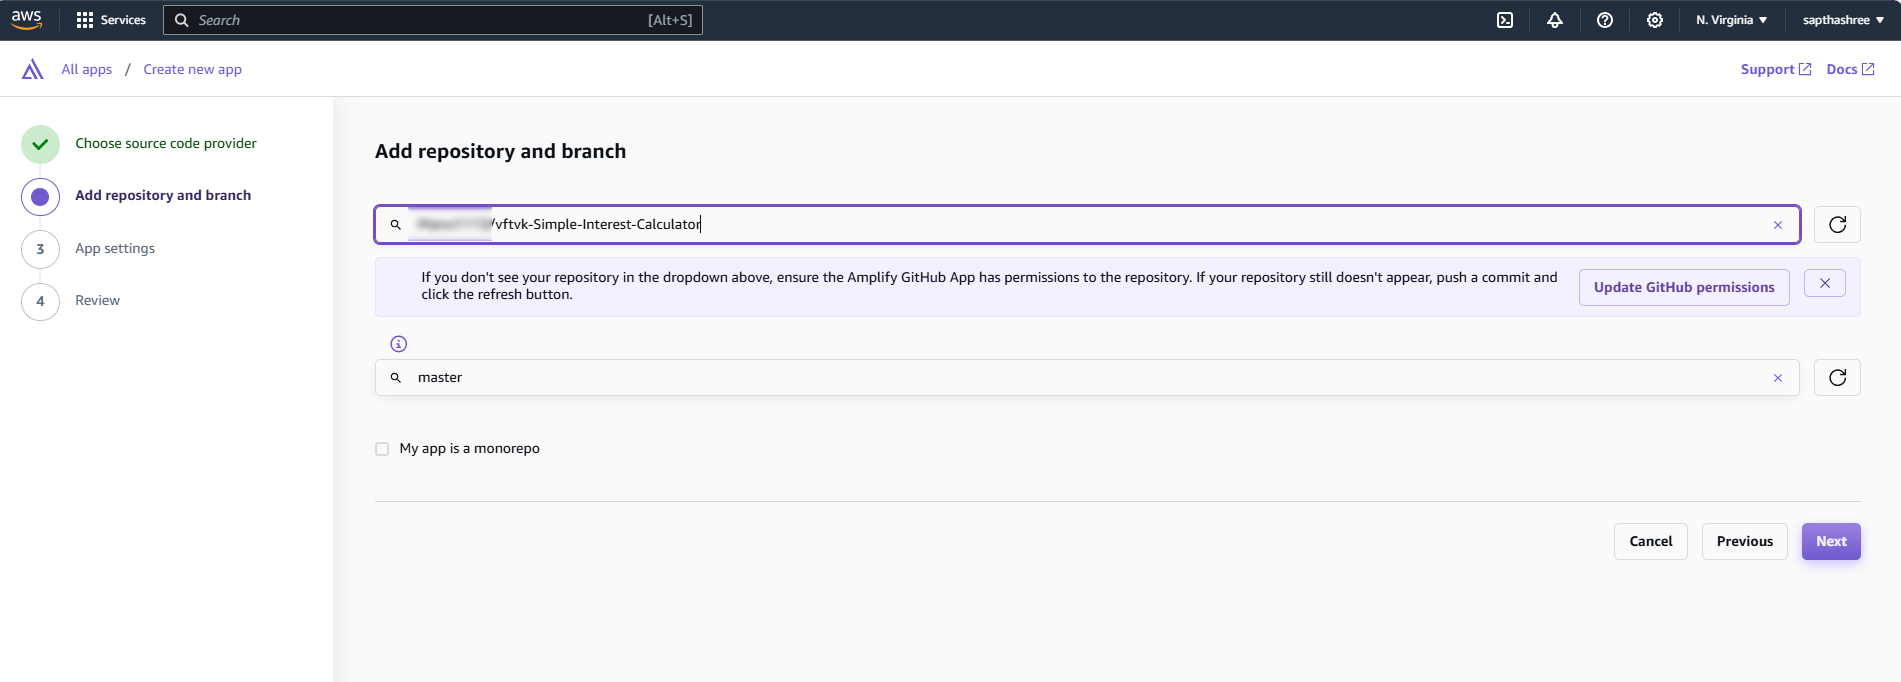
Note: Specify the Frontend build command and the build directory according to your project.
注意:根据您的项目指定前端构建命令和构建目录。
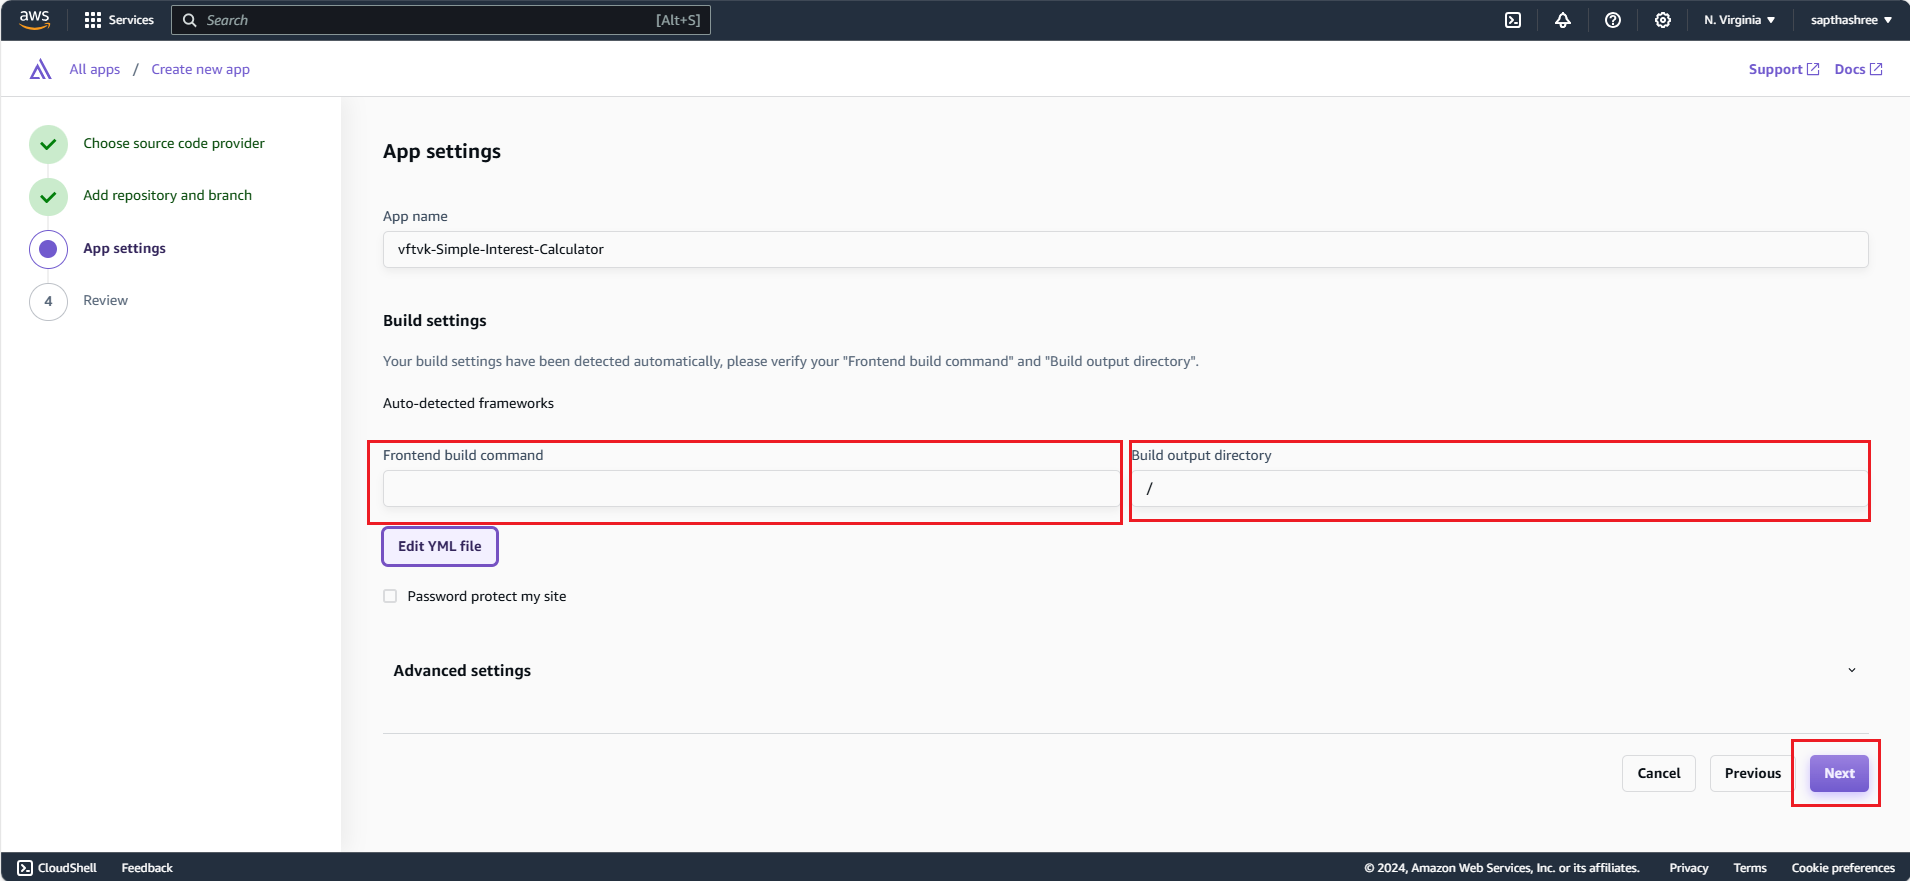
3. Review and complete the process.
审查并完成流程。
The process takes some time to complete (provisioning, building, and deploying your changes).
该流程需要一些时间来完成(包括资源分配、构建和部署您的更改)。
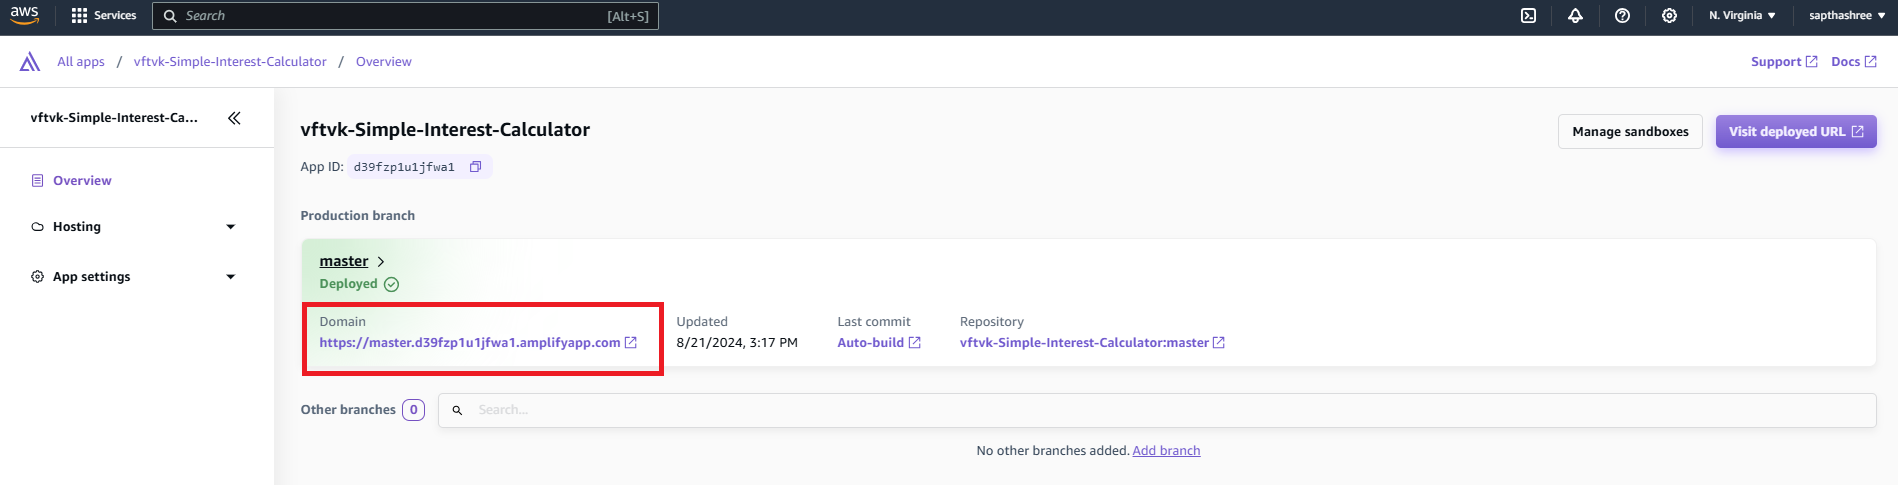
4. Once completed, you can visit the provided URL to see your web application in action.
一旦完成,您可以访问提供的 URL 来查看您的 Web 应用程序的实际运行情况。
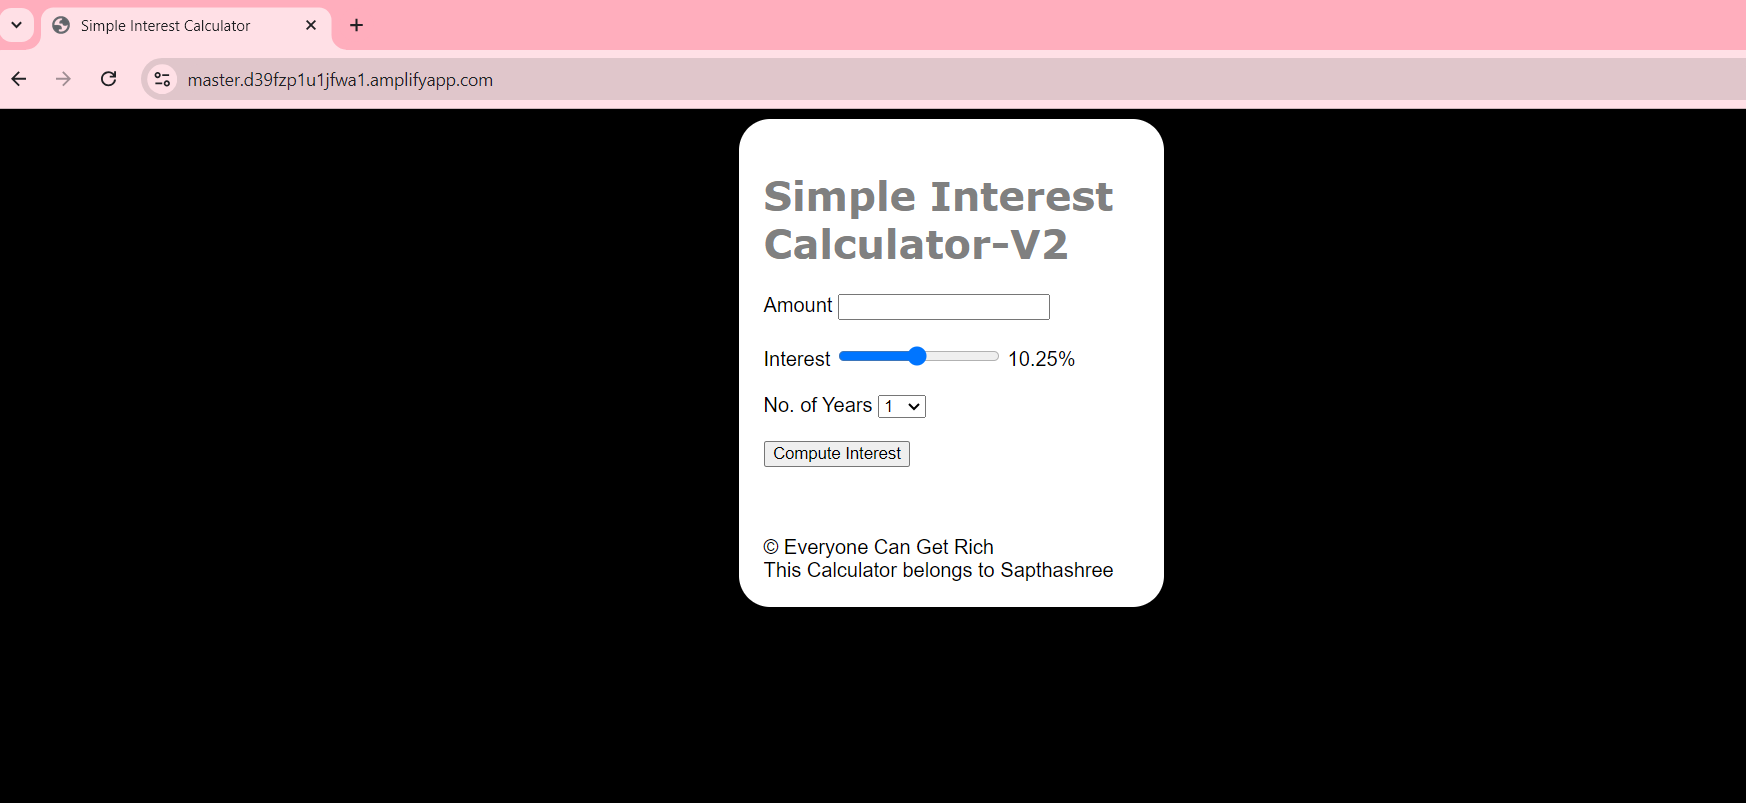
Note: If the deployment fails, click on the Hosting from the left pannel and choose build settings and update the YML file.
注意:如果部署失败,请从左侧面板点击“Hosting”,选择“构建设置”并更新 YML 文件。
But this application is not complete, you are yet to build the back end to do the capitalization and reversal of the input string.
但是这个应用程序并不完整,您还需要构建后端来执行输入字符串的大写和反转。
Create AWS Lambda Functions 创建 AWS Lambda 函数
Capitalize Function: 首字母大写函数
- You start by defining the first AWS Lambda function to Capitalize the input text.
首先,定义一个 AWS Lambda 函数来将输入文本首字母大写。
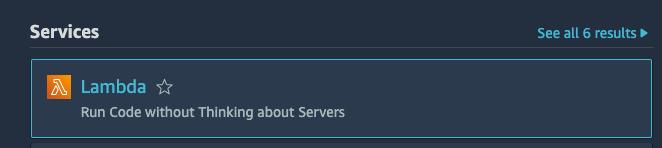
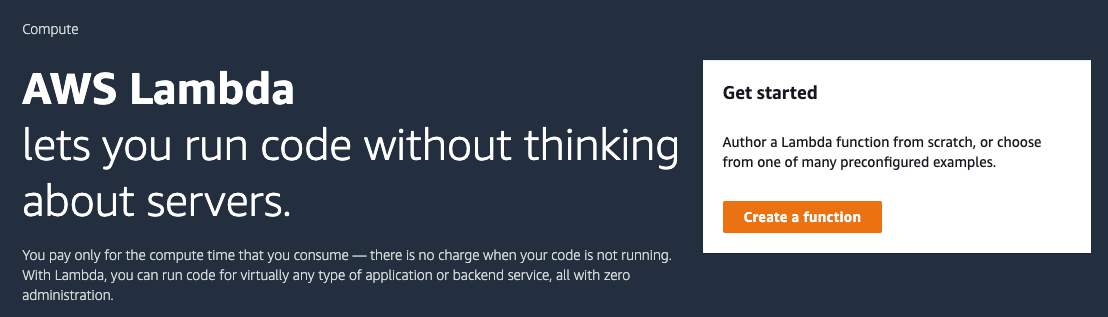
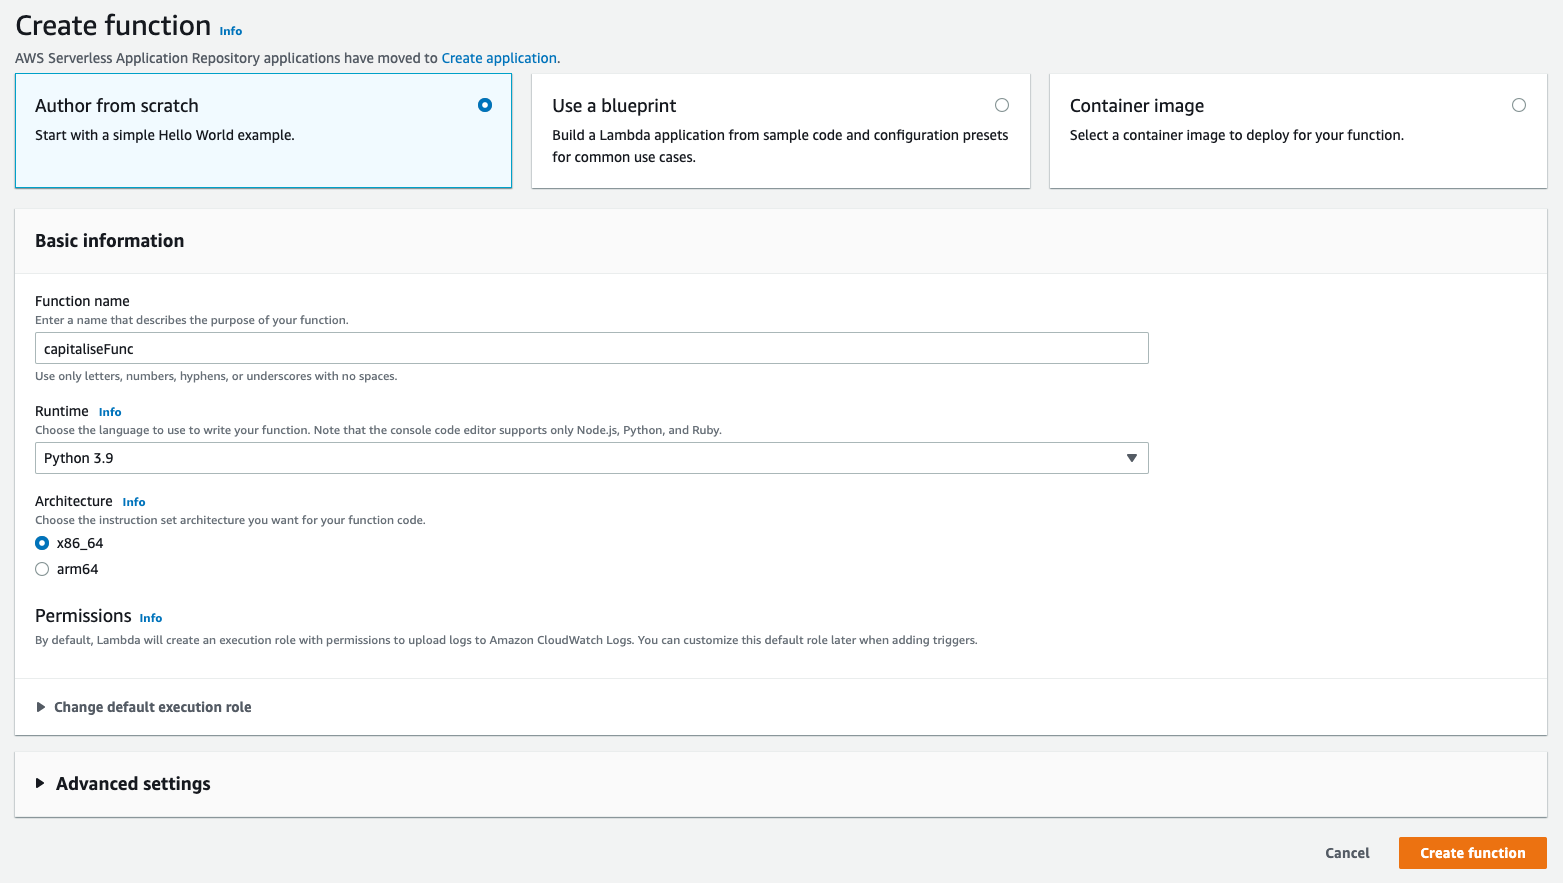
- Provide the function name and runtime. Choose Python 3.9 for this.
提供函数名称和运行时环境。此处选择 Python 3.9。
- Defining the function will look like this:
定义函数的代码如下:
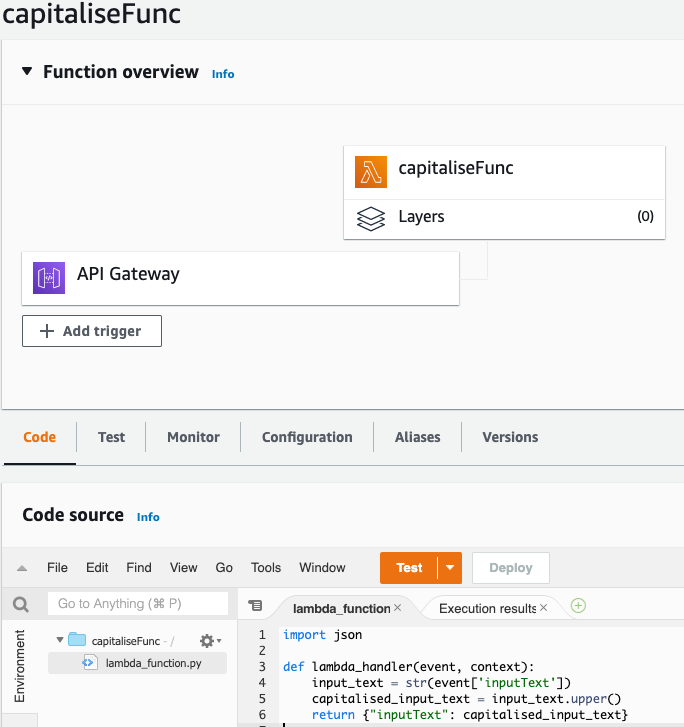
- The code you have written is very basic, as it accepts input text as part of the body (it’s a HTTP POST function). And returns the object again as input text with capitalized value (so you can chain this to the reverse function).
你编写的代码非常基础,因为它将输入文本作为主体的一部分(这是一个 HTTP POST 函数),并再次以大写值为输入文本返回对象(这样你可以将其链接到反向函数)。
 import json

 def lambda_handler(event, context):
     input_text = str(event['inputText'])
     capitalised_input_text = input_text.upper()
     return {"inputText": capitalised_input_text}
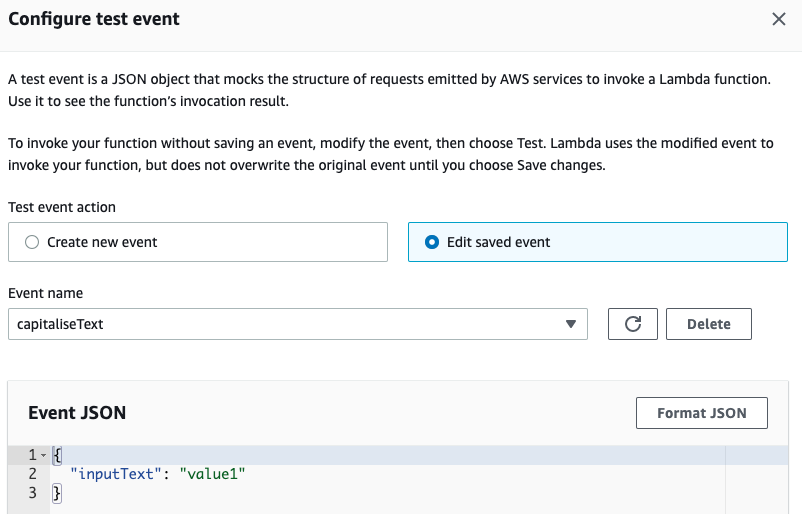
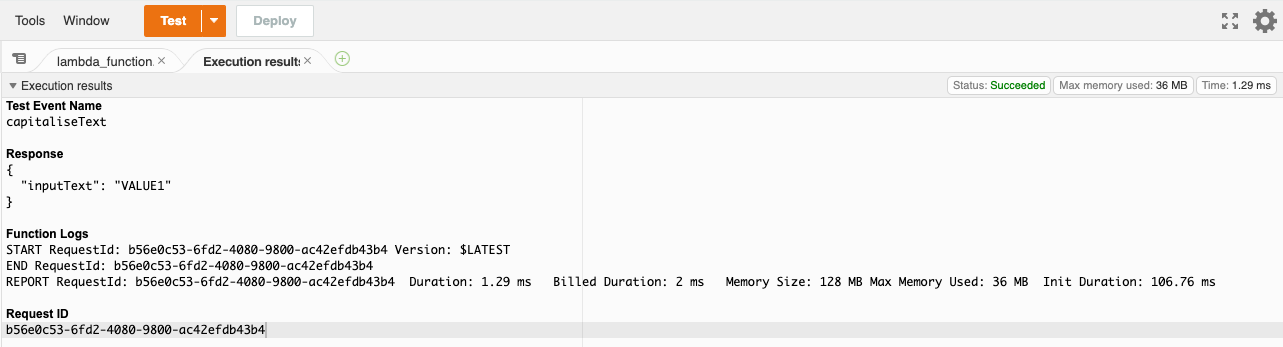
5. And once you deploy your function, you can then test it and see the following outcome.
一旦你部署了你的函数,你就可以测试它并看到以下结果。
6. Similarly, you create the reverse function.
类似地,你创建反向函数。
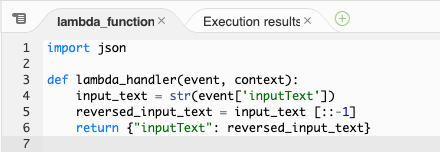
import json

def lambda_handler(event, context):
    input_text = str(event['inputText'])
    reversed_input_text = input_text[::-1]
    return {"inputText": reversed_input_text}
-
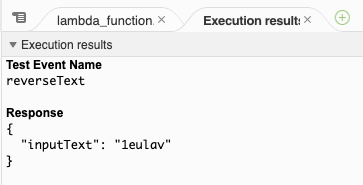
Deploy and test the function.
部署并测试该函数。
-
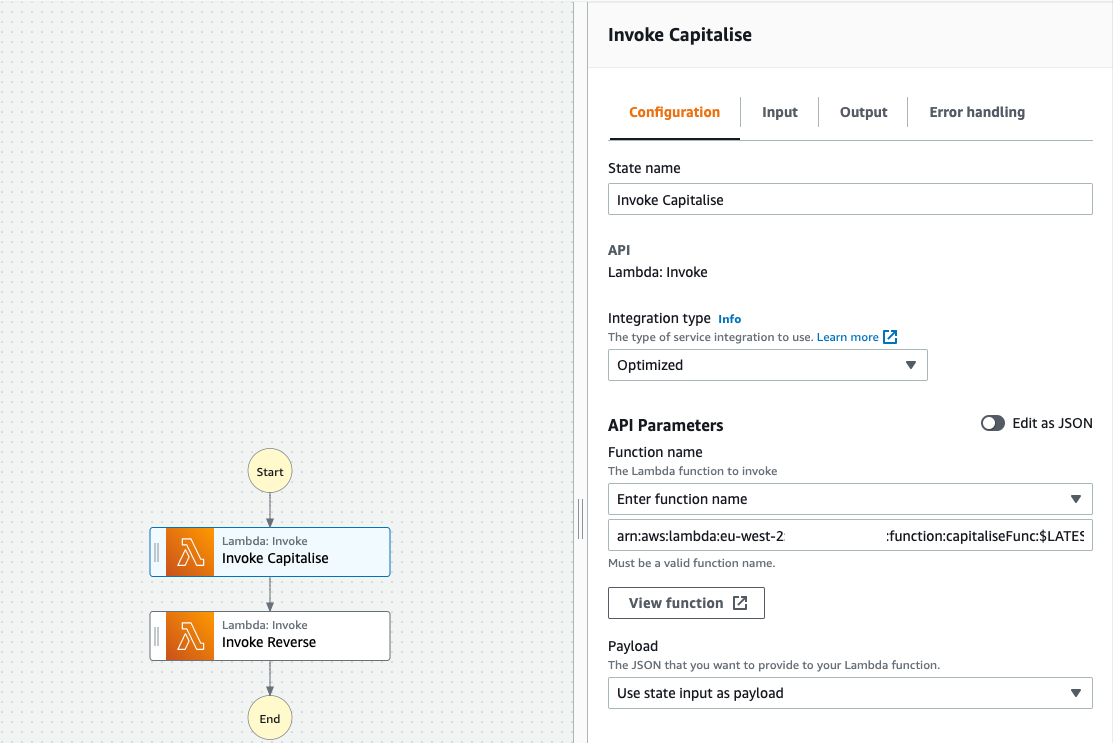
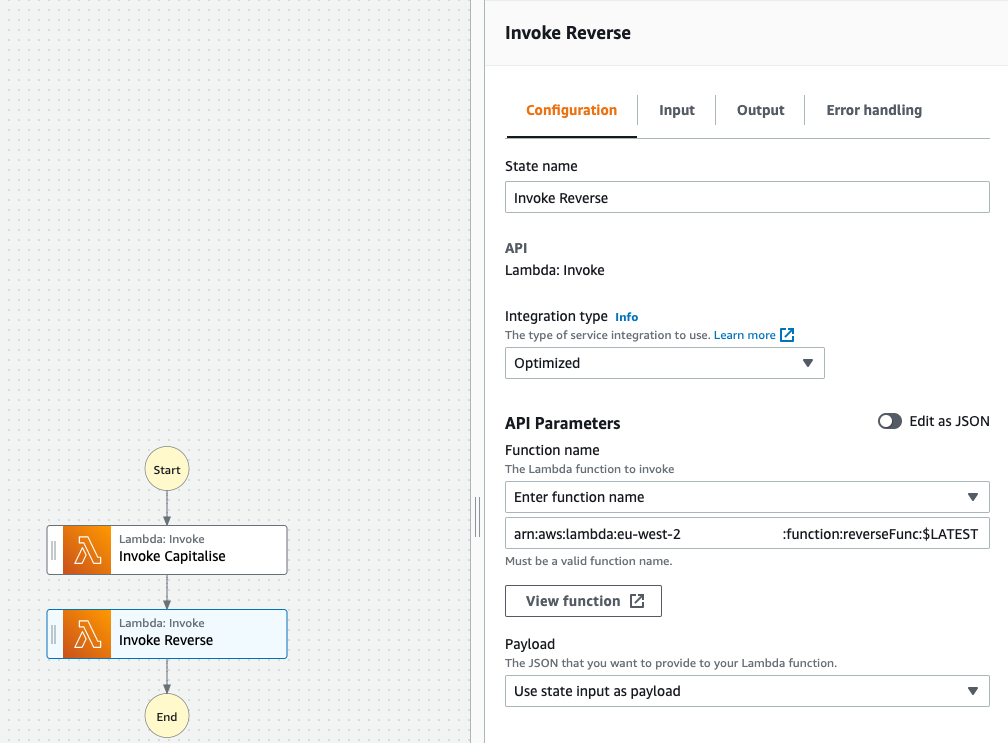
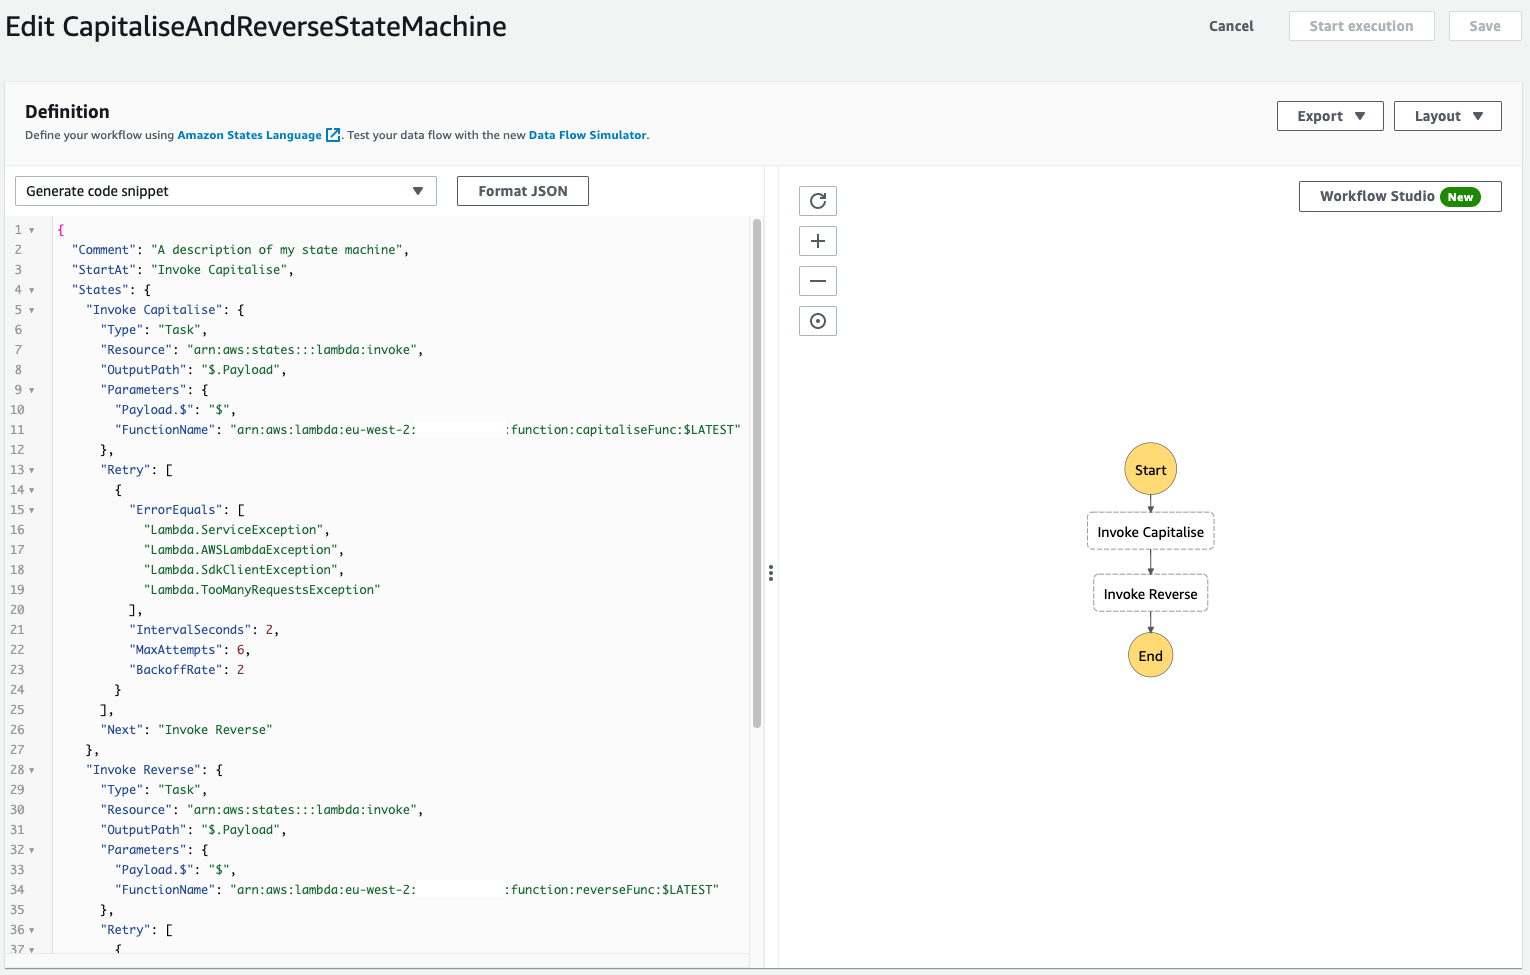
Now that you have two functions defined and created, you can chain them together using StepFunctions.
现在您已经定义并创建了两个函数,可以使用 StepFunctions 将它们连接起来。
-
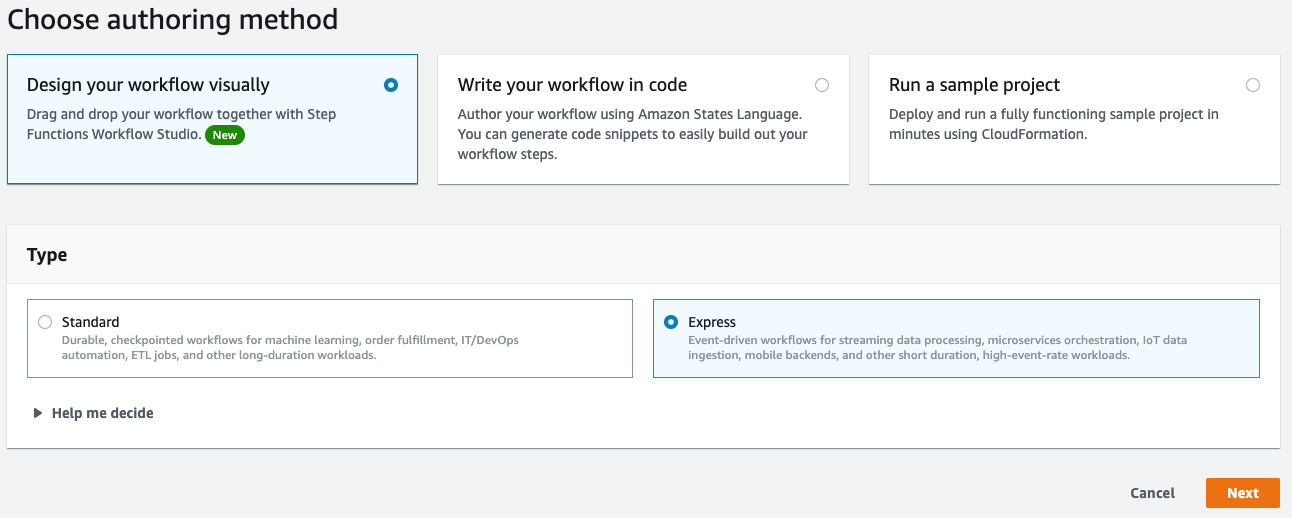
Start by creating a state machine.
首先创建一个状态机。

-
You can choose to design workflow visually for ease and use Express to make your functions work synchronously.
您可以选择通过可视化设计工作流以方便使用,并使用 Express 使您的函数同步运行。
-
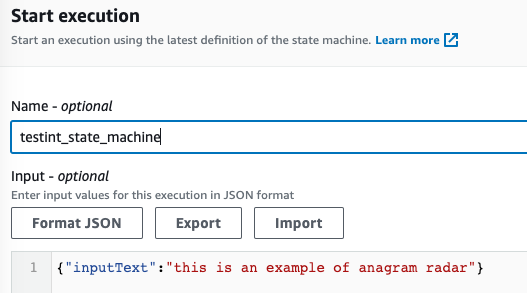
Click on New execution to test your State machine..
点击“新建执行”来测试您的状态机。


Create API Gateway 创建 API 网关
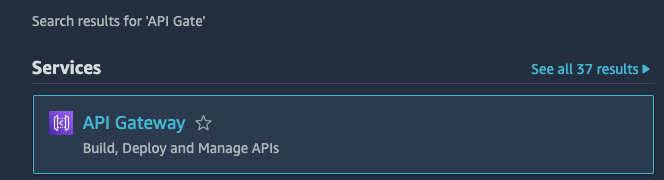
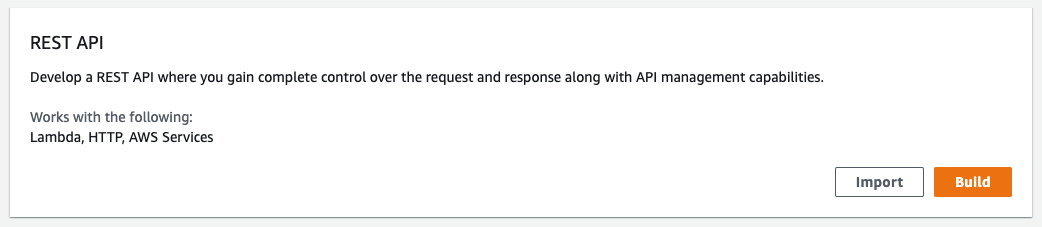
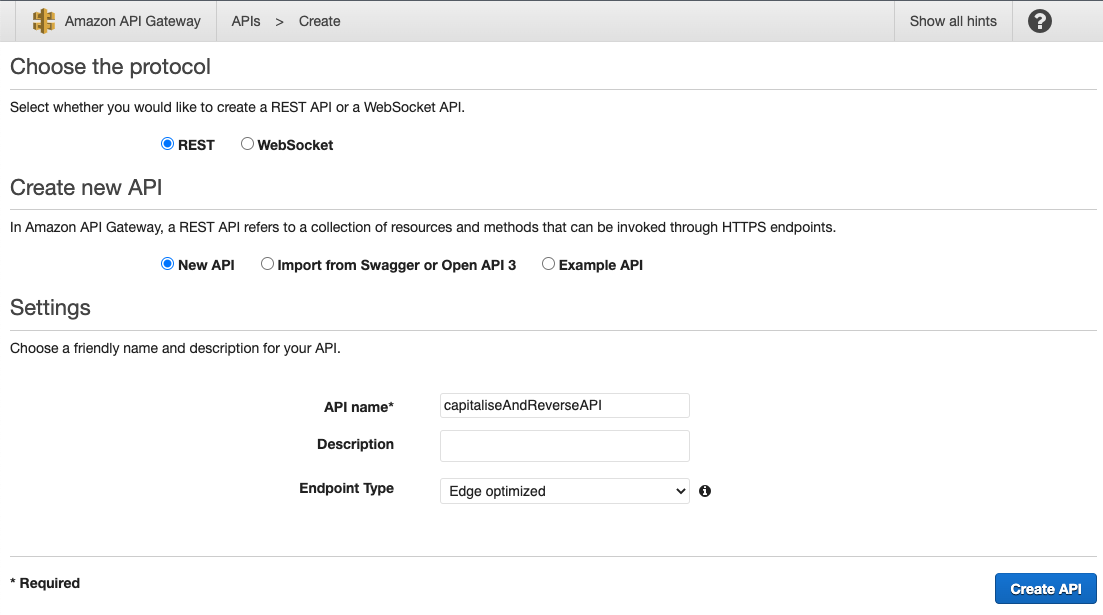
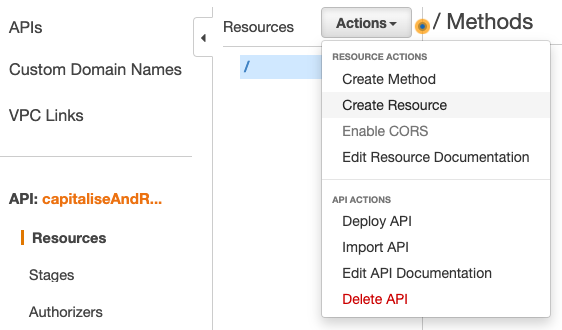
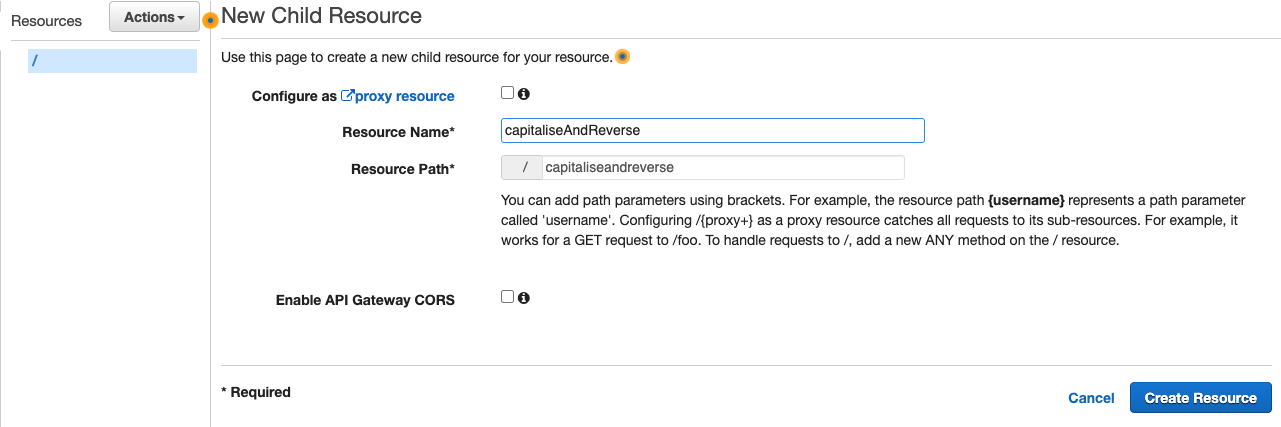
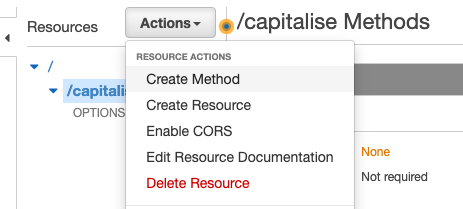
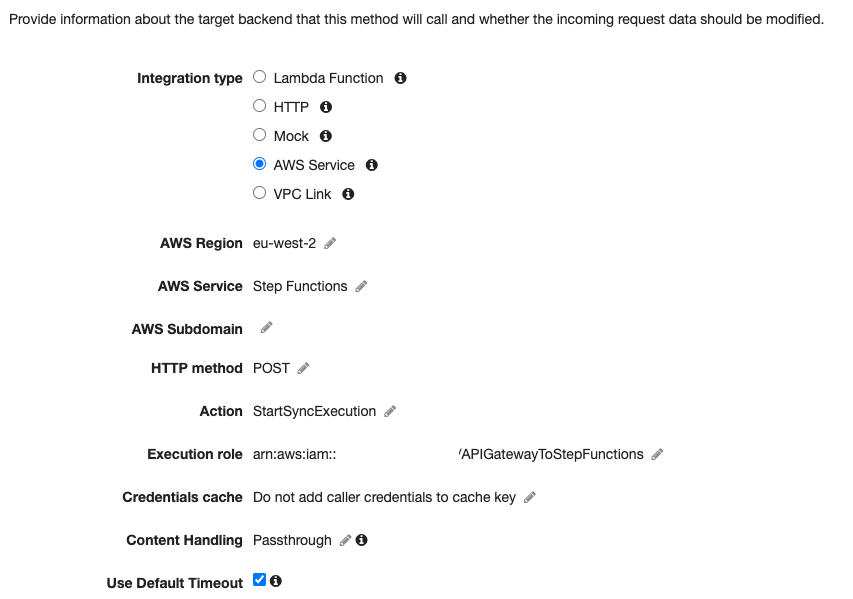
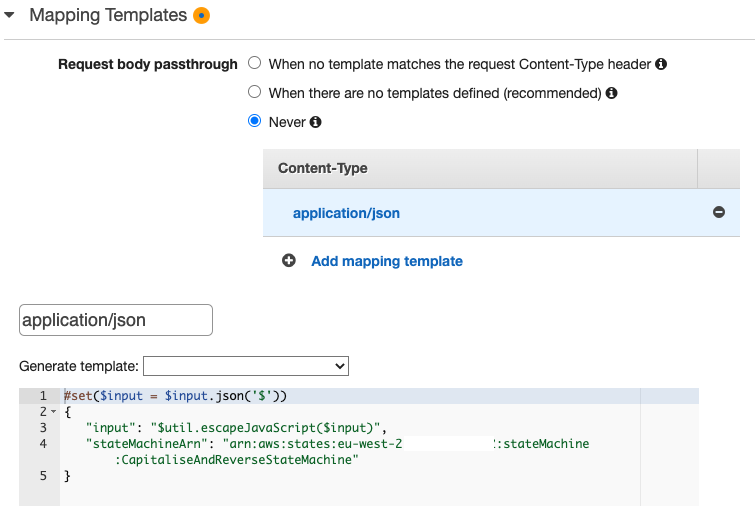
You then define the Stage. A Stage is a named reference to a deployment, which is a snapshot of the API. You use a Stage to manage and optimize a particular deployment. For example, you can configure Stage settings to enable caching, customize request throttling, configure logging, define stage variables, or attach a canary release for testing.
然后您定义阶段。阶段是一个部署的命名引用,而部署是 API 的快照。您使用阶段来管理和优化特定的部署。例如,您可以配置阶段设置以启用缓存、自定义请求速率限制、配置日志记录、定义阶段变量或附加金丝雀发布进行测试。
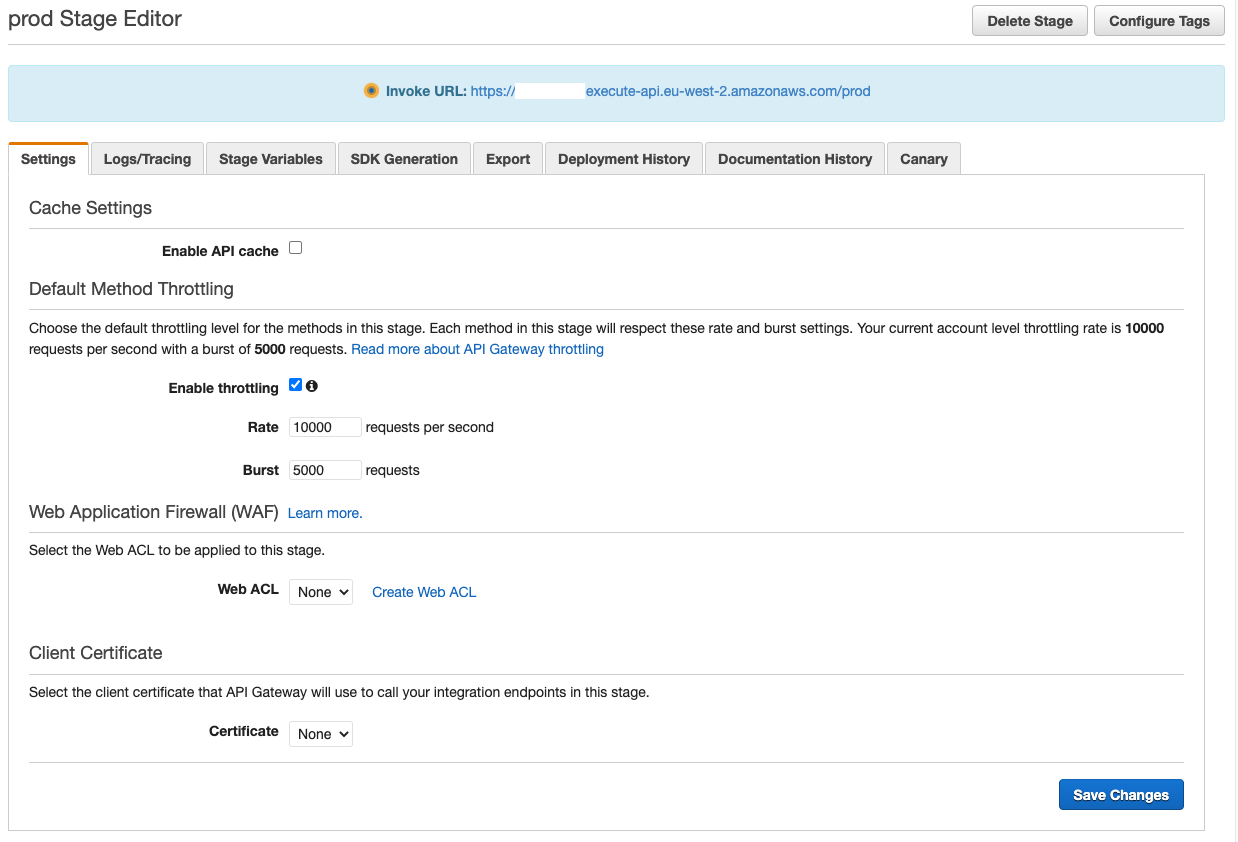
Generate the SDK, so you can use the generated code in your web app and call this API Gateway.
生成 SDK,以便您可以在您的 Web 应用程序中使用生成的代码来调用此 API 网关。

You then extract the generated JavaScript code as below:
然后您提取生成的 JavaScript 代码,如下所示:
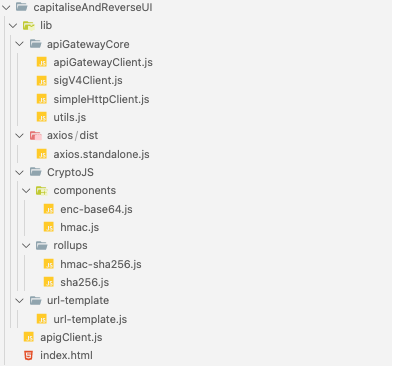
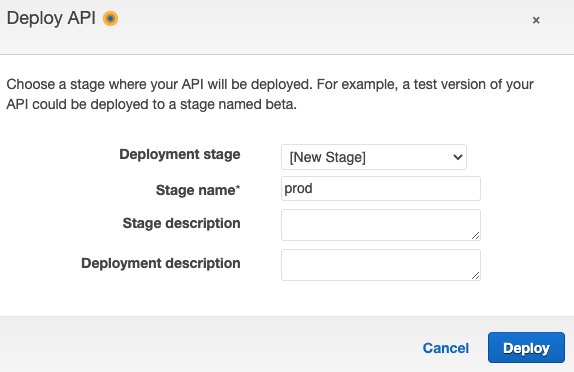
And finally deploy the API (back in the AWS API Gateway section).
最后部署 API(回到 AWS API Gateway 部分)。
Finalize Front-End 完成前端
Your final HTML will looks like below; do notice that you have introduced a field to display your output
您的最终 HTML 如下所示;请注意,您引入了一个字段来显示输出
<!DOCTYPE html>
<html lang="en">
  <head>
    <meta charset="UTF-8" />
    <meta http-equiv="X-UA-Compatible" content="IE=edge" />
    <meta name="viewport" content="width=device-width, initial-scale=1.0" />
    <title>Reverse and Capitalise with AWS Lambda</title>
    <style>
      body { font-family: Verdana; text-align: center; }
      form { max-width: 500px; margin: 50px auto; padding: 30px 20px; box-shadow: 2px 5px 10px rgba(0, 0, 0, 0.5); }
      .form-control { text-align: left; margin-bottom: 25px; }
      .form-control input { padding: 10px; display: block; width: 95%; }
    </style>
  </head>
  <body>
    <form id="form" onsubmit="callLambdaFunction(); return false;">
        <div class="form-control">
            <input type="text" id="inputText" placeholder="Enter some text here" />
        </div>
        <div class="form-control">
            <button type="submit" value="submit">Submit</button>
        </div>
        <div class="form-control">
            <input type="text" readonly id="outputText" placeholder="Output will appear here" />
        </div>
    </form>
    <script type="text/javascript" src="lib/axios/dist/axios.standalone.js"></script>
    <script type="text/javascript" src="lib/CryptoJS/rollups/hmac-sha256.js"></script>
    <script type="text/javascript" src="lib/CryptoJS/rollups/sha256.js"></script>
    <script type="text/javascript" src="lib/CryptoJS/components/hmac.js"></script>
    <script type="text/javascript" src="lib/CryptoJS/components/enc-base64.js"></script>
    <script type="text/javascript" src="lib/url-template/url-template.js"></script>
    <script type="text/javascript" src="lib/apiGatewayCore/sigV4Client.js"></script>
    <script type="text/javascript" src="lib/apiGatewayCore/apiGatewayClient.js"></script>
    <script type="text/javascript" src="lib/apiGatewayCore/simpleHttpClient.js"></script>
    <script type="text/javascript" src="lib/apiGatewayCore/utils.js"></script>
    <script type="text/javascript" src="apigClient.js"></script>
    <script type="text/javascript">
      function callLambdaFunction() {
        try {
            var inputTextValue = document.getElementById("inputText").value;
            var apigClient = apigClientFactory.newClient();
            var params = {};
            var body = { inputText: inputTextValue };
            apigClient.capitaliseandreversePost(params, body)
                .then(function (result) {
                    document.getElementById("outputText").value = JSON.parse(result.data.output).inputText;
                })
                .catch(function (result) {
                    console.log(result);
                });
        } catch (error) {
          console.log(error);
        }
        return false;
      }
    </script>
  </body>
</html>
You then commit and push the changes to AWS CodeCommit repository and wait for it to be deployed.
然后您将更改提交并推送到 AWS CodeCommit 仓库,并等待其部署。
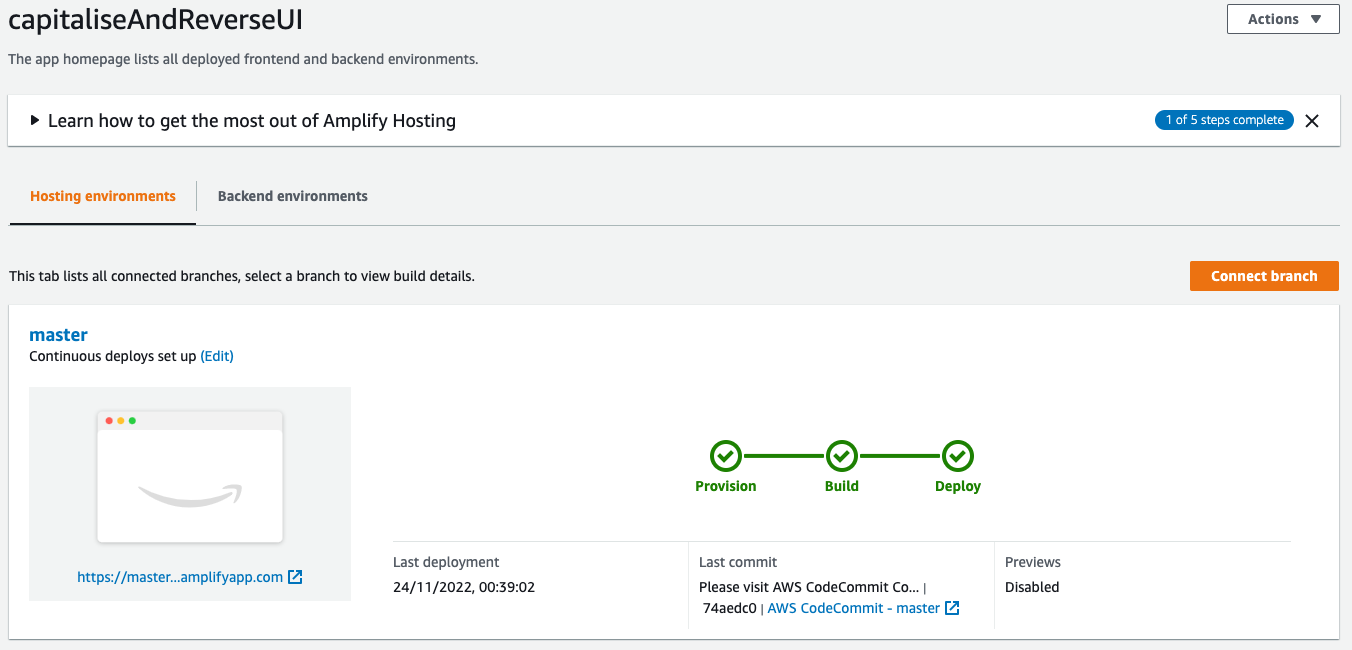
And you can now test your web app by visiting the URL provided to you by AWS Amplify.
现在,您可以通过访问 AWS Amplify 提供给您的 URL 来测试您的 Web 应用。