Module 01 · Introduction to Microservices
Hands-on Activity: Modernize JPetStore with Microservices实践活动:使用微服务现代化 JPetStore
In this lab, you will get familiar using the Swagger API.
在本实验中,您将熟悉使用 Swagger API。
Learning Objectives 学习目标
After completing this lab:
完成本实验后:
- Use the Swagger UI and understand the various components.
使用 Swagger UI 并理解其各个组件。 - Access endpoints through the Swagger UI.
通过 Swagger UI 访问端点。
Hands-on Lab - Modernize JPetStore with Microservices
Estimated Time: 30 minutes
In this lab, you will become familiar with using the Swagger UI. The Swagger UI is an open source project to visually render documentation for an API defined with the OpenAPI (Swagger) specification. REST APIs endpoint is one end of a communication channel. When an API interacts with another system, the touchpoints of this communication are considered endpoints. For APIs, an endpoint can include a URL of a server or service.
Learning Objectives
After completing this exercise, you should be able to perform the following tasks:
- Use the Swagger UI and understand the various components.
- Access endpoints through the Swagger UI.
Pre-requisites
- You must be familiar with Docker applications and commands.
- You must have a good understanding of REST API.
Task 1 - Getting the Swagger UI
- Open a terminal window by using the top menu in the IDE: Terminal > New Terminal.
- In the terminal, run the following command to pull the docker image for Swagger.
docker pull swaggerapi/swagger-ui
- To run the swagger application and access the UI, run the following command.
docker run -dp 8080:8080 swaggerapi/swagger-ui
Note - You will get a hex code in return. This means the server has successfully started.
- Click on the button below or click the Skills Network icon and choose Launch Application from the menu and enter the port number 8080.
Launch Application - It opens the browser and connects to port 8080 which is where the Swagger application is running.
Swagger UI comes up connecting to the default, preconfigured sample PetStore JSON. You can check this JSON file by opening in a new page
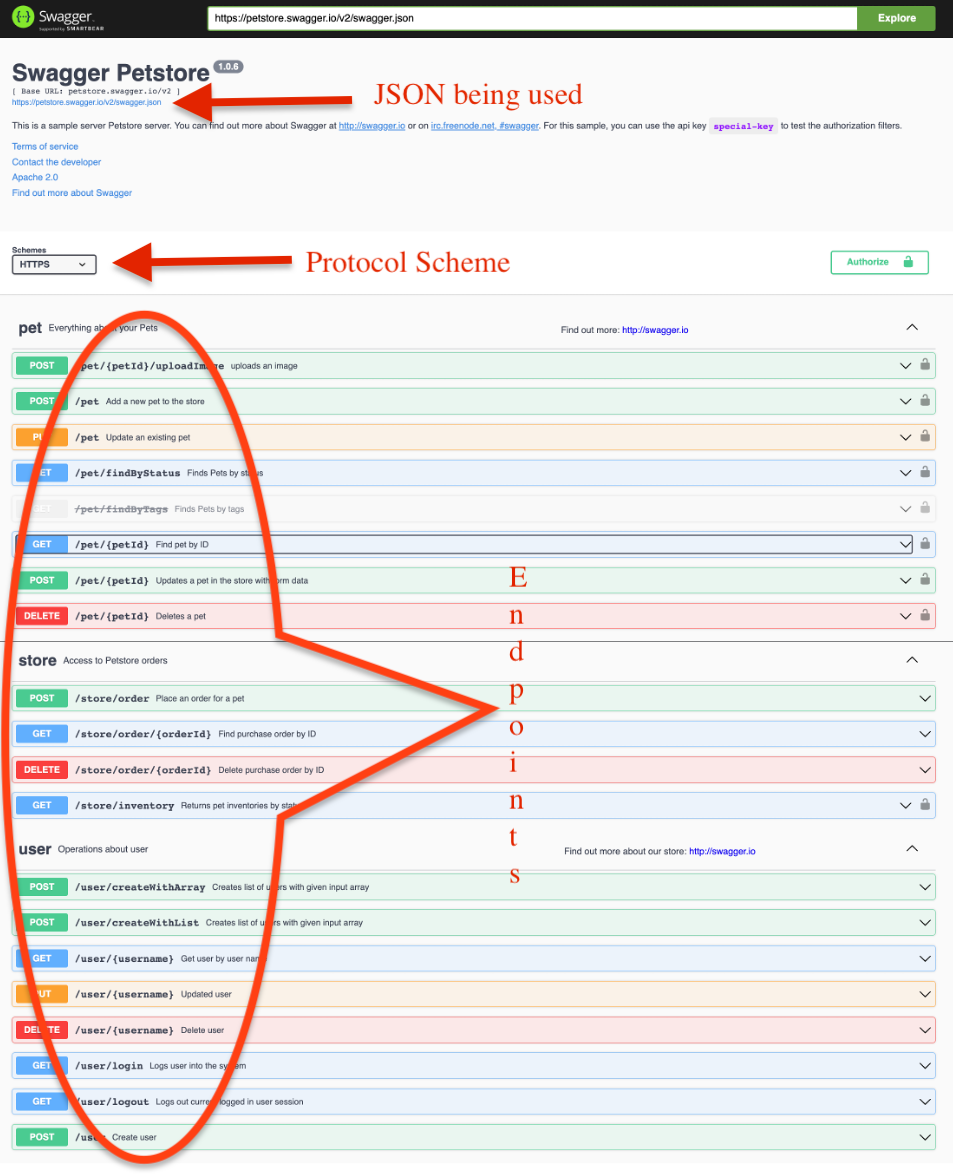
The page will look as shown below. It lists the following:
- JSON being used
- The protocol scheme
- The end points along with the type of REST requests - GET, POST, PUT, UPDATE, DELETE
- It also lists the Models that are used in the application
Task 2 - Accessing endpoints through the Swagger UI
As a part of this task you will -
- Add a pet
- Get the details of the pet by id
- Update the pet status to sold
- Get the details of the pet by id to see if the status has been updated
- Delete the pet
- Get the details of the pet by id to see that it doesn't exist
You will try POST, GET and DELETE endpoints.
- Click the dropdown next to the end point POST /pet.

- Click on Try it out to add a pet.
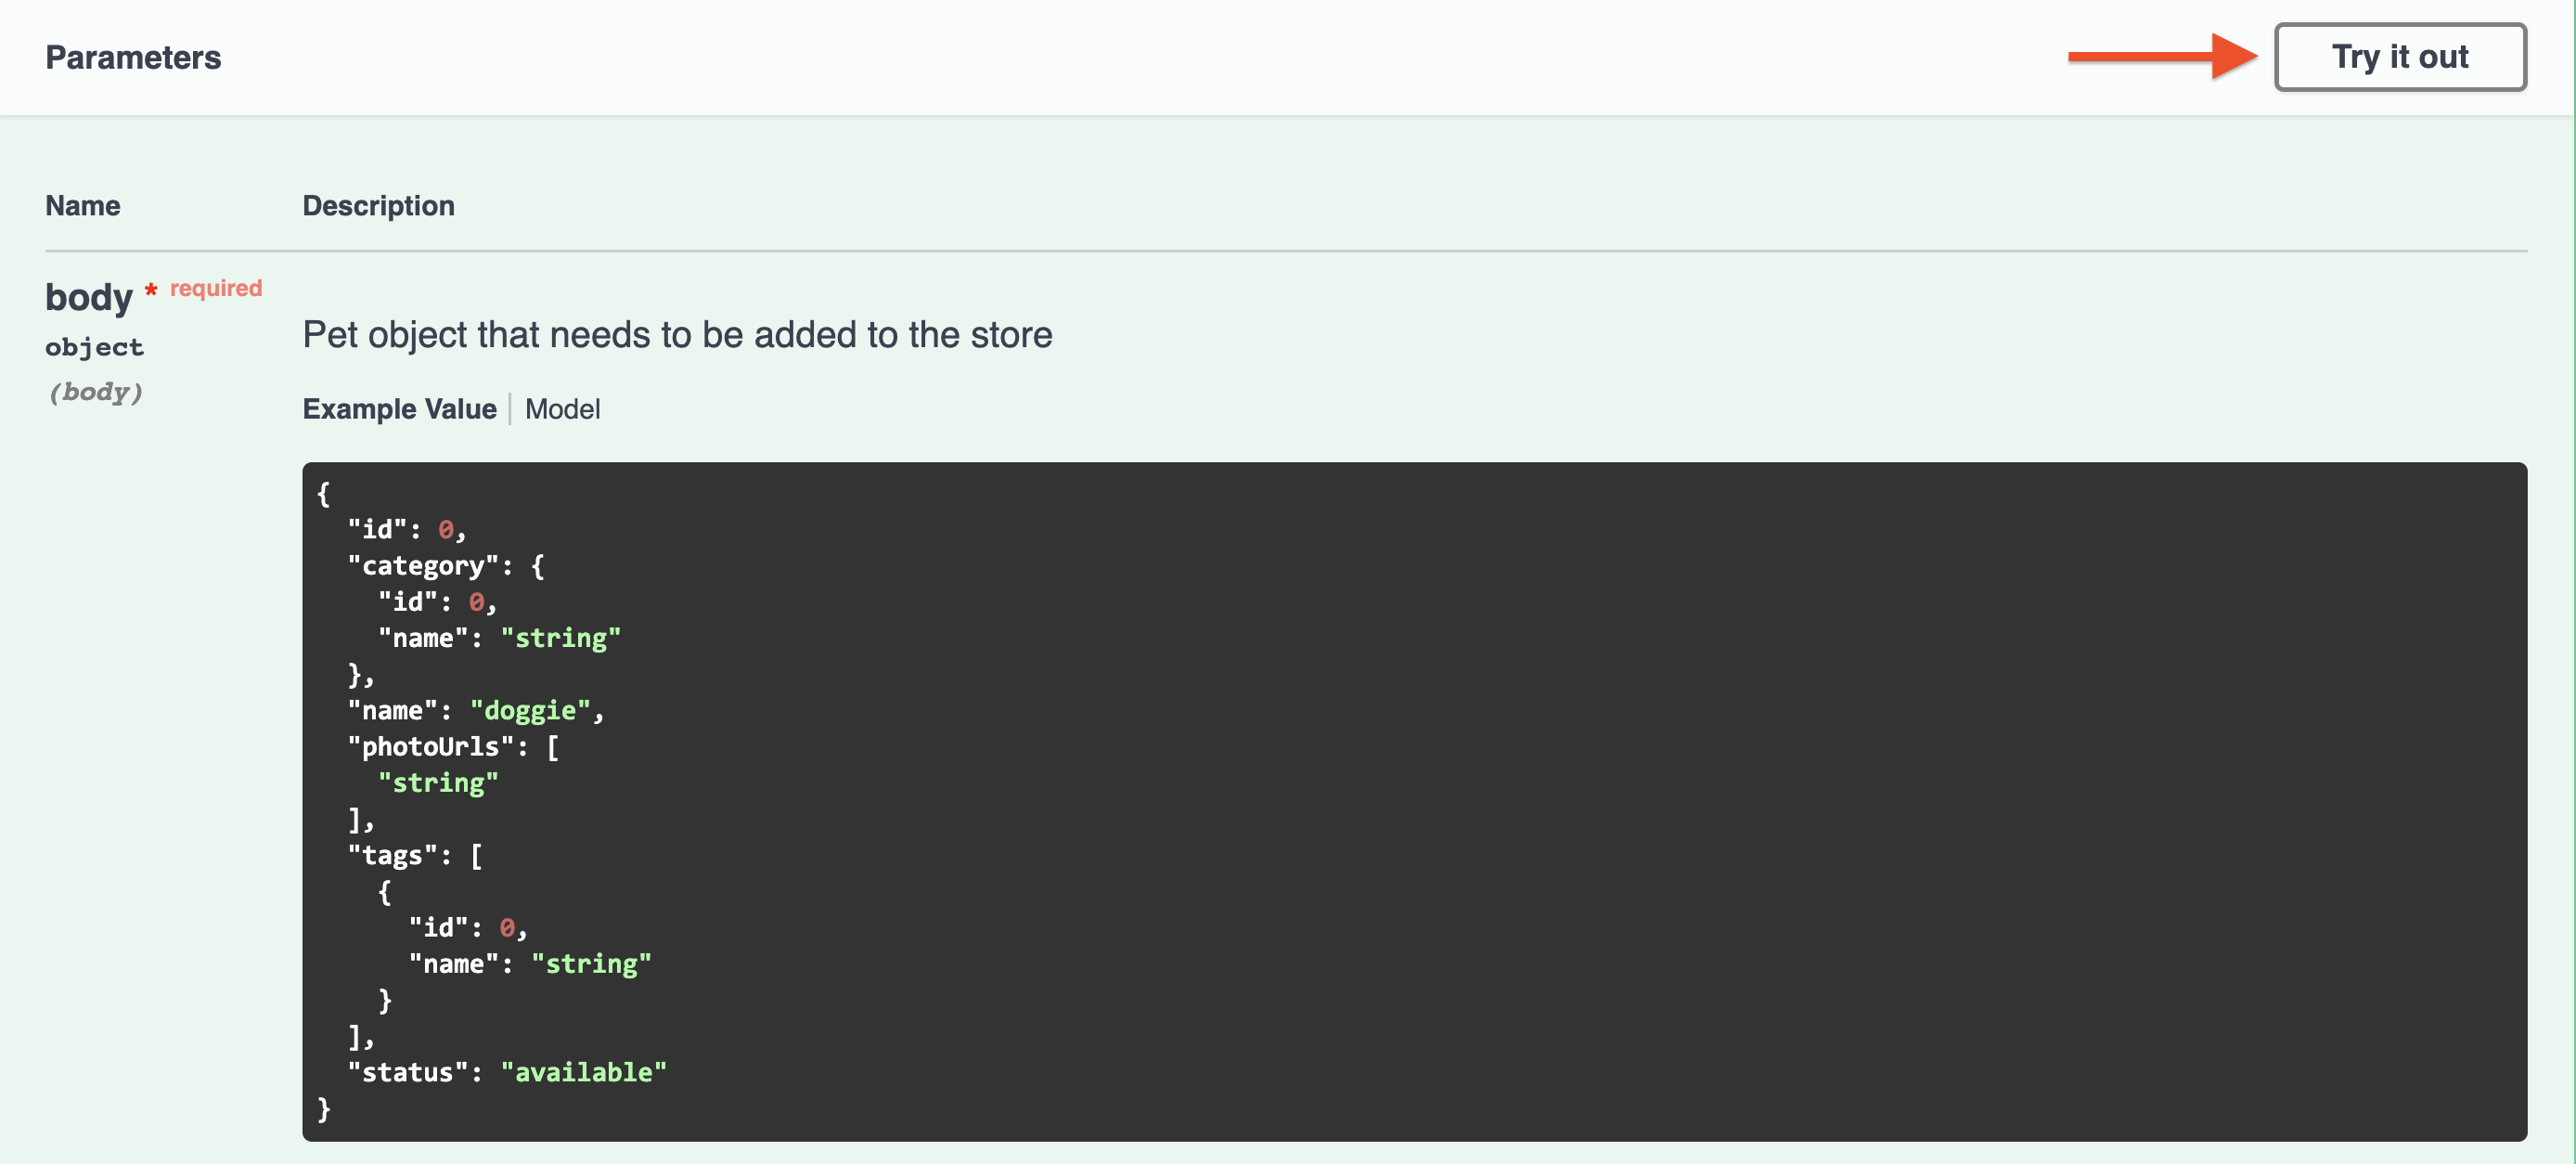
- This will allow you to edit the values. Replace the prepopulated JSON, with the following:
{
  "id": 10,
  "category": {
    "id": 1,
    "name": "dogs"
  },
  "name": "Hershey",
  "photoUrls": [
    "https://i.natgeofe.com/n/4f5aaece-3300-41a4-b2a8-ed2708a0a27c/domestic-dog_thumb_3x2.jpg"
  ],
  "tags": [
    {
      "id": 1,
      "name": "Friendly"
    }
  ],
  "status": "available"
}
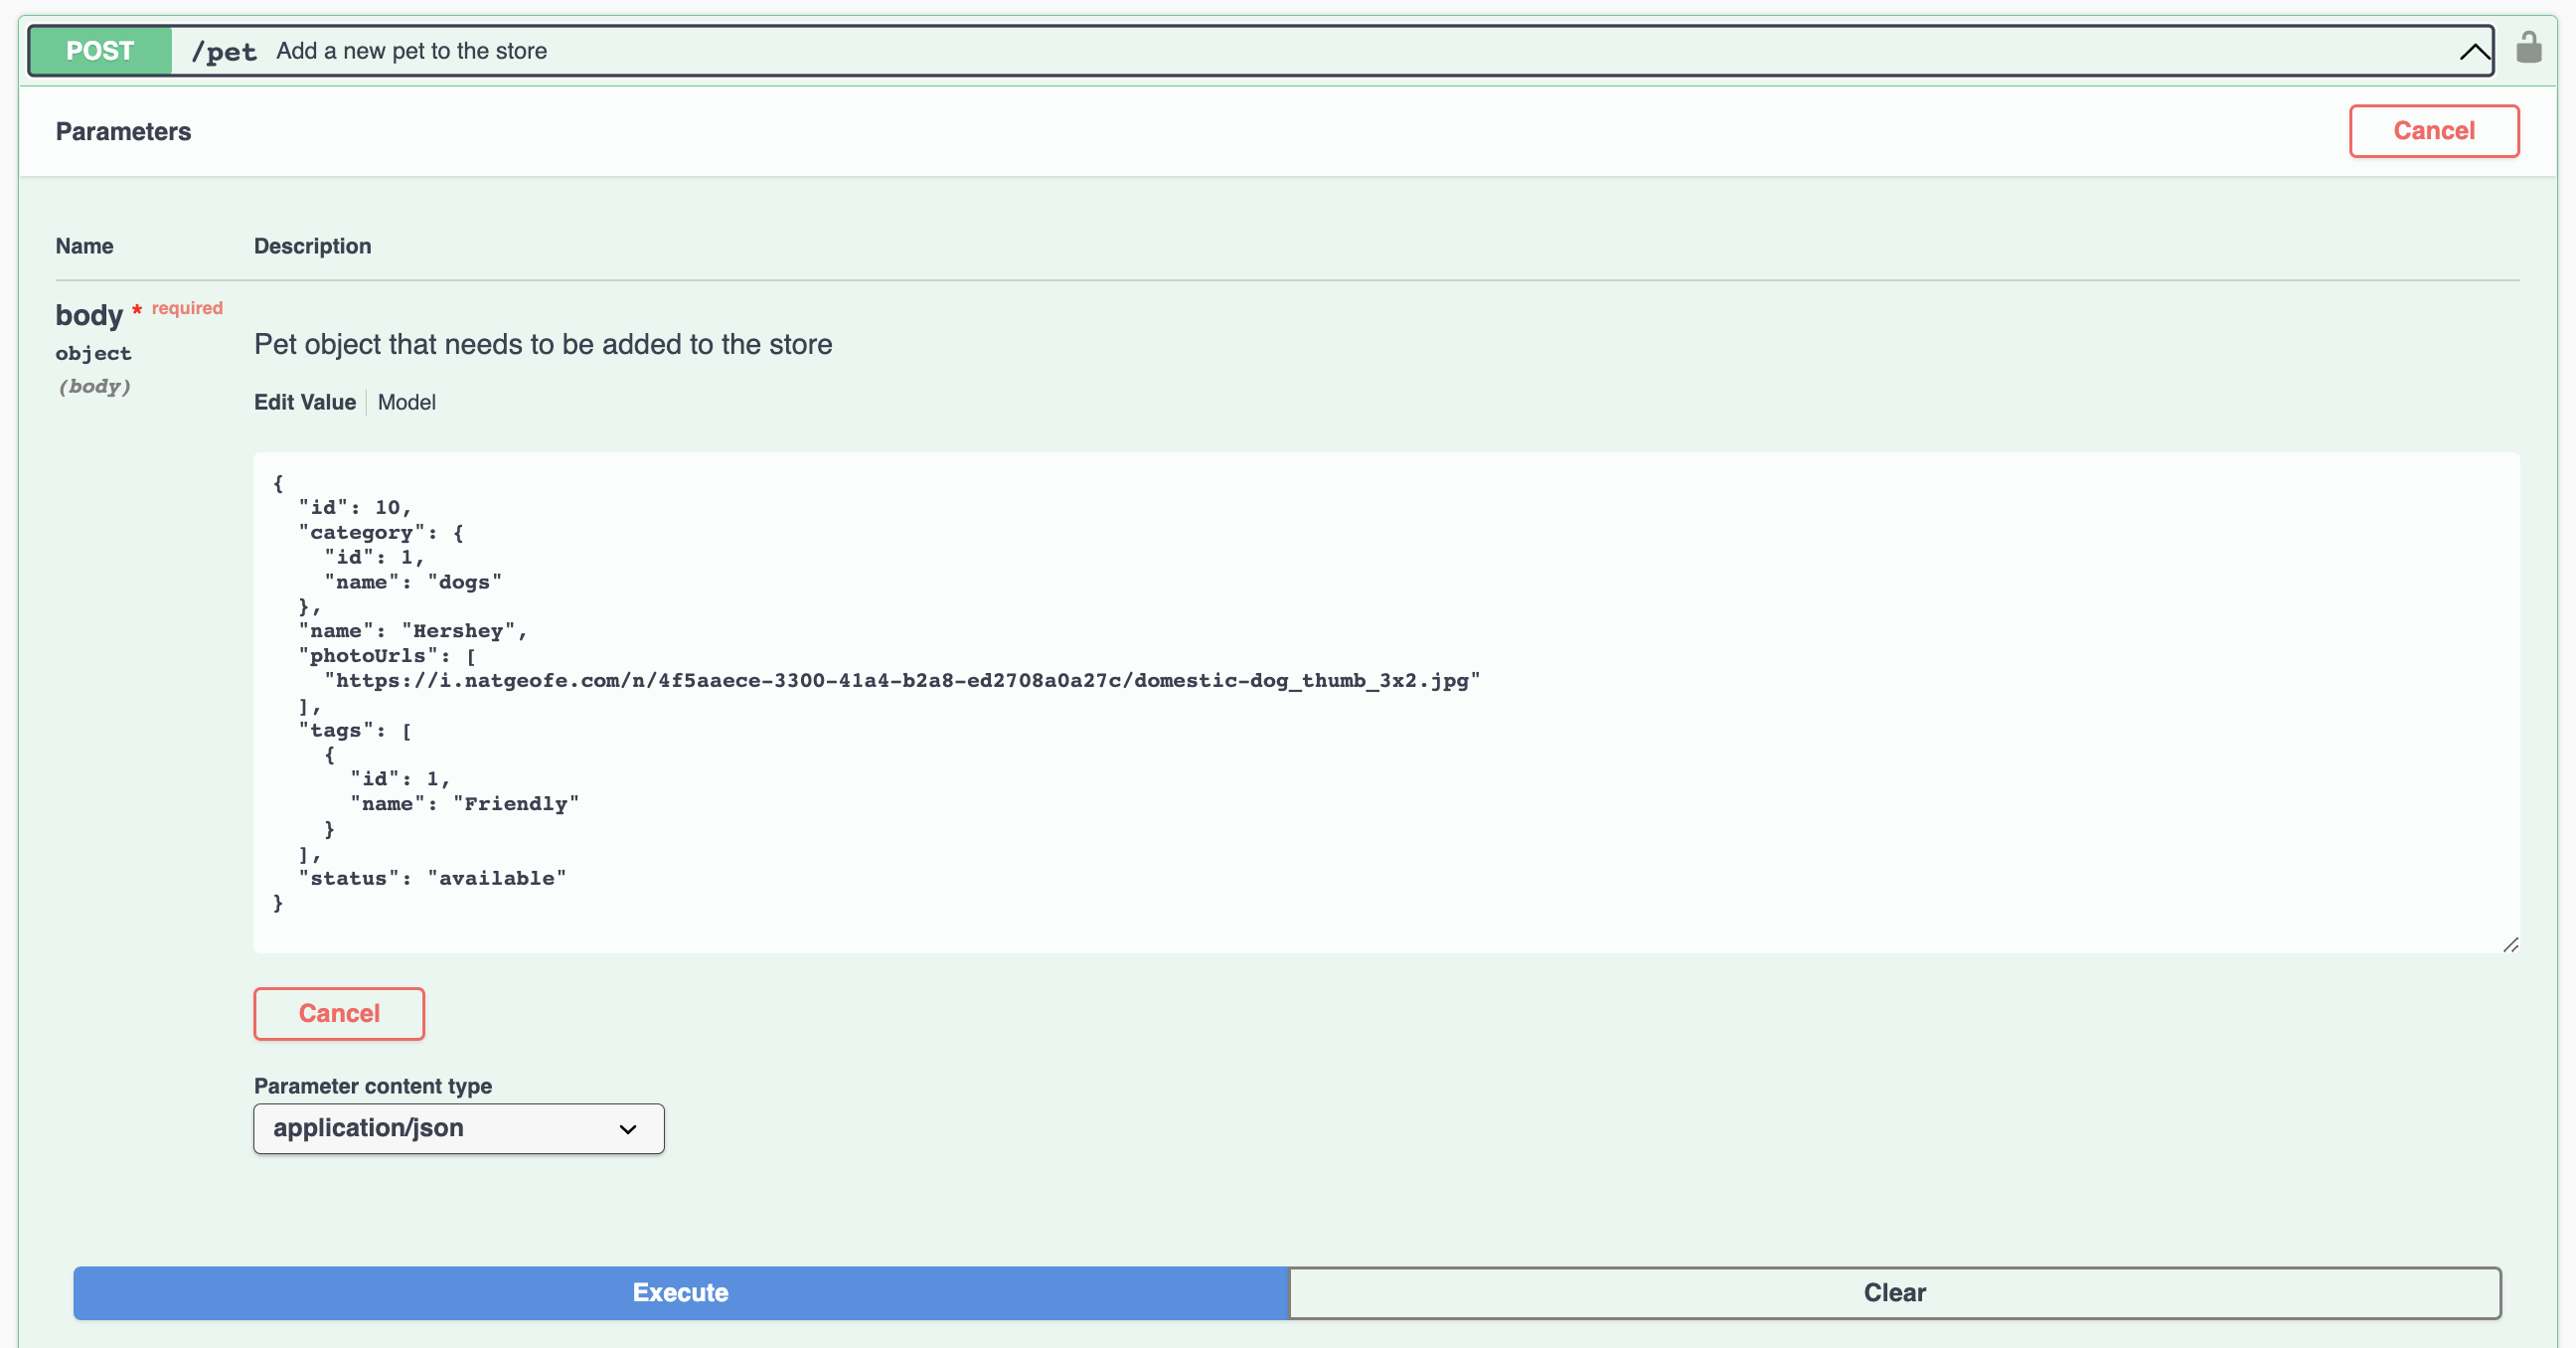
4. Click Execute to add the pet. You should see a Server Response with Code 200, which means the POST request was successful.
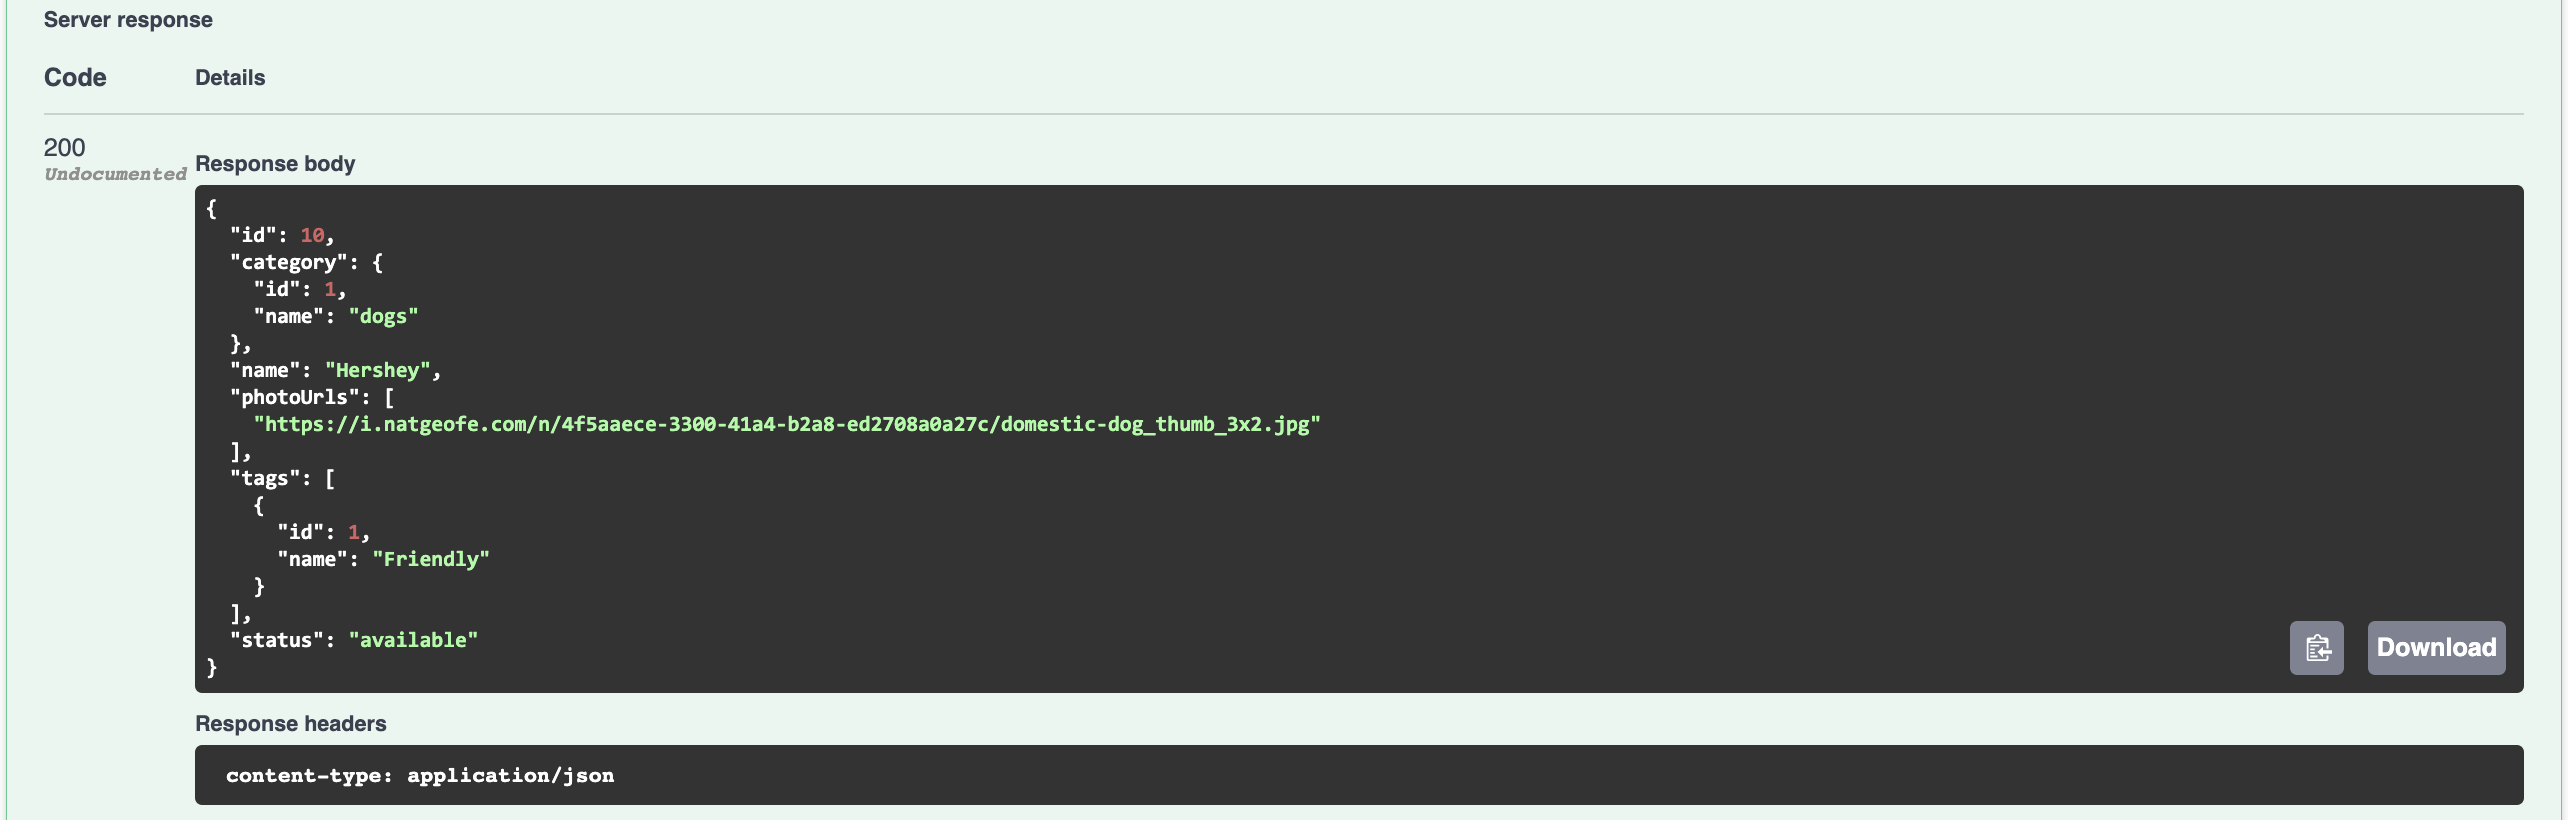
5. Close the dropdown for POST /pet.
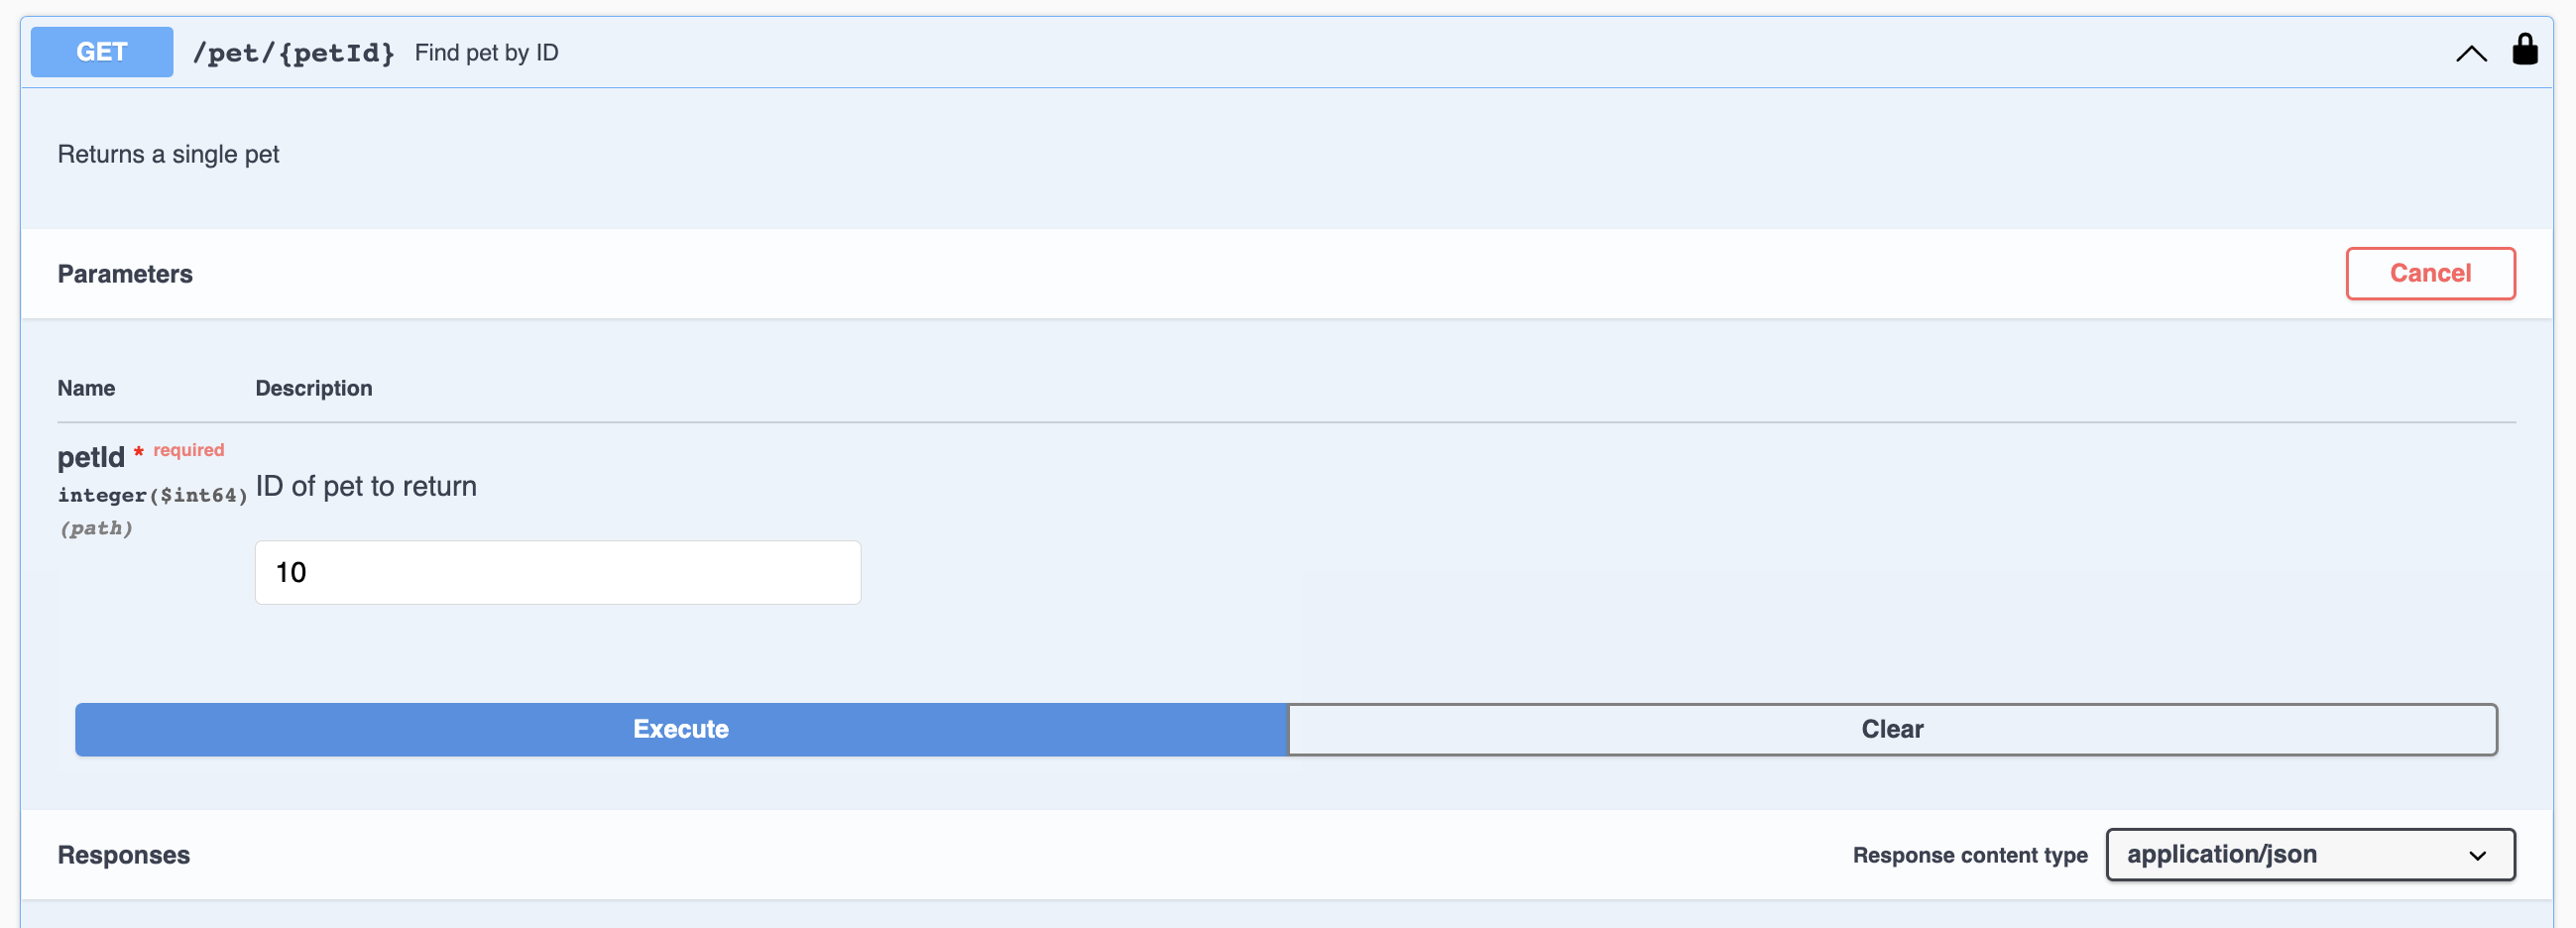
6. Now you will get the details of the pet you just added. Click the dropdown next to GET /pet/{petid}.
7. Click Try it out and enter the id of the pet whose details you want to retrieve. Our pet's id is 10. Click Execute.
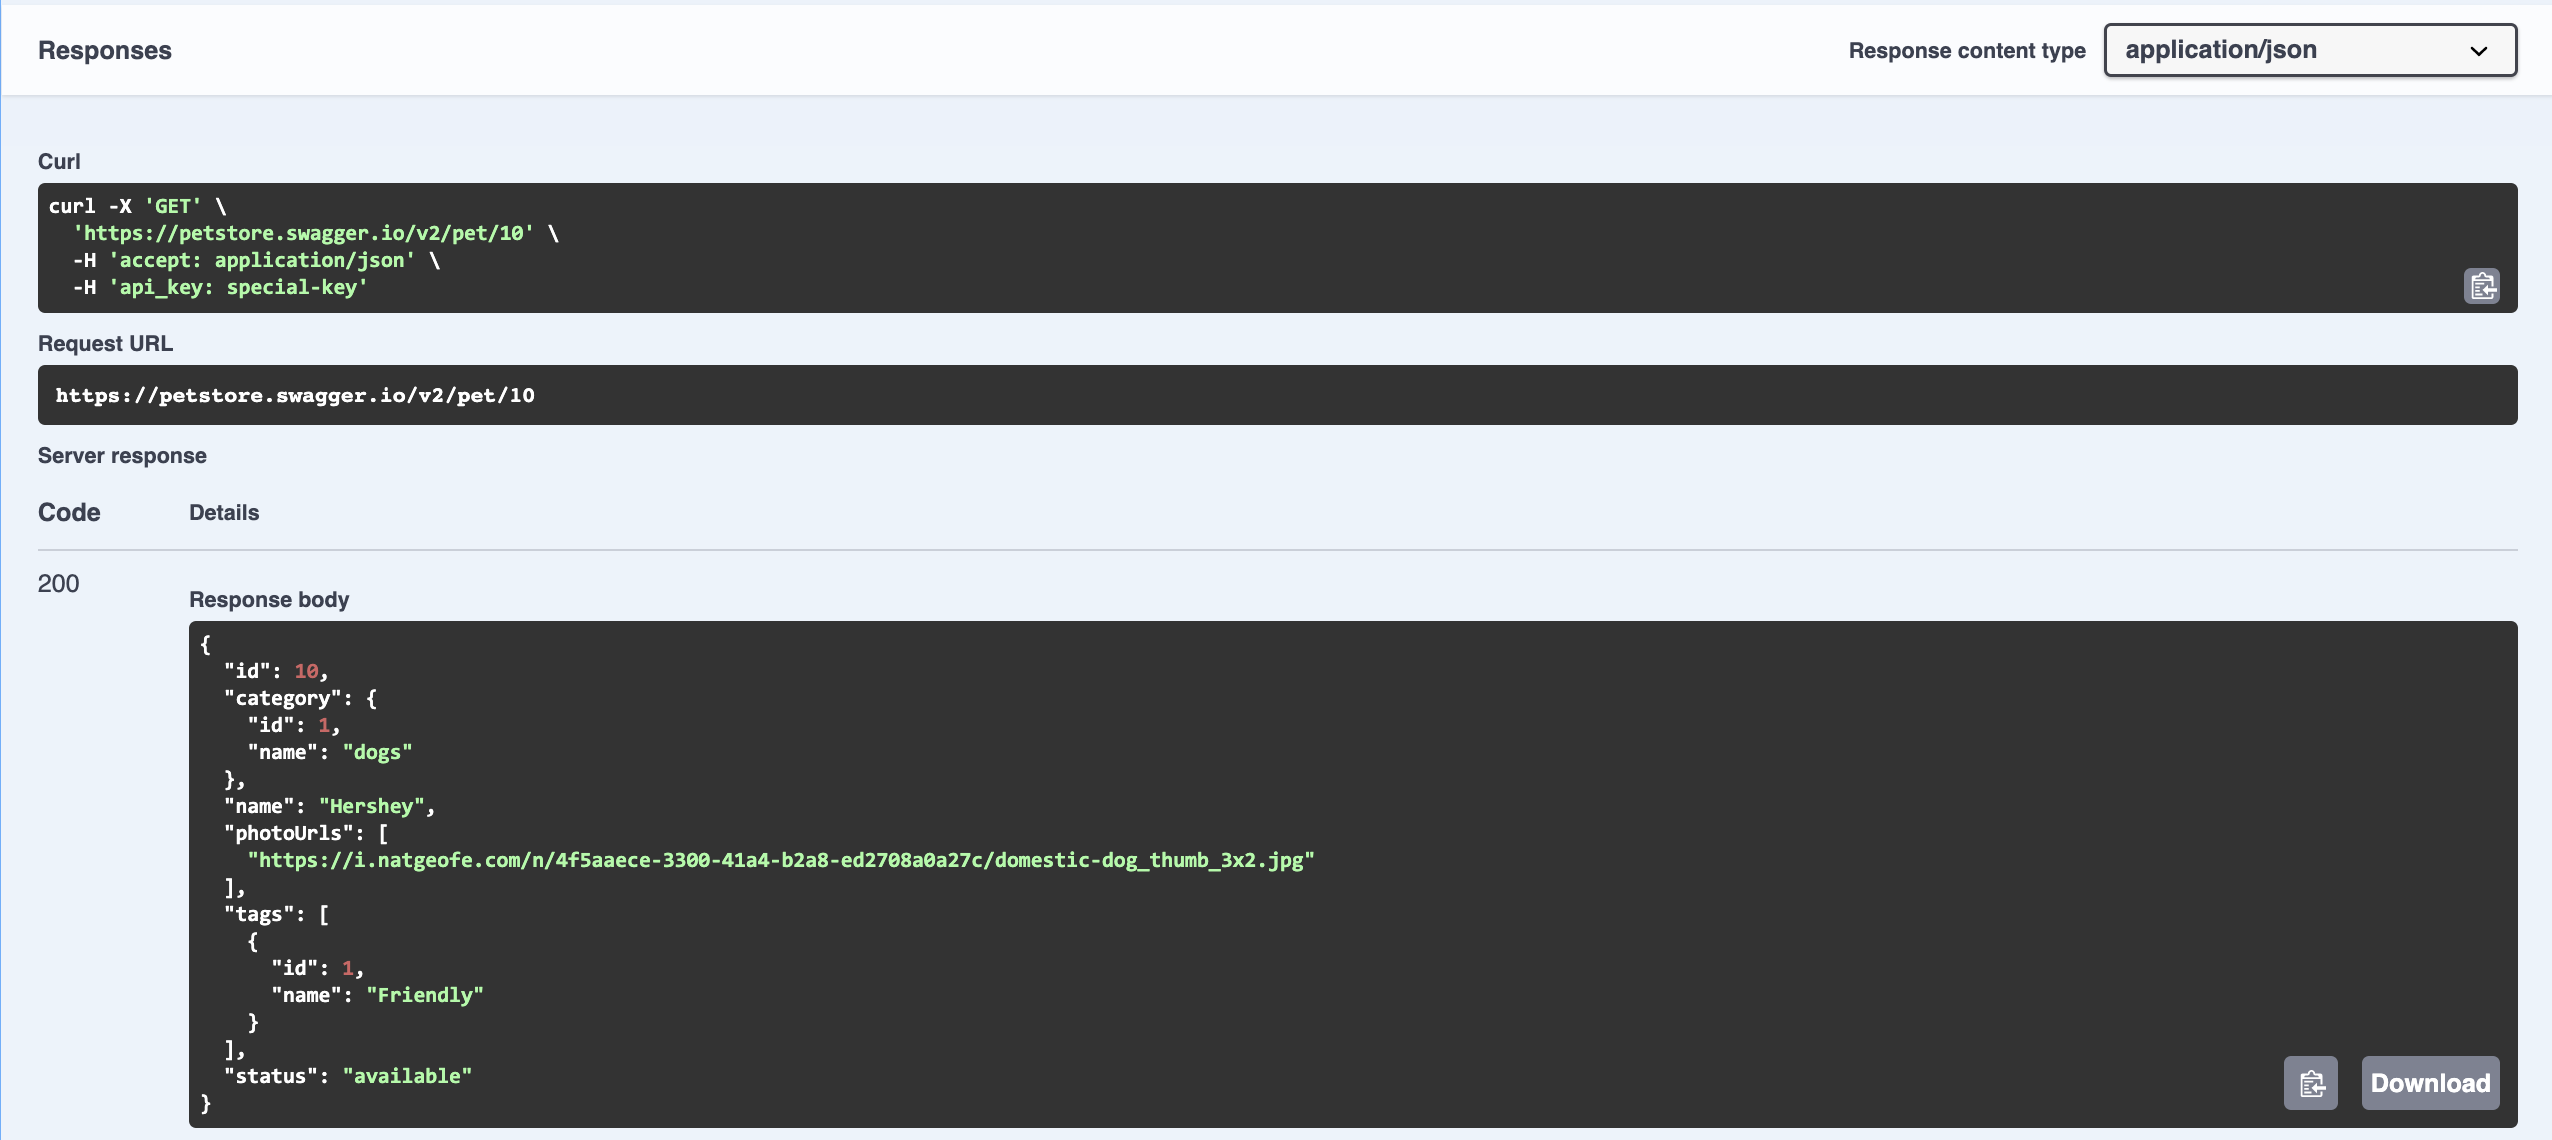
8. In the Server Response obtained, you will see 200 indicating the request was successful and the details of the pet.
9. Close the GET /pet/{petid} dropdown.
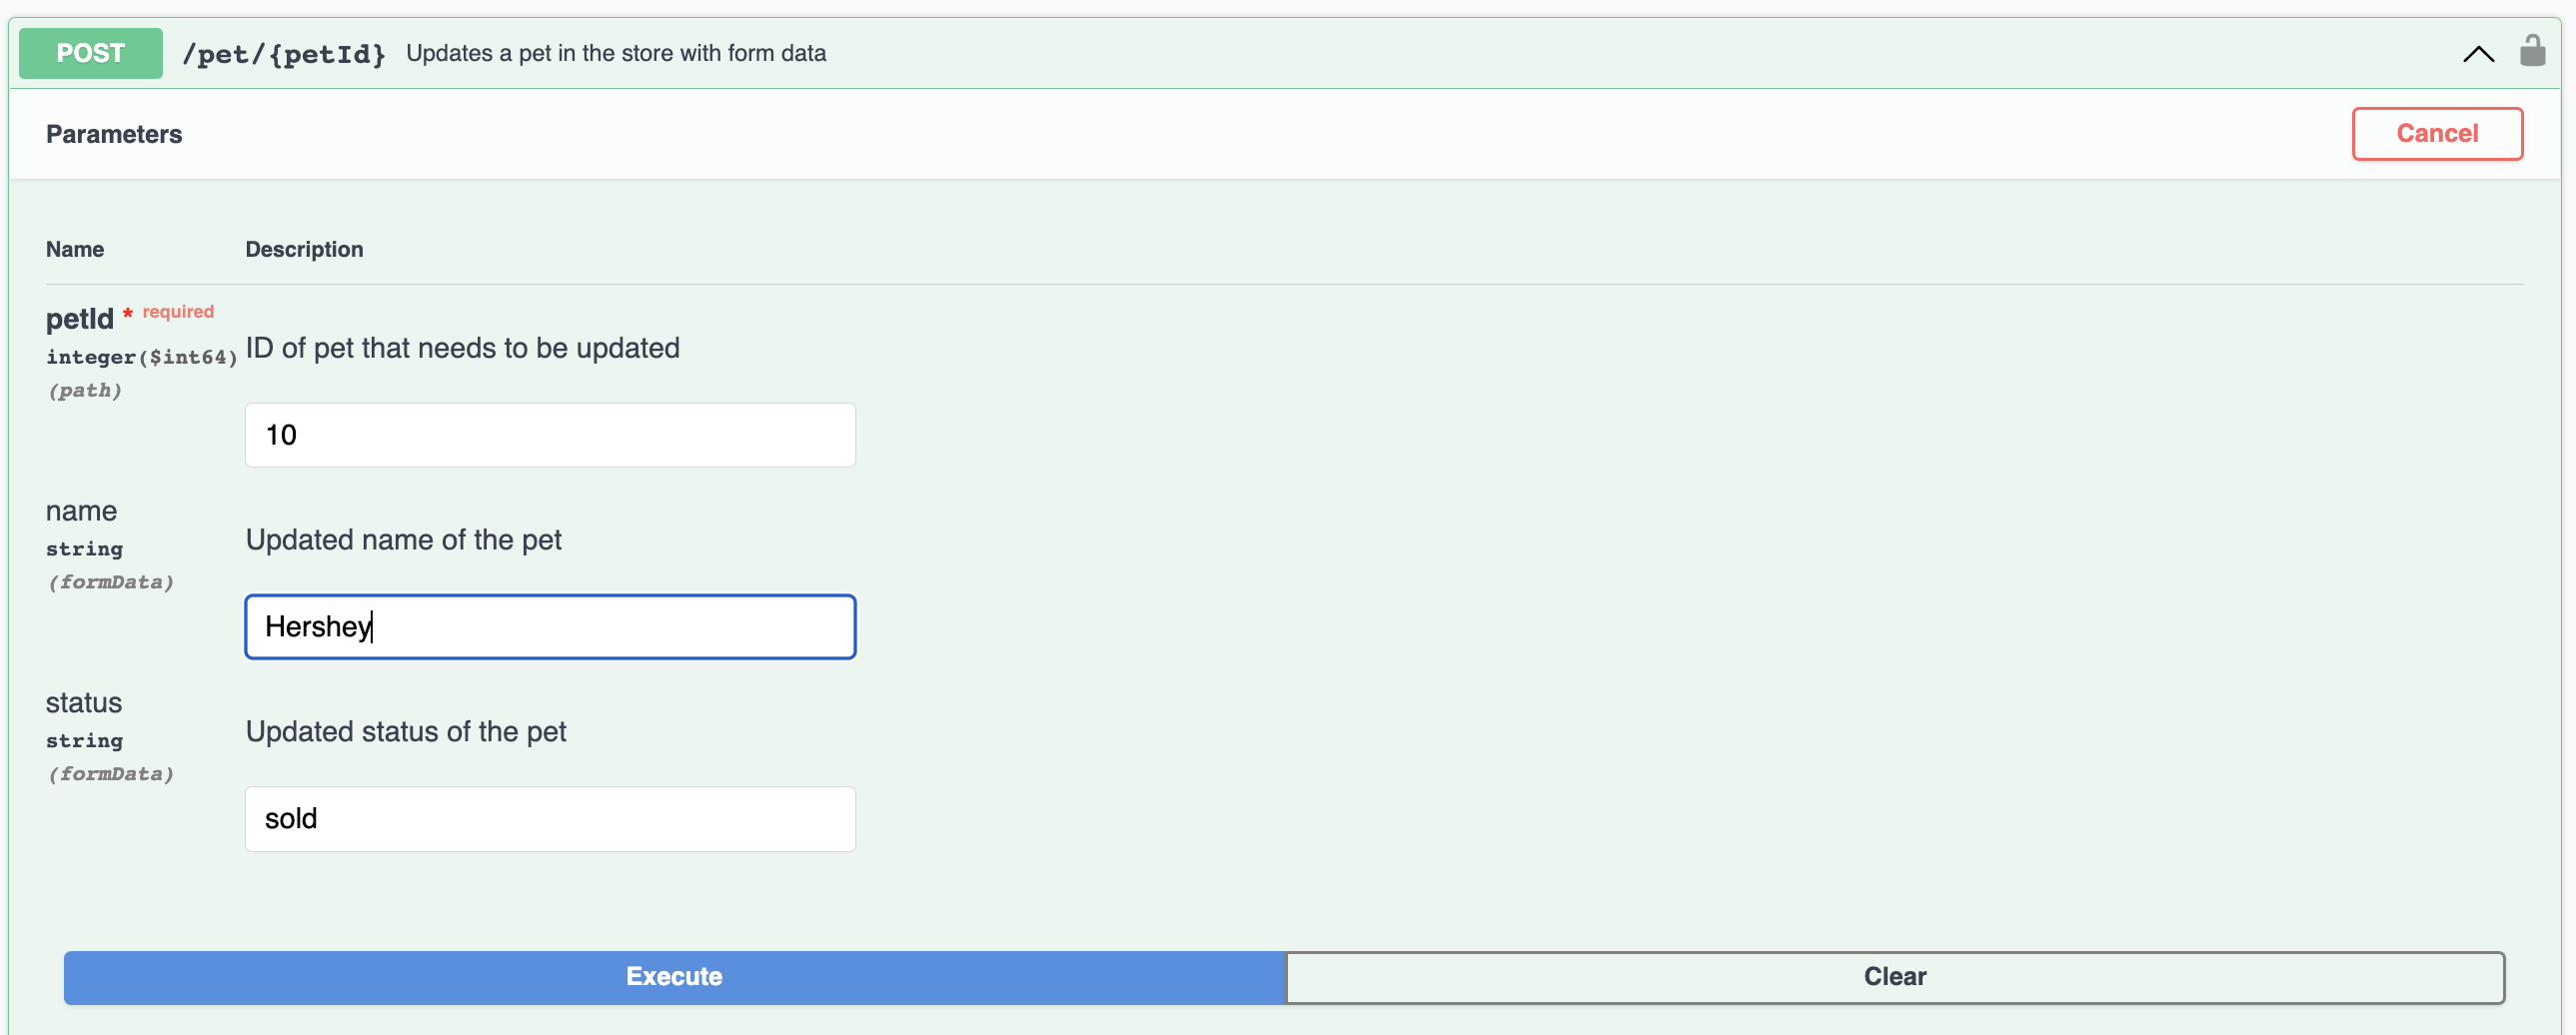
10. You will now update the status of the pet to sold. To do this, click the dropdown next to POST /pet/{petid}.
11. Now you will change the status of the pet with id 10 to sold. Click Try it out and make the changes as shown below, and then click Execute.
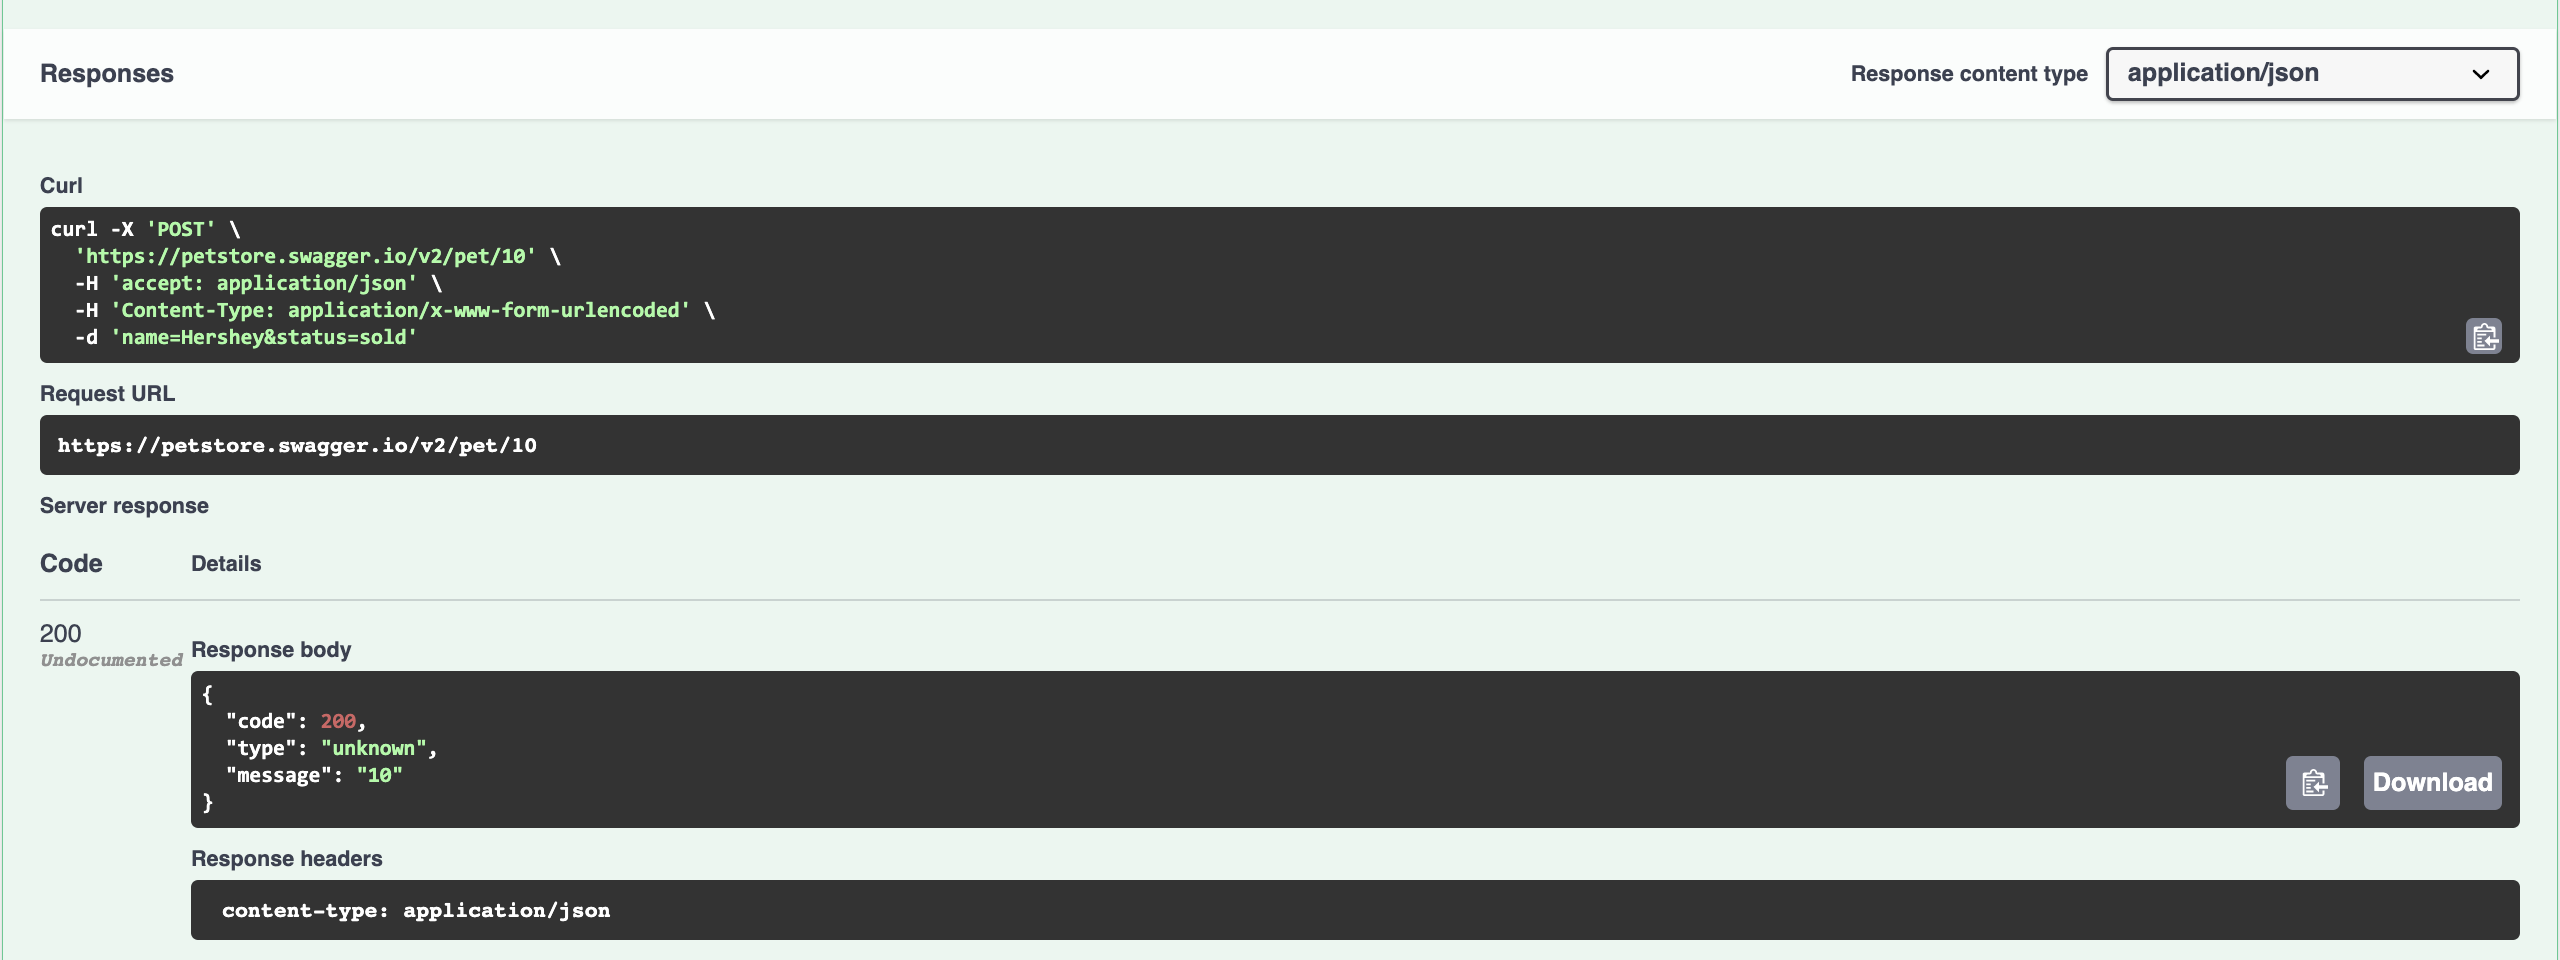
12. If the update ran successfully, you get a server response with code 200.
13. Close the POST /pet/{petid} dropdown.
14. You can check if the pet you just updated reflects as sold. Click the dropdown next to GET /pet/{petid}.
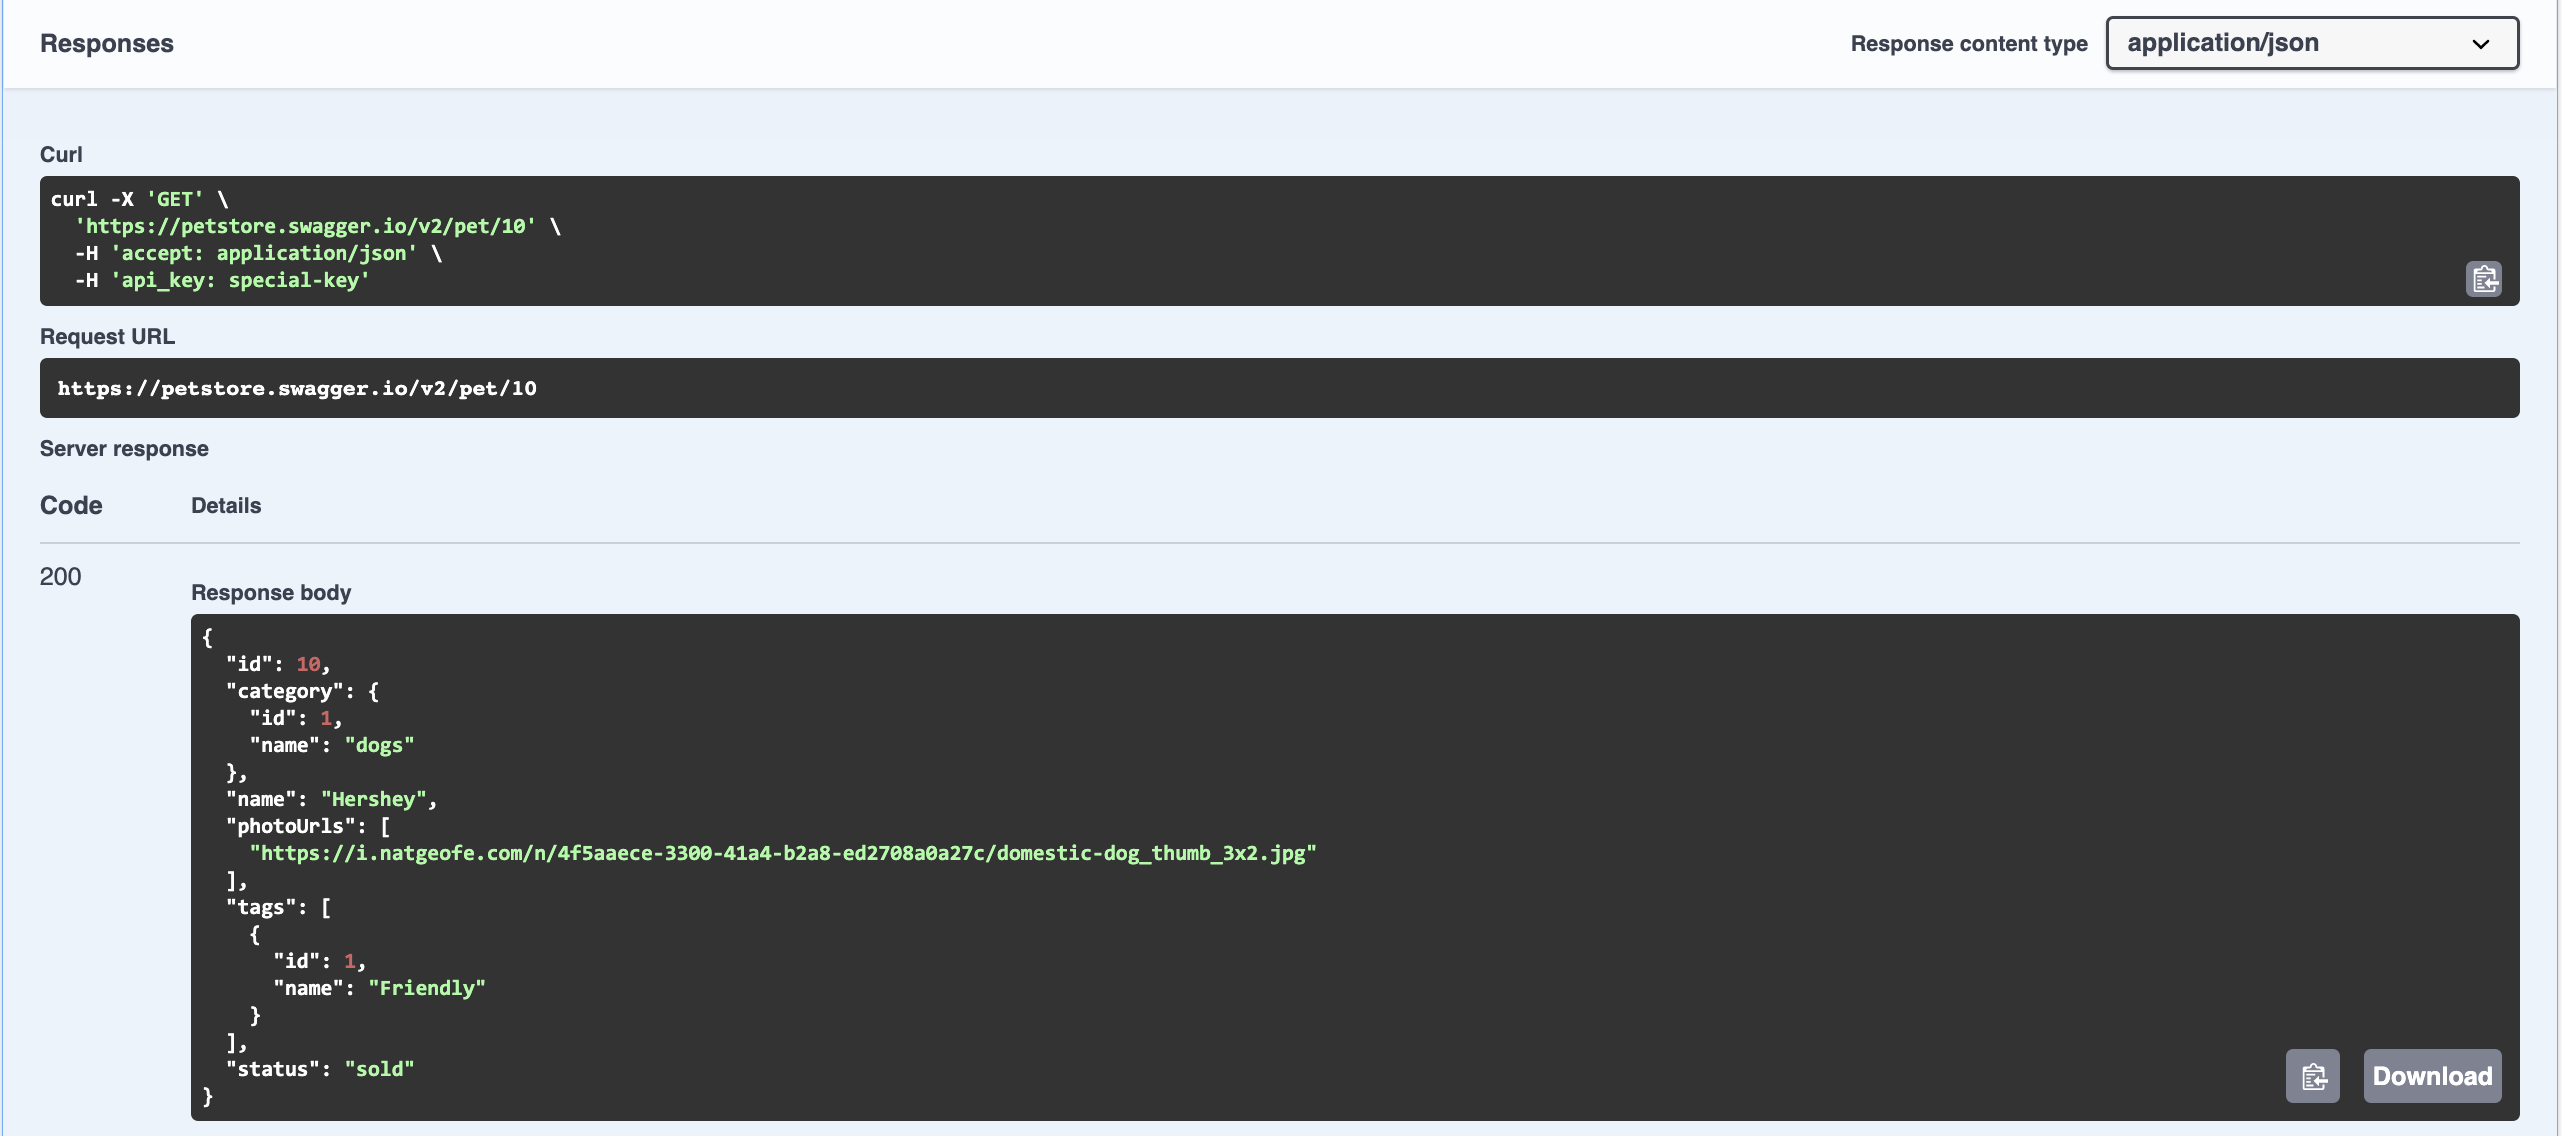
15. Enter the id of the pet whose details you want to retrieve. The pet you updated has the id 10. Click Execute.
16. In the Server Response obtained, you will see 200 indicating the request was successful and the details of the pet.
17. Close the GET /pet/{petid} dropdown.
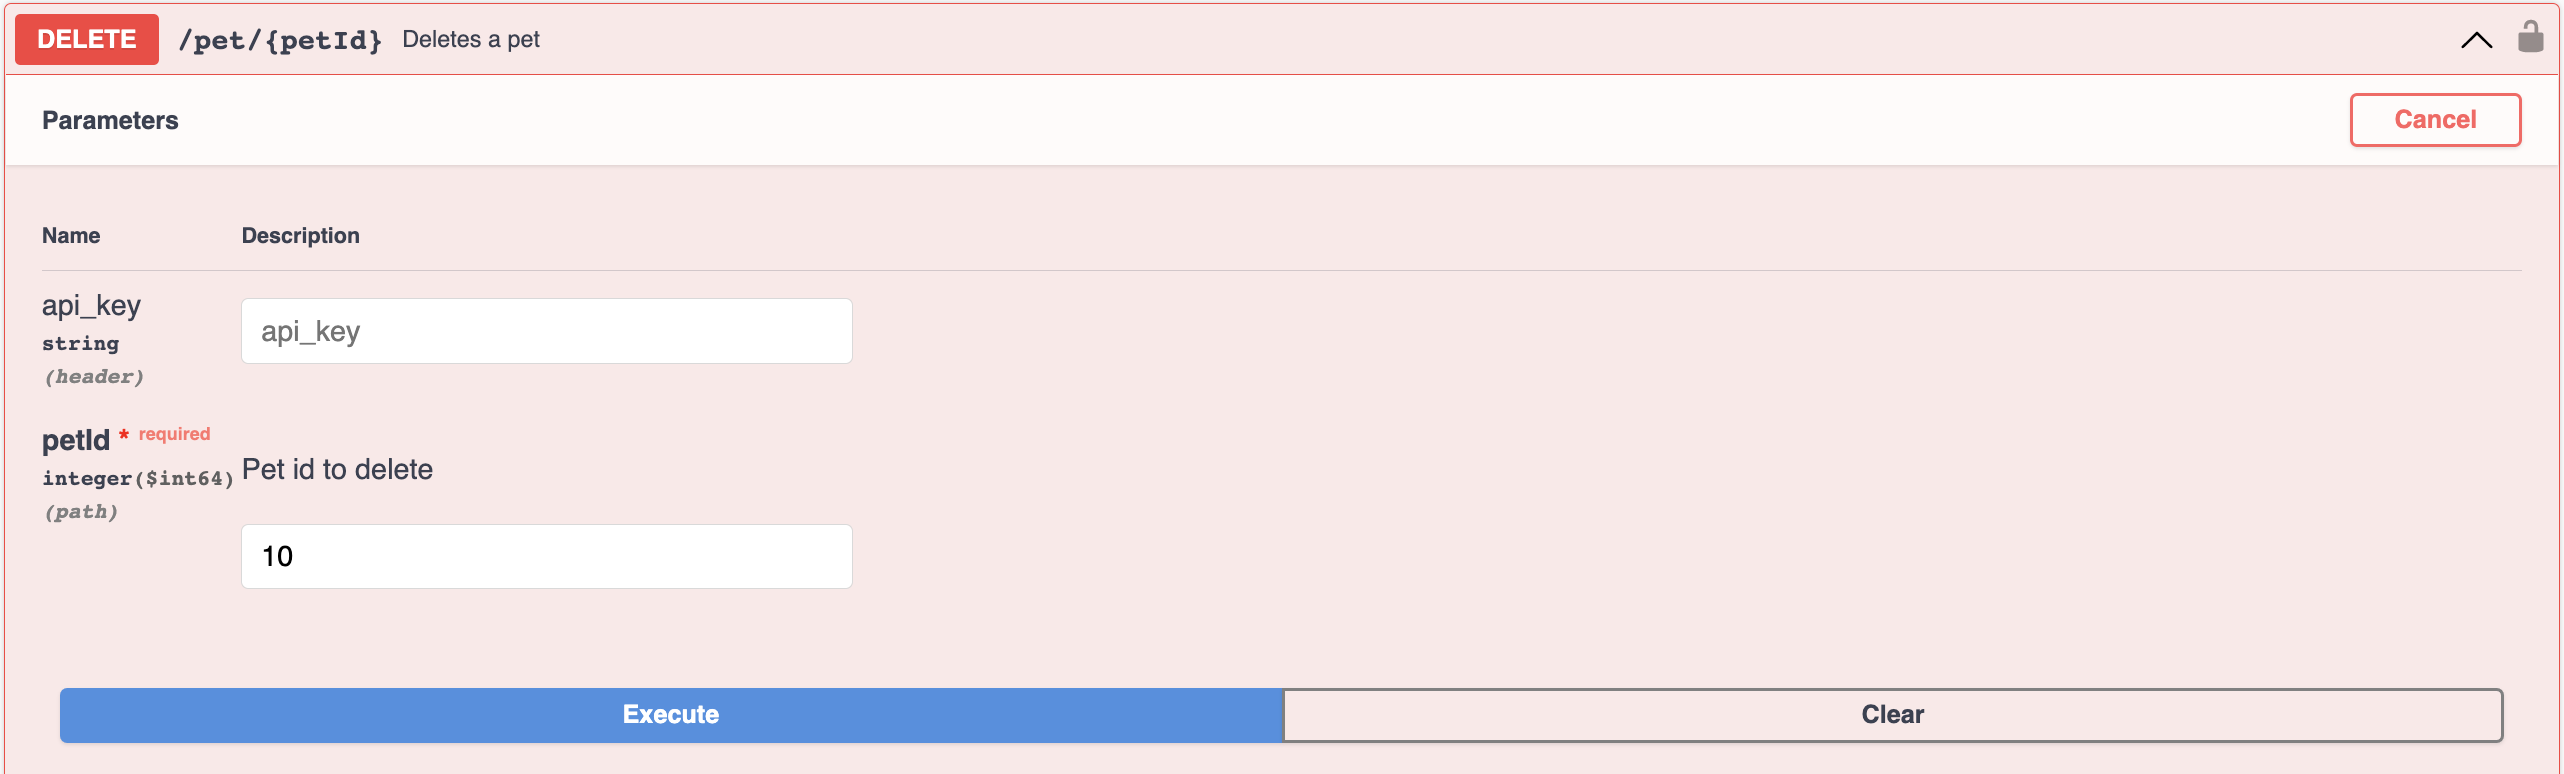
18. Now that the pet is sold, you can delete it from your system. Click the dropdown next to DELETE /pet/{petid}. Click Try it out and enter the petid as 10.
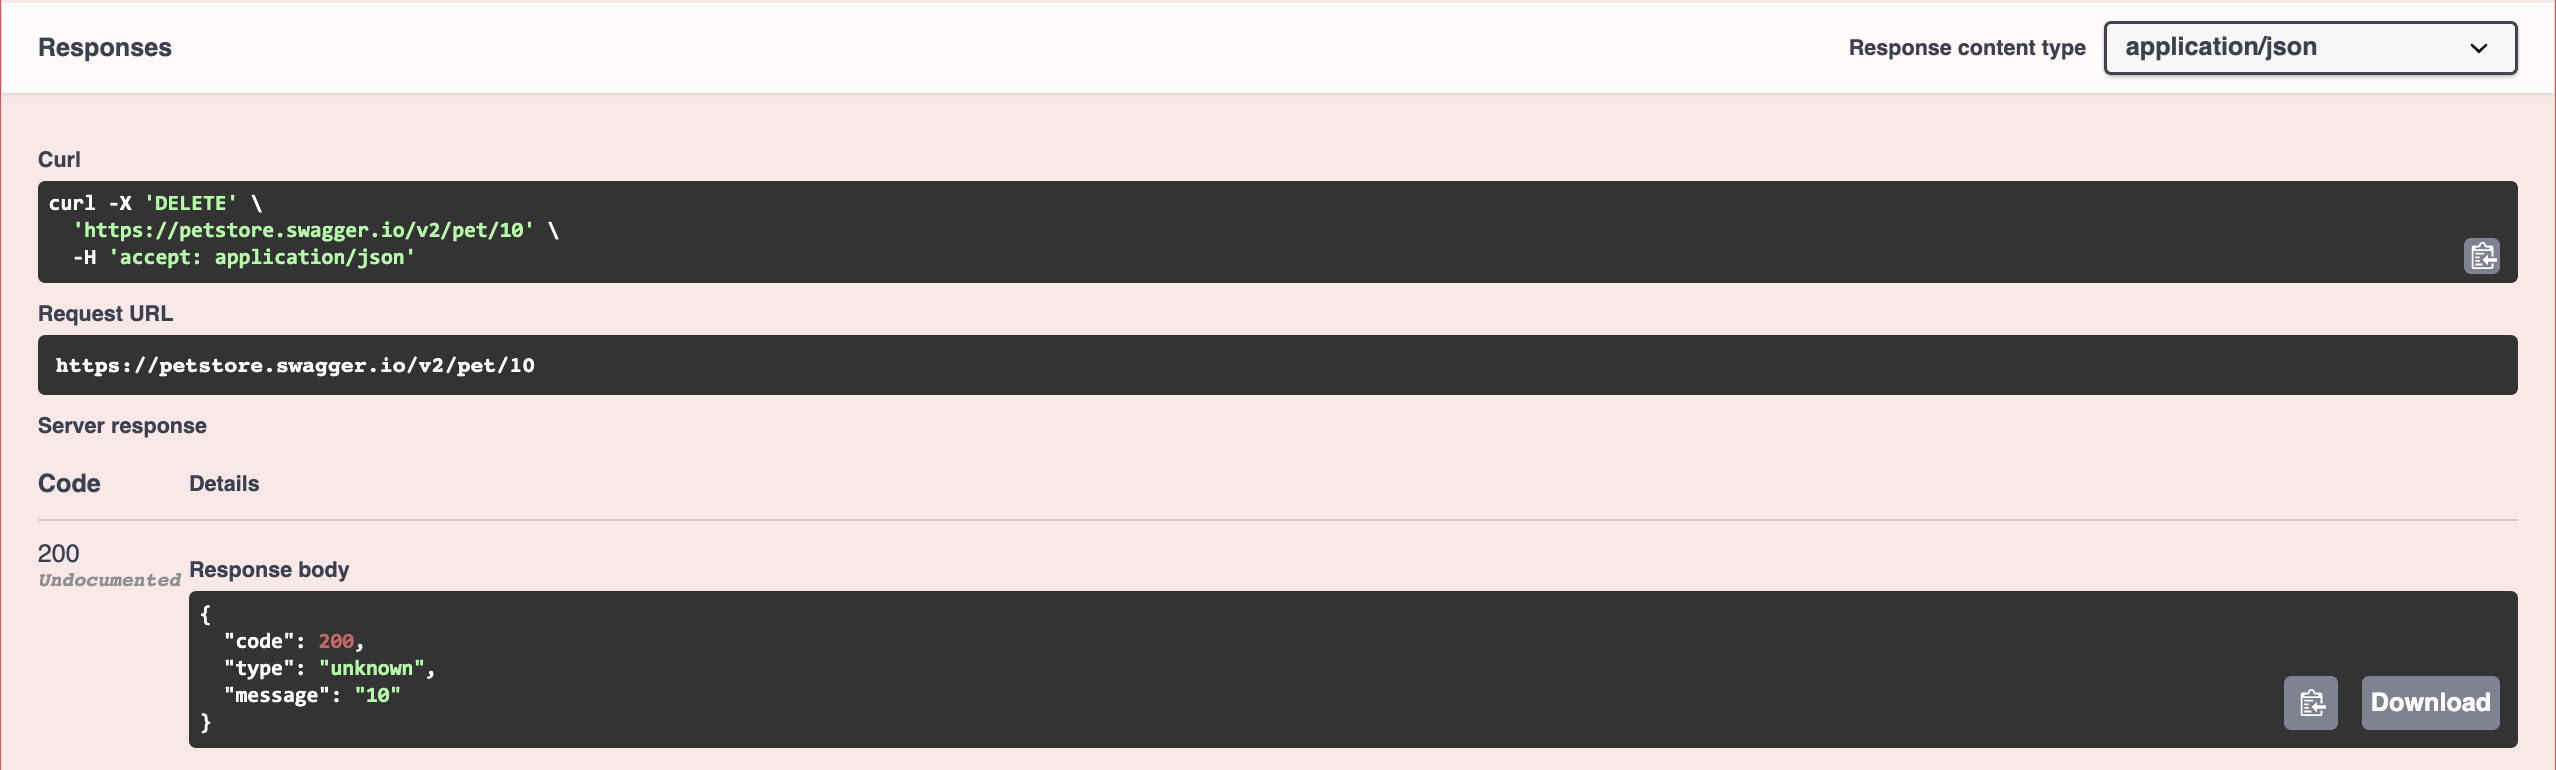
19. Click Execute. If the delete ran successfully, you get a server response with code 200.
20. You can check if the pet you just deleted, has been removed from the system. Click the dropdown next to GET /pet/{petid}.
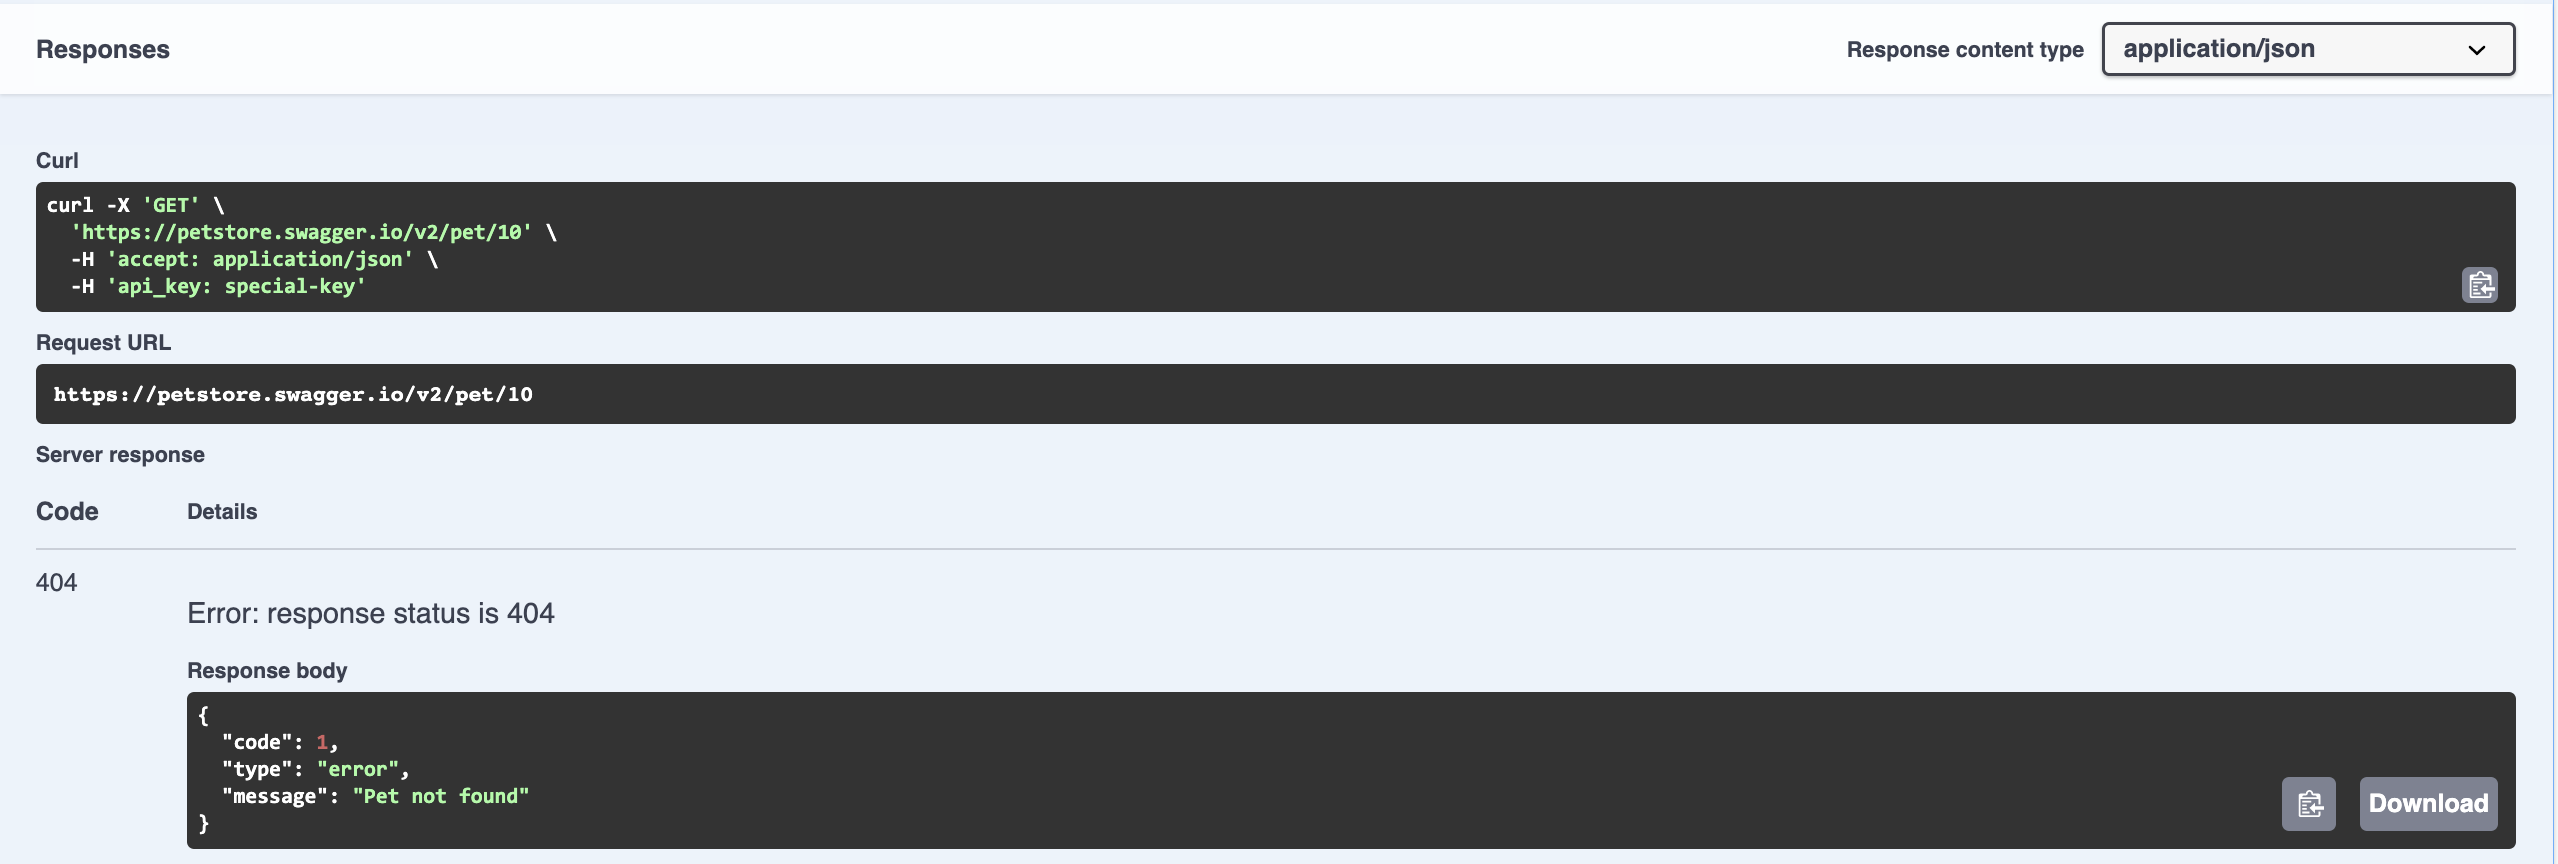
21. Enter the id of the pet whose details you want to retrieve. The pet you deleted has the id 10. Click Execute.
22. In the Server Response obtained you will see 404 indicating the request was errorneous and there is no such pet.
Congratulations! You have successfully completed the task.