Module 05 · RStudio & GitHub
Hands-on Lab: Getting Started with GitHub动手实验:GitHub 入门
Estimated time: 20 min 预计时间:20 分钟
In this lab, you will get started with GitHub by creating a GitHub account and project and adding a file to it using its Web interface.
在本实验中,你将通过创建 GitHub 账户和项目,并使用其网络界面向其中添加文件来开始使用 GitHub。
Objectives 目标
After completing this lab, you will be able to:
完成此实验后,您将能够:
- Describe GitHub 描述 GitHub
- Create a GitHub account 创建 GitHub 账户
- Add a project and repo
添加项目和仓库 - Edit and create a file
编辑和创建文件 - Upload a file and Commit
上传文件并提交
GitHub Overview GitHub 概览
First, let's introduce you to GitHub. GitHub is a collection of folders and files. It is a Git repository hosting service, but it adds many of its own features. Git is a command-line tool. It hosts and maintains a server via command line. GitHub provides this Git server and a Web-based graphical interface for you. It also provides access control and collaboration features, such as wikis and basic task management tools for every project. In addition, GitHub provides cloud storage for source code, supports all popular programming languages, and streamlines the iteration process. GitHub includes a free plan for individual developers and hosting Open Source projects.
首先,让我们向您介绍 GitHub。GitHub 是一个文件夹和文件的集合。它是一个 Git 仓库托管服务,但它添加了许多自己的功能。Git 是一个命令行工具。它通过命令行托管和维护服务器。GitHub 提供了这个 Git 服务器,并提供了一个基于 Web 的图形界面供您使用。它还提供了访问控制和协作功能,例如 wikis 以及每个项目的基本任务管理工具。此外,GitHub 提供了源代码的云存储,支持所有流行的编程语言,并简化了迭代过程。GitHub 包括为个人开发者和托管开源项目的免费计划。
Exercise 1: Creating a GitHub Account 练习 1:创建 GitHub 账户
Please use the following steps to create an account on GitHub:
请按照以下步骤在 GitHub 上创建账户:
Step 1: Create an account: https://github.com/join
步骤 1:创建账户:https://github.com/join
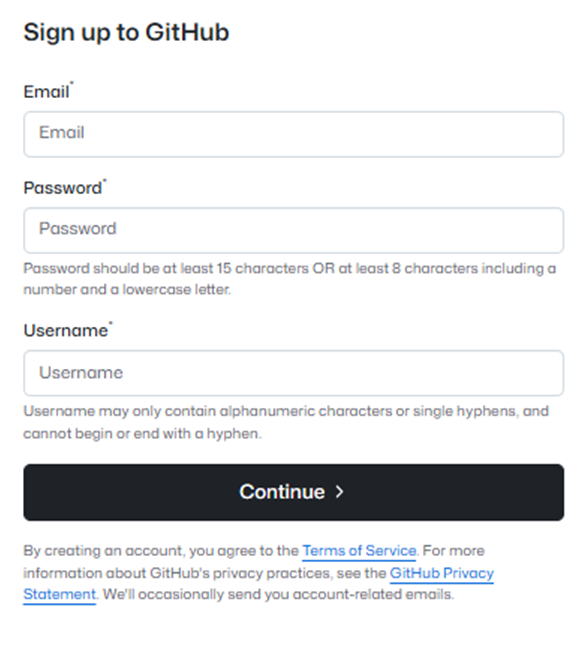
NOTE: If you already have a GitHub account, you can skip this step and simply log in to your account.
注意:如果您已经拥有一个 GitHub 账号,可以跳过此步骤,直接登录您的账号。
Step 2: Provide the necessary details to create an account as shown below:
步骤 2:按照下方所示提供必要的详细信息以创建账号:
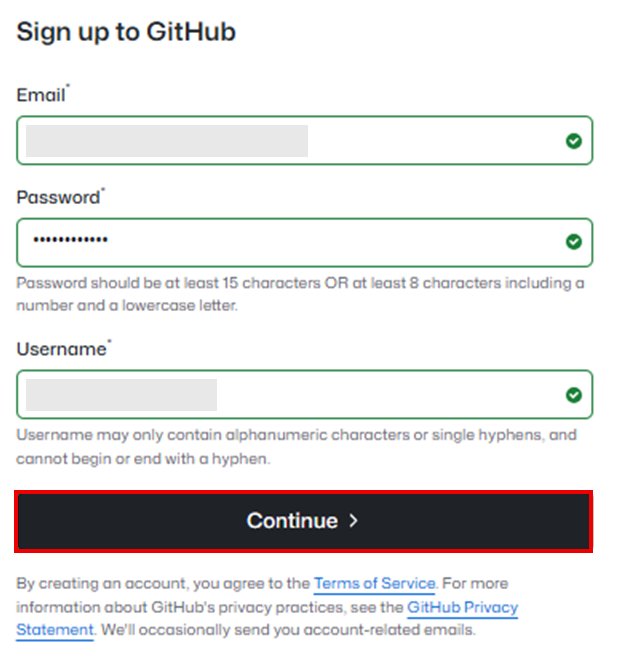
Click Continue. 点击 Continue 。
Step 3: Click Visual puzzle to verify the account.
步骤 3:点击 Visual puzzle 以验证账号。
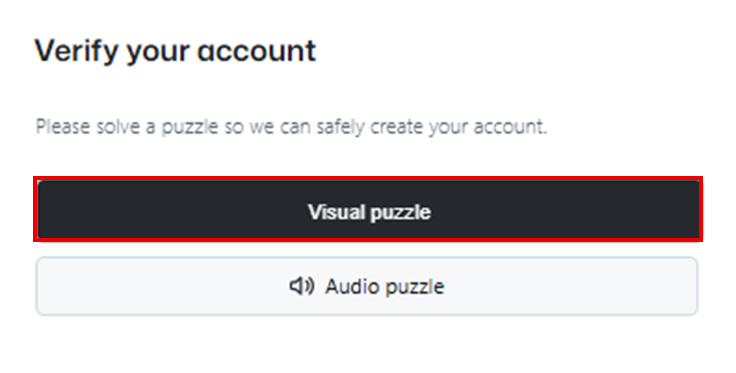
Step 4: Solve the puzzle and Submit.
第 4 步:解决谜题并 Submit 。
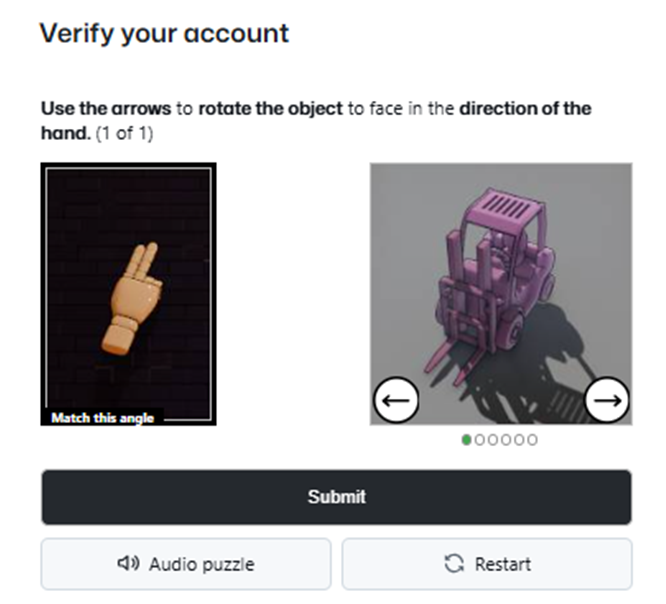
Step 5: Open your email, find the GitHub verification email, copy the verification code, and return to the GitHub Signup page to enter it.
第 5 步:打开您的邮箱,找到 GitHub 验证邮件,复制验证码,并返回 GitHub 注册页面输入它。
Step 6: Confirm your email address using the verification code and Continue.
第 6 步:使用验证码确认您的邮箱地址并 Continue 。
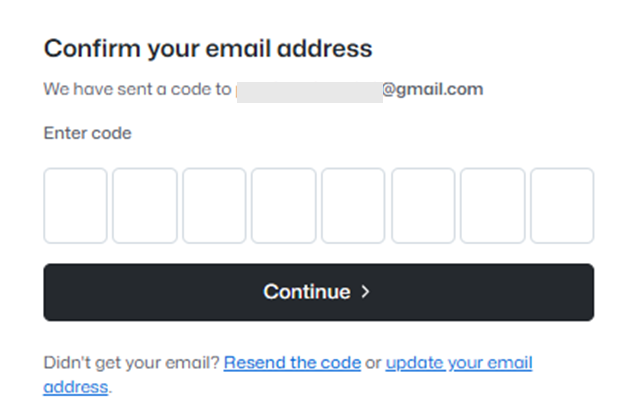
NOTE: If you do not receive the verification email, click Resend the code.
注意:如果您没有收到验证邮件,请点击 Resend the code 。
Step 7: Sign in to GitHub, enter Id and Password and Sign in
步骤 7:登录 GitHub,输入用户名和密码并 Sign in
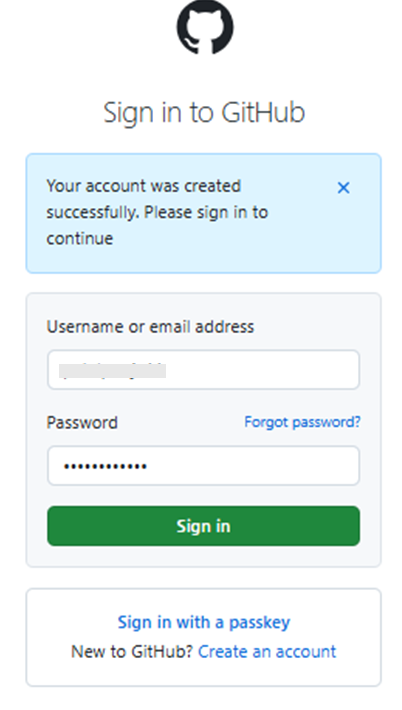
You will see the home page.
您将看到主页。
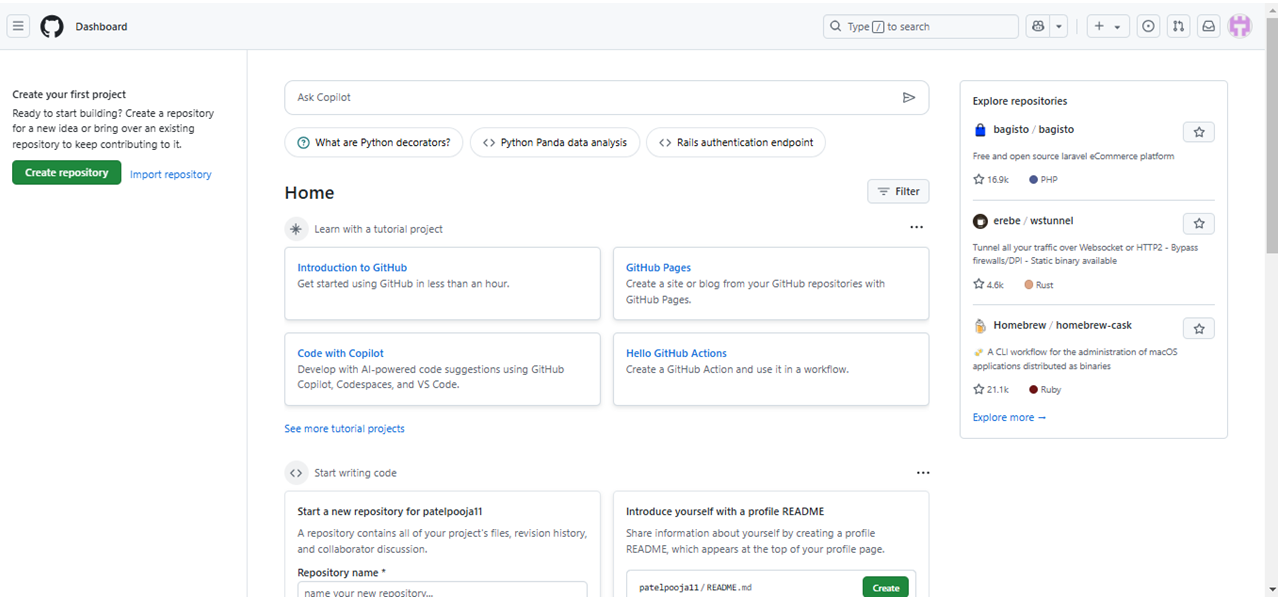
Exercise 2: Adding a project and repo 练习 2:添加项目和仓库
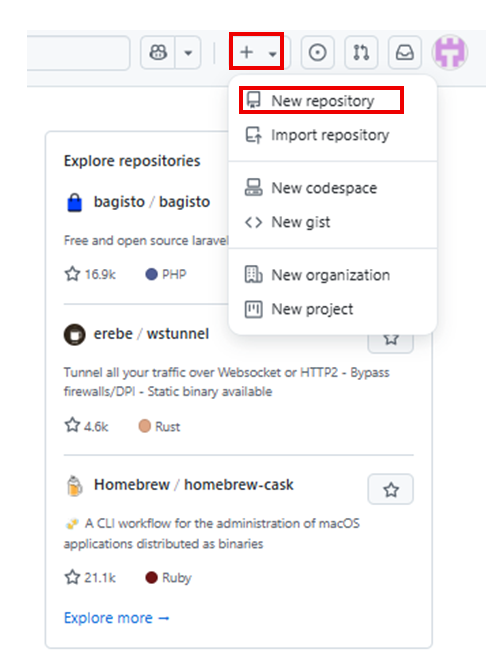
Step 1: Click the + symbol and click New repository.
步骤 1:点击 + 符号并点击 New repository 。
Step 2: Provide a name for the repository and initialize it with the empty README.md file.
第二步:为仓库提供一个名称,并用空的 README.md 文件初始化它。
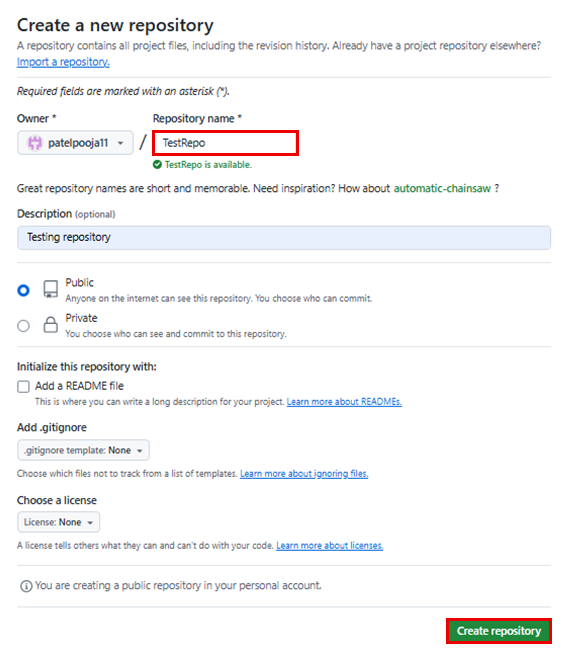
Click Create repository. 点击 Create repository 。
Now, you will be redirected to the repository you have created.
现在,您将被重定向到您创建的仓库。
Let us start editing the repository.
让我们开始编辑仓库。
Exercise 3: Create and edit a file 练习 3:创建和编辑文件
Exercise 3a: Edit a file 练习 3a:编辑文件
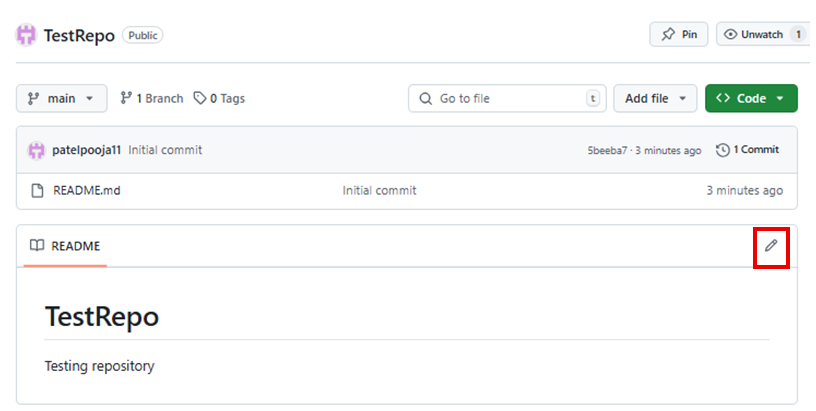
Step 1: Once the repository is created, the root folder of your repository is listed by default, and has just one file, ReadMe.md. Click the pencil icon to edit the file.
步骤 1:创建存储库后,默认情况下会列出存储库的根文件夹,其中只有一个文件, ReadMe.md 。点击铅笔图标编辑文件。
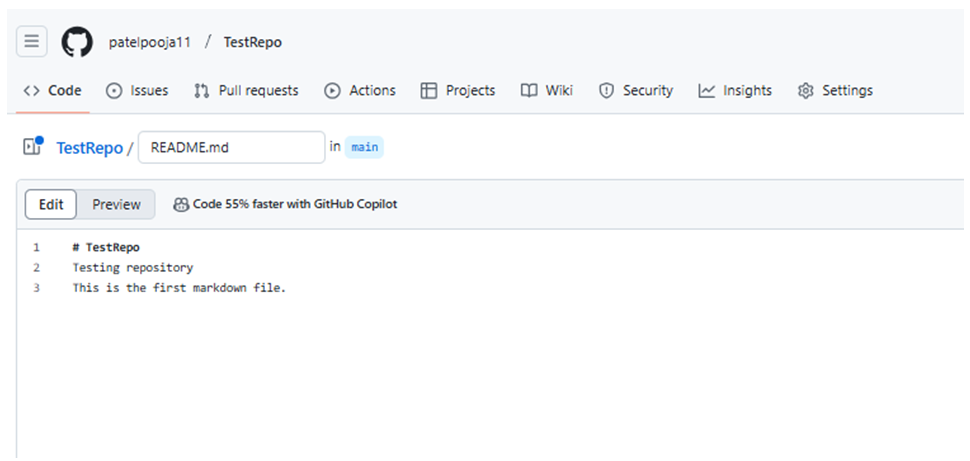
Step 2: Add some text to the file.
步骤 2:向文件中添加一些文本。
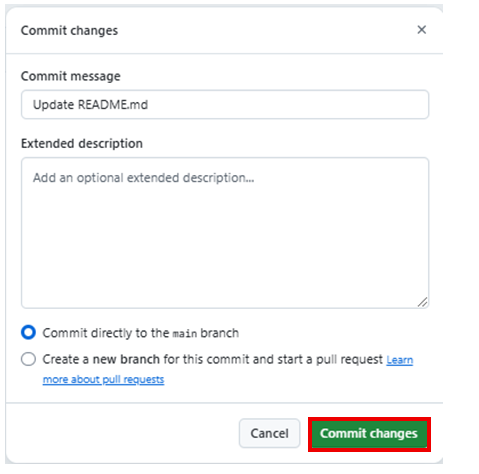
Step 3: After adding the text and click Commit Changes.
步骤 3:添加文本后点击 Commit Changes 。
Now, check that your file is edited with the new text.
现在,检查您的文件是否已使用新文本进行编辑。
Exercise 3b: Create a new file 练习 3b:创建新文件
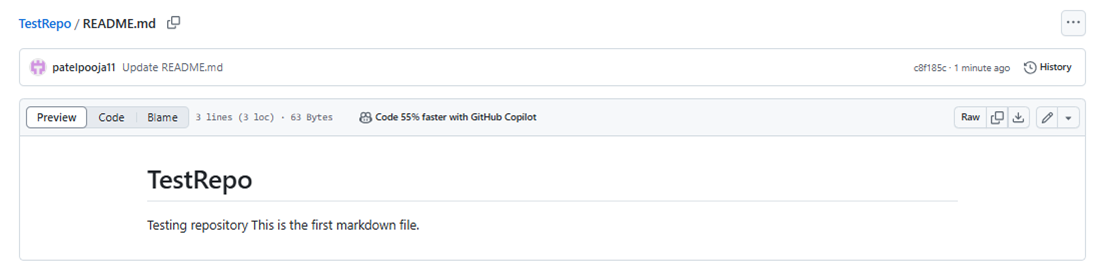
Step 1: Click the repository name to return to the master branch, like in this testrepo.
步骤 1:点击仓库名称返回主分支,例如在 testrepo 这个测试仓库中。
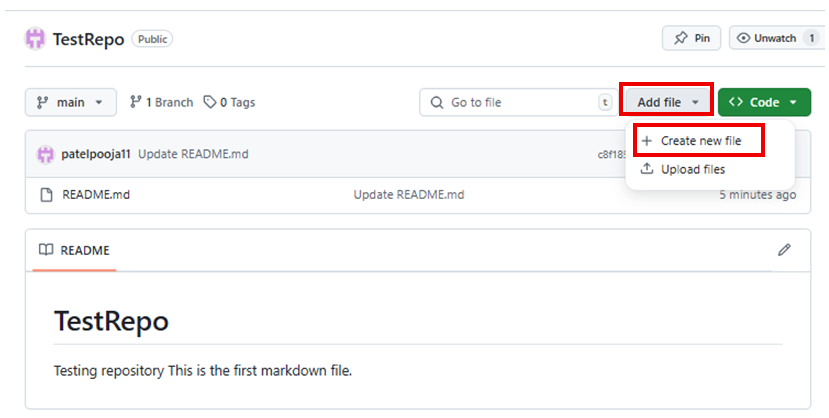
Step 2: Click Add file and select Create New file to create a file in the repository.
第二步:点击 Add file 并选择 Create New file 在仓库中创建文件。
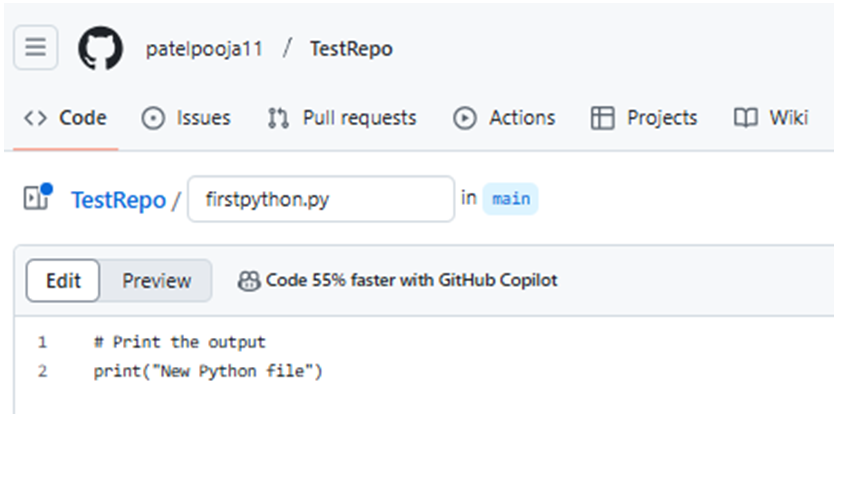
Step 3: Provide the file name and the extension of the file. For example, firstpython.py and add the lines.
第三步:提供文件名和文件扩展名。例如 firstpython.py,并添加行内容。
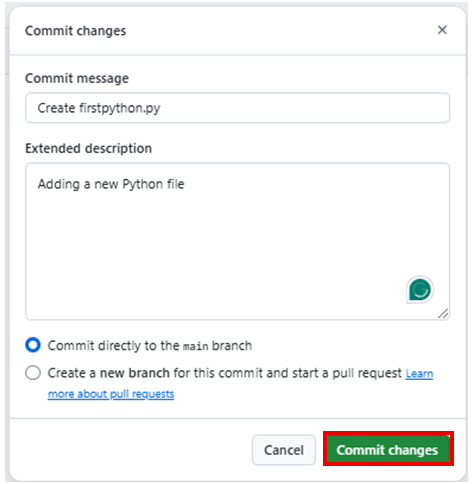
Step 4: Commit changes after adding the text. Add description of the file (optional) and click Commit changes.
第四步:添加文本后提交更改。 Add description 文件(可选)并点击 Commit changes 。
Step 5: Your file is now added to your repository, and the repository listing shows when the file was added and changed.
第五步:您的文件现已添加到您的仓库中,仓库列表显示了文件添加和更改的时间。
Exercise 4: Upload a file & Commit 练习 4:上传文件并提交
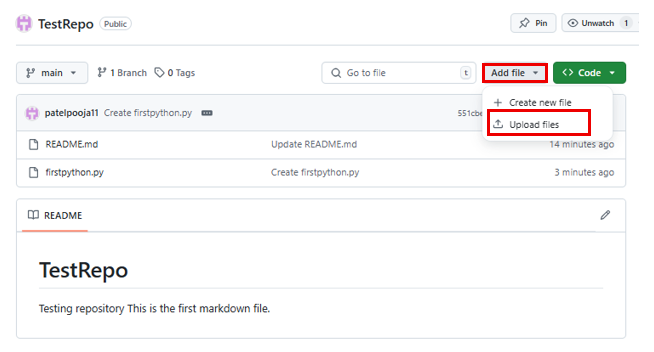
Step 1: Click Add file and select Upload files to upload a file (any .txt, .ipynb, .png file) in the repository from the local computer.
步骤 1:点击 Add file 并从本地计算机选择 Upload files 以上传存储库中的文件(任何 .txt、.ipynb、.png 文件)。
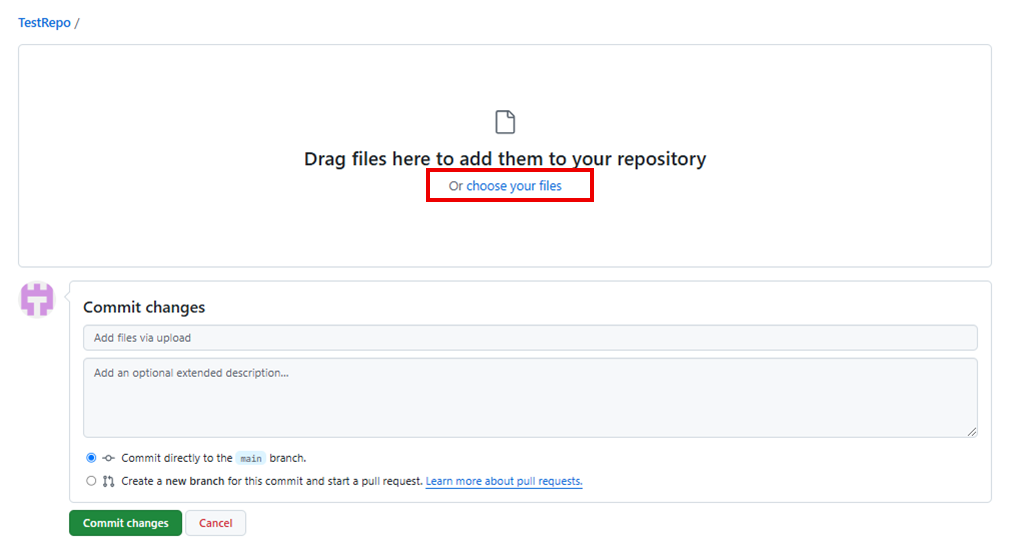
Step 2: Click choose your files and select any files from your computer.
步骤 2:点击 choose your files 并从您的计算机选择任意文件。
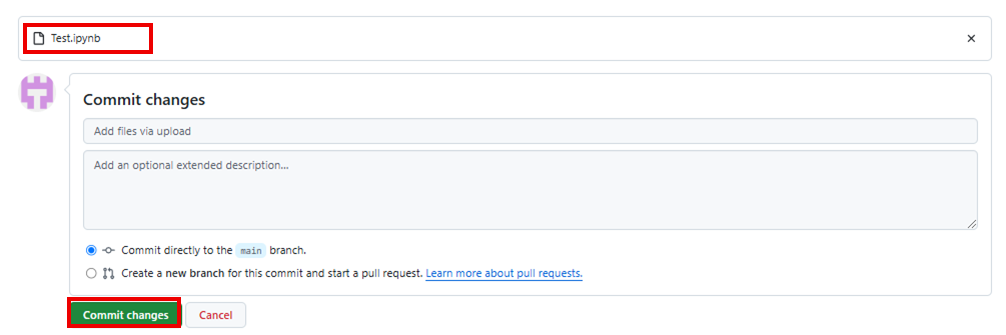
Step 3: Once the file finishes uploading, click Commit changes.
步骤 3:文件上传完成后,点击 Commit changes 。
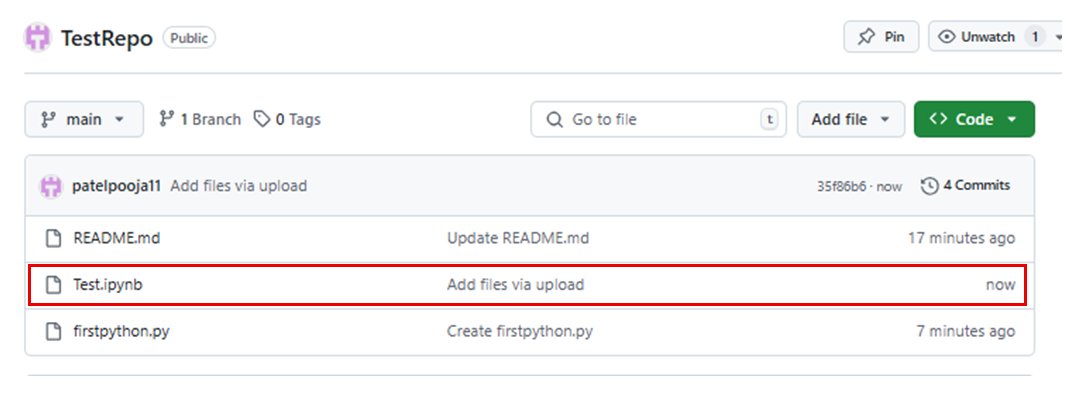
Step 4: Now, your file is uploaded in the repository.
步骤 4:现在,您的文件已上传到仓库中。
Summary 摘要
In this document, you have learned how to create a new repository, add a new file, edit a file, upload a file in a repository, and commit the changes.
在本文档中,您学习了如何创建新仓库、添加新文件、编辑文件、上传文件到仓库以及提交更改。
Author(s) 作者
Romeo Kienzler 罗梅奥·凯恩茨勒
Malika Singla
Other Contributor(s) 其他贡献者
Rav Ahuja 拉夫·阿胡贾