Module 07 · [Optional] IBM Watson Studio
Hands-on Lab: Creating a watsonx.ai Project with Jupyter Notebooks动手实验:创建 watsonx.ai 项目与 Jupyter Notebook
Duration: 20 mins 时长:20 分钟
Objective(s): 目标
After completing this lab, you will be able to-
完成此实验后,您将能够-
- Setup watsonx.ai service on IBM Cloud
在 IBM Cloud 上设置 watsonx.ai 服务 - Create project in watsonx.ai
在 watsonx.ai 中创建项目 - Add an interactive Python notebook to a project in watsonx.ai
在 watsonx.ai 的项目中添加一个交互式 Python 笔记本
You will then proceed to next part of this lab instructions which will guide you on how to work with Jupyter Notebooks.
然后您将进入本实验说明的下一部分,该部分将指导您如何使用 Jupyter 笔记本。
Pre-requisite(s): 前提条件
You need an IBM Cloud account to work with Jupyter labs in watsonx.ai. If you don't have an account created already, click and open this link and follow the instructions, to create an IBM Cloud account.
您需要有一个 IBM Cloud 账户才能在 Jupyter 实验室中与 watsonx.ai 进行工作。如果您还没有创建账户,请点击并打开此链接,按照说明创建一个 IBM Cloud 账户。
Task 1: For New Users (with no watsonx.ai service) 任务 1:针对新用户(无 watsonx.ai 服务)
If you have created a watsonx.ai service before, proceed to Task 2:
如果您之前已创建过 watsonx.ai 服务,请继续执行任务 2:
- Click here to go to the IBM Cloud watsonx.ai page.
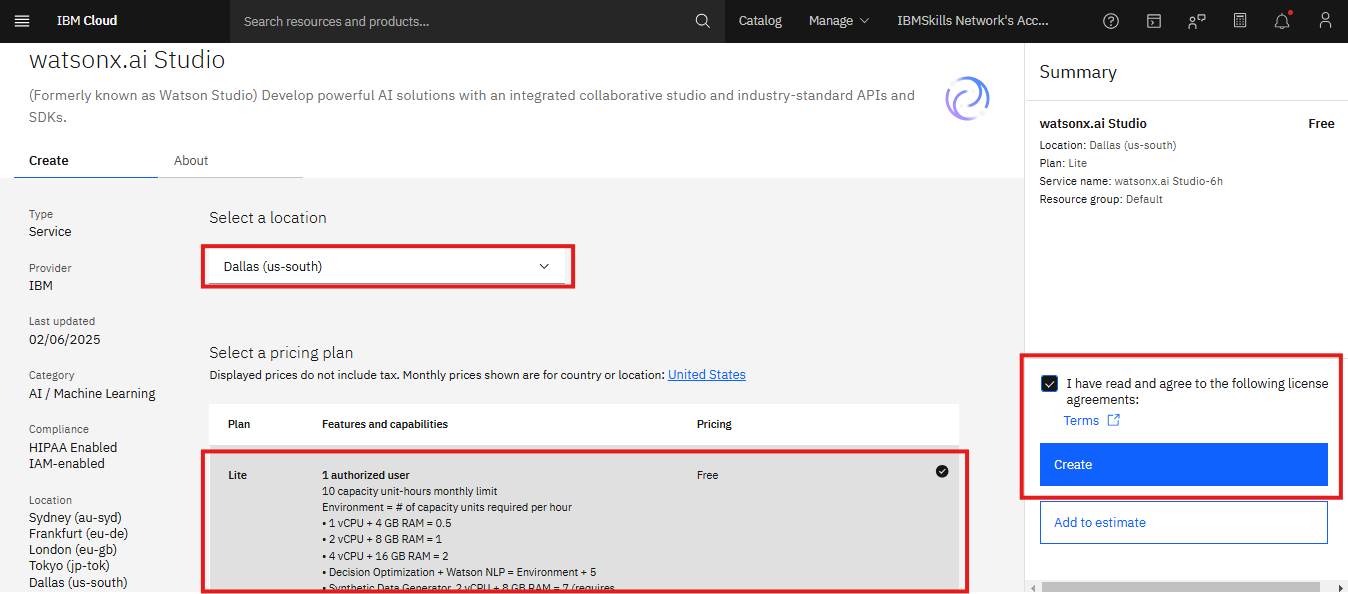
点击此处前往IBM Cloud watsonx.ai 页面。 - To create a watsonx.ai service, choose a region that offers Lite plan, then choose the Lite plan from the list and click Create. In the image below, the Lite plan is chosen for “Dallas” region.
要创建 watsonx.ai 服务,请选择提供 Lite 计划的区域,然后从列表中选择 Lite 计划并点击创建。在下方图片中,为“Dallas”区域选择了 Lite 计划。
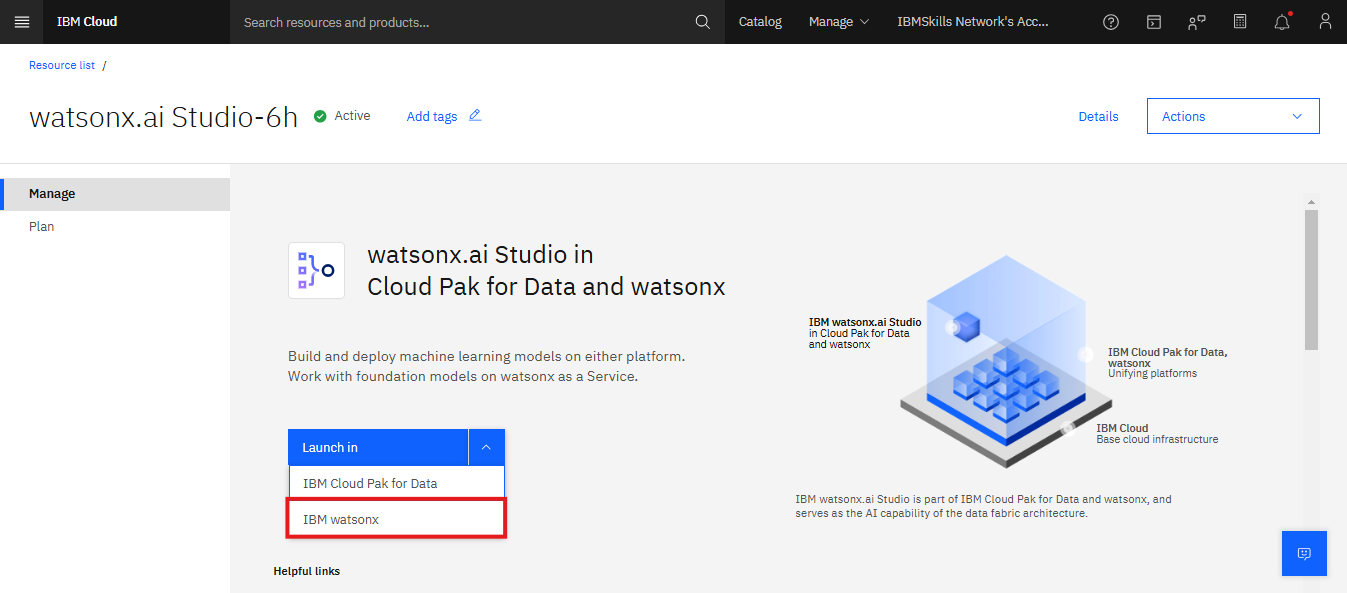
- On the watsonx.ai page, click on Launch in IBM watsonx.
在 watsonx.ai 页面上,点击 IBM watsonx 中的启动。
Task 2: For Existing Users (who already have Watsonx Service) 任务 2:对于现有用户(已经拥有 Watsonx 服务)
- Go to the IBM Resources List
前往 IBM Resources 列表
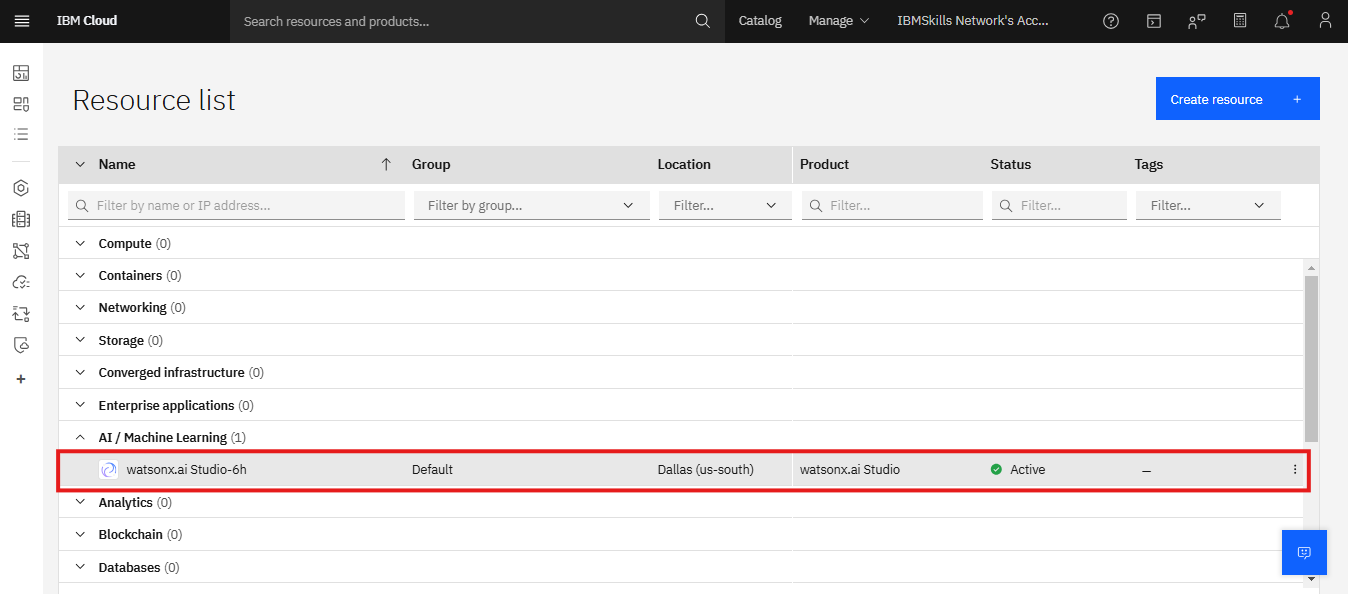
Resources List 资源列表 - When you click on AI / Machine Learning, all your existing services will be shown under the list. Click the watsonx.ai Studio service you created:
当您点击 AI / 机器学习时,您现有的所有服务将显示在列表下。点击您创建的 watsonx.ai Studio 服务:
- On the watsonx.ai page, click on Launch in IBM watsonx.
在 watsonx.ai 页面上,点击 IBM watsonx 中的启动。
Task 3: Creating a new project 任务 3:创建新项目
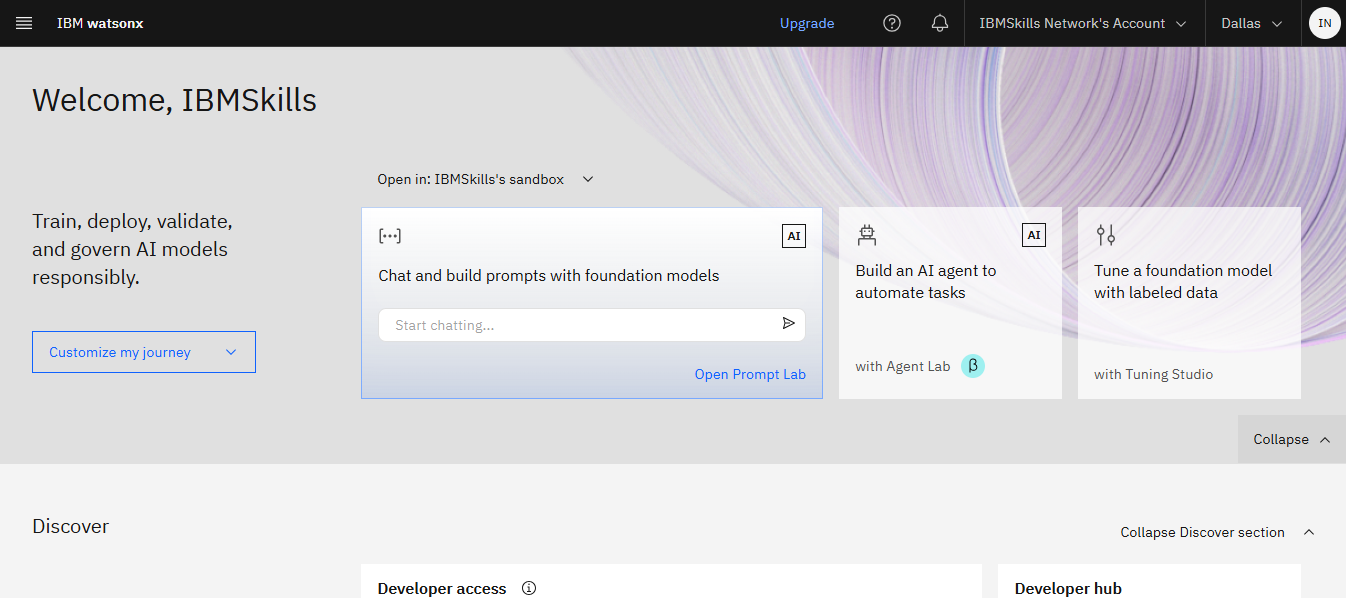
- IBM watsonx.ai homepage appears as follows.
IBM watsonx.ai 主页如下所示。
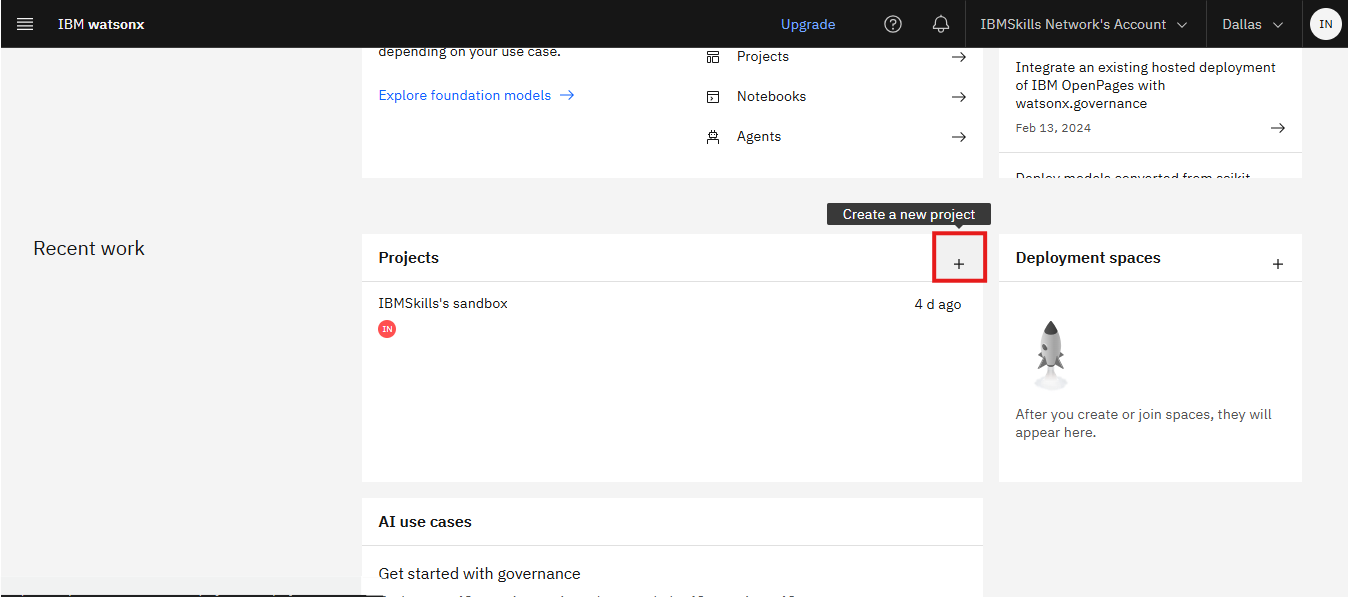
- Scroll down and click on the plus sign to create a new project.
向下滚动并点击加号以创建新项目。
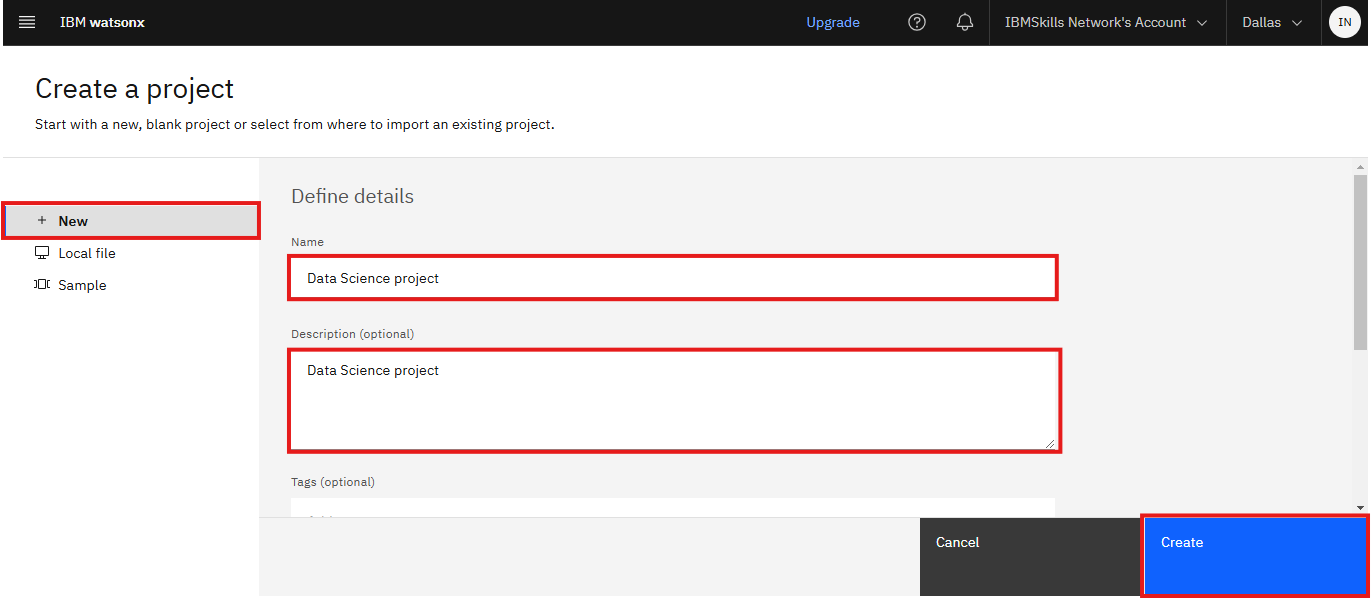
- On the Create project page, enter Project Name and Description.
在创建项目页面,输入项目名称和描述。
- After creating the project you can start with either a new blank project or select a file from an existing project to import.
创建项目后,您可以开始一个新空白项目,或从现有项目中选择文件导入。
Task 4: Adding Jupyter Notebook to watsonx.ai Project 任务 4:将 Jupyter Notebook 添加到 watsonx.ai 项目
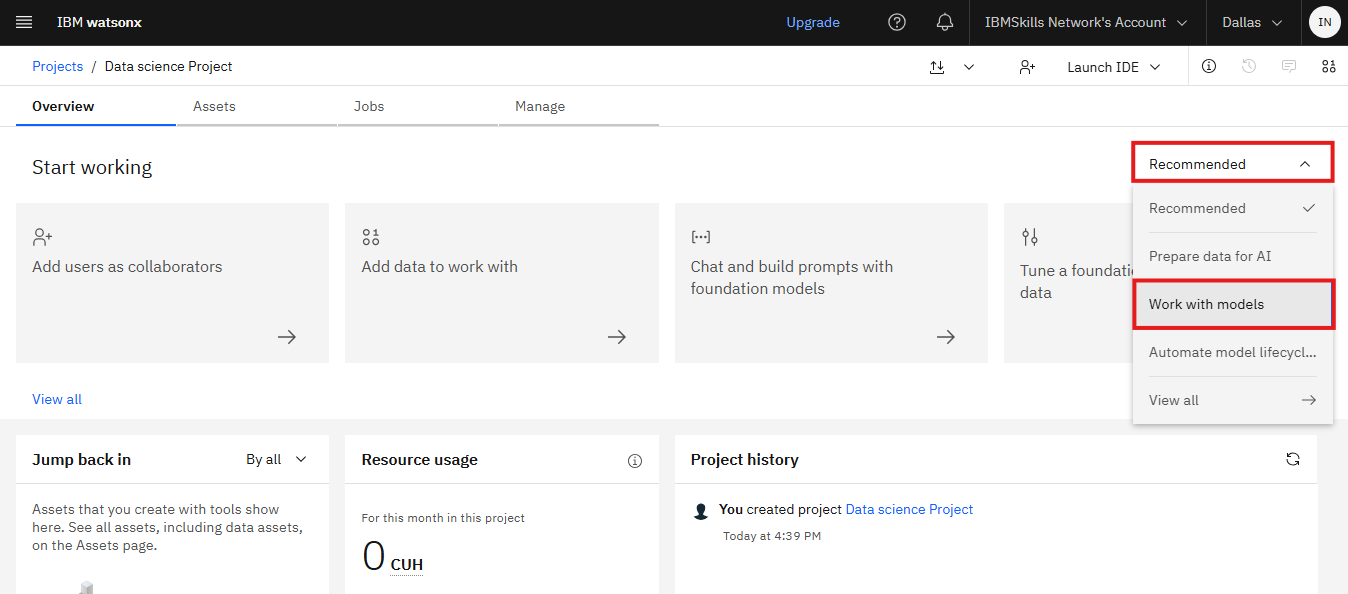
- On the project Overview page, you will notice several options to get started with the project. Change the filter from Recommended to Work with Models to explore more projects.
在项目概览页面,您将注意到几个开始项目的选项。将过滤器从推荐更改为与模型一起工作,以探索更多项目。
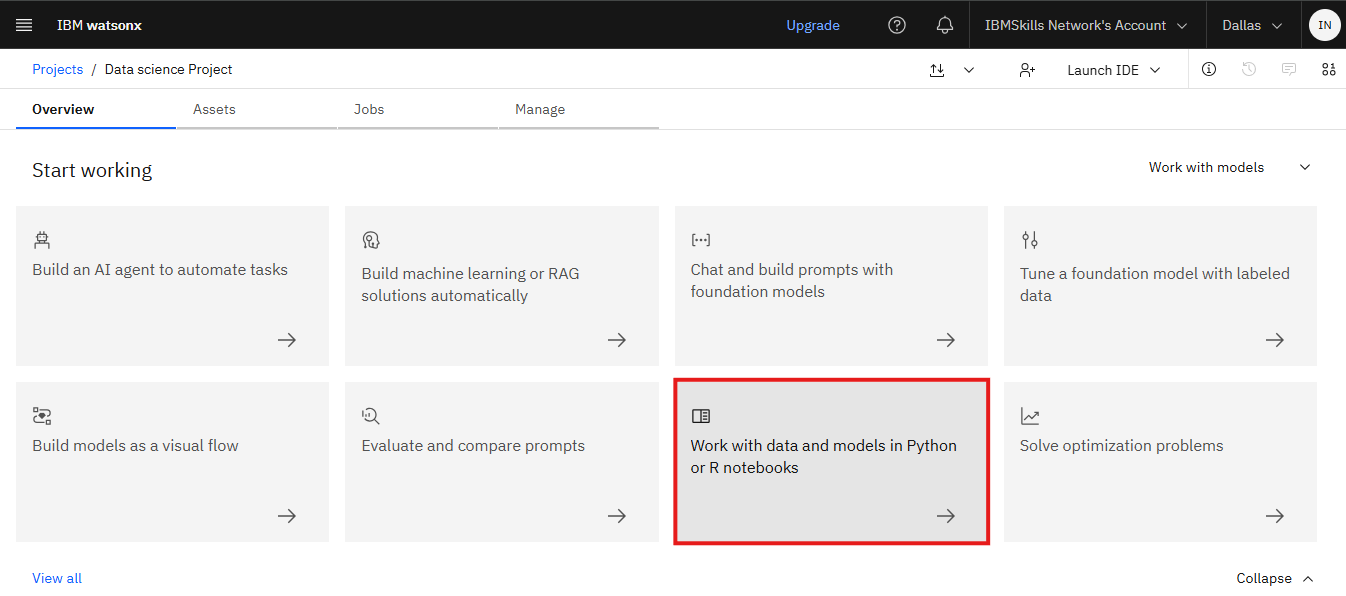
- Click on Work with data and models in Python or R Notebooks.
点击 Python 或 R 笔记本中的与数据和模型一起工作。
OR 或者
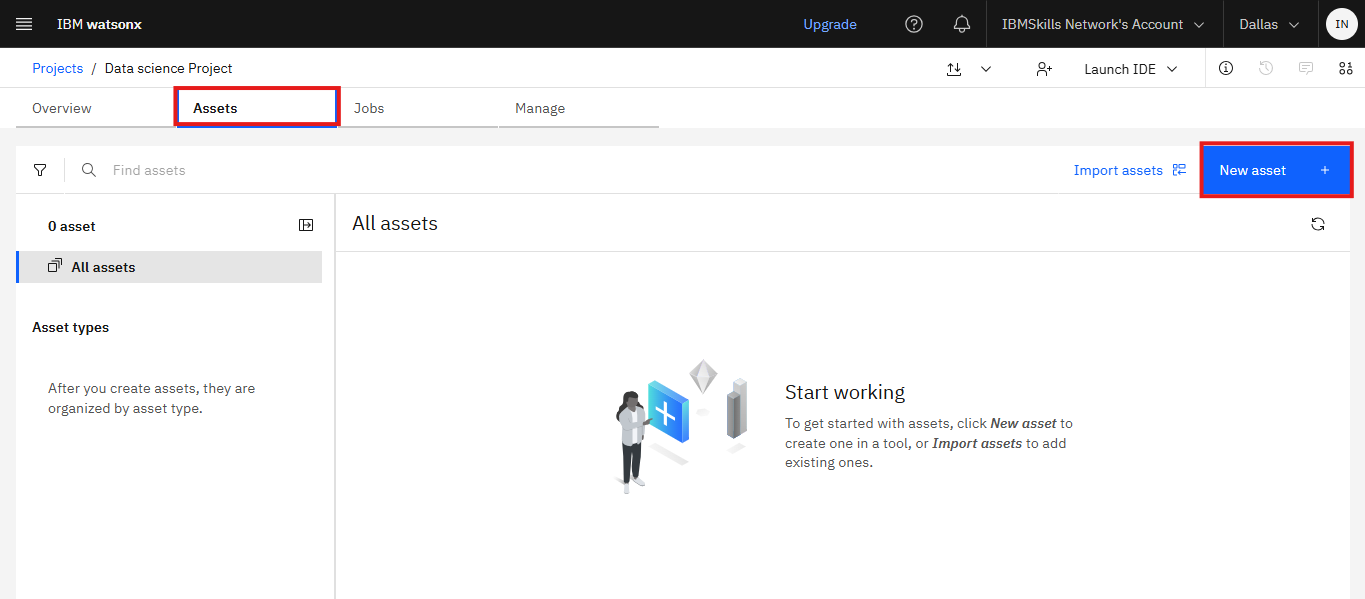
Alernatively, you can click on Assets tab and then click New asset. Now click on Work with data and models in Python or R Notebooks.
或者,您可以点击资产选项卡,然后点击新建资产。现在点击 Python 或 R 笔记本中的与数据和模型一起工作。
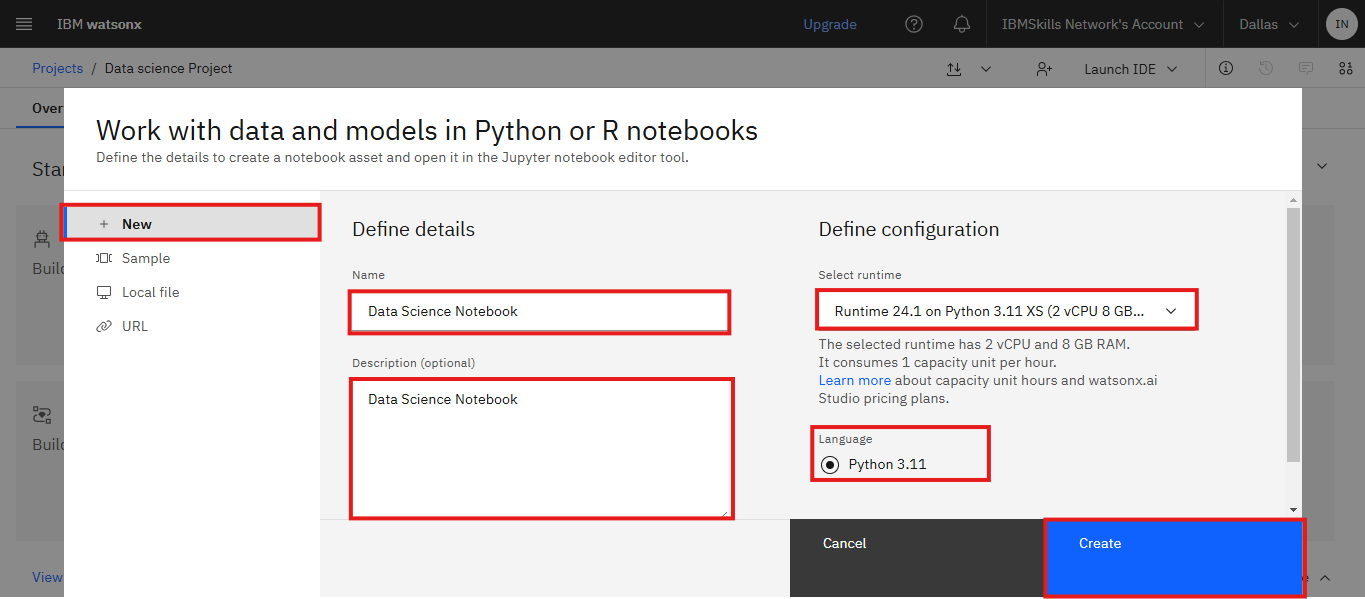
- On the Work with data and models in Python or R Notebooks page
在与数据和模型一起工作的 Python 或 R 笔记本页面- Select New to add a blank new Jupyter notebook to your project
选择“新建”以向您的项目添加一个空白的新 Jupyter 笔记本 - Enter a name and optional description for the notebook
为笔记本输入一个名称和可选的描述 - Specify the language as Python or R depending on the type of environment you are working for your project.
根据您为项目选择的环境类型,指定语言为 Python 或 R。
In this lab, we are choosing the Runtime as Python.
在本实验中,我们选择 Python 作为运行时。 - Click Create. 点击创建。
- Select New to add a blank new Jupyter notebook to your project
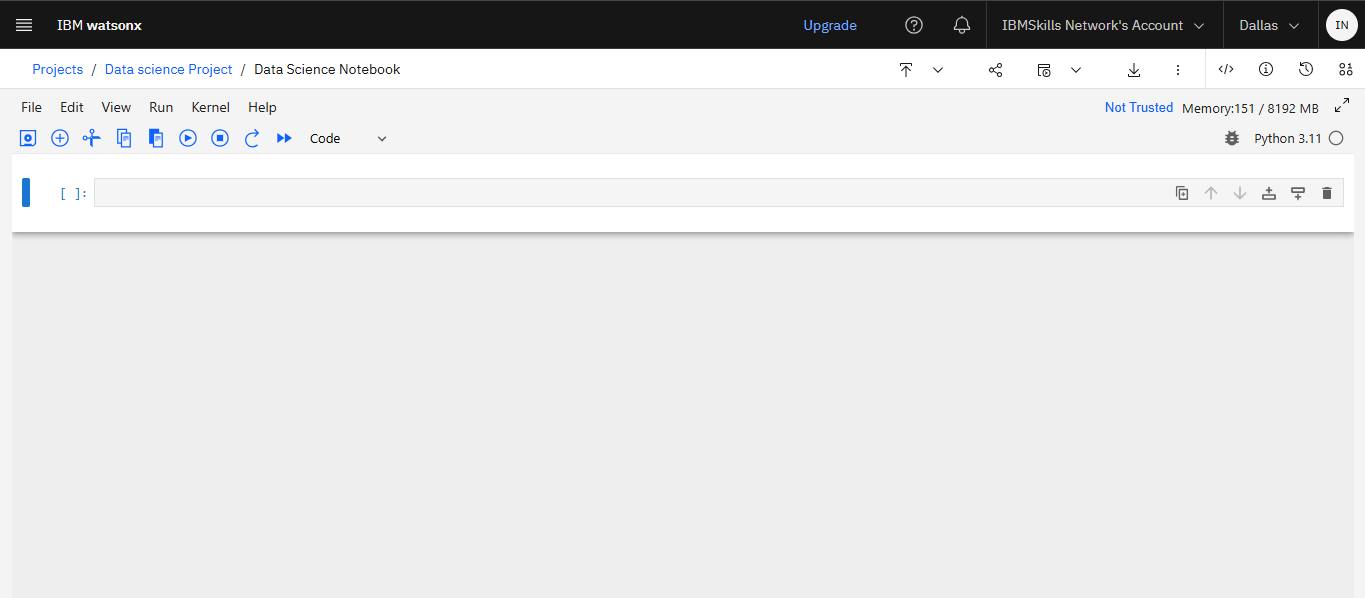
- Wait until the notebook appears. It will take few mins to initate Jupyter kernel.
等待笔记本出现。初始化 Jupyter 内核需要几分钟时间。 - Now you are ready to code with a new blank Jupter Notebook. You can observe that a blank cell (rendered as 'Code' ) is already added.
现在您已经准备好使用新的空白 Jupyter 笔记本进行编码。您会发现一个空白单元格(显示为'代码')已经被添加。
This concludes this tutorial.
本教程到此结束。